


Hardrada
-
Posts
698 -
Joined
-
Last visited
Content Type
Profiles
Forums
Events
Blogs
Gallery
Store
Everything posted by Hardrada
-
https://www.smokingpipes.com/accessories/lighters/moreinfo.cfm?product_id=141099 Most of the times I use a Bic, though; but the angled flame of a pipe lighter does come in handy, as well as the ability to regulate the flame size, which Bics don't have anymore. I had wanted to get one of those Thread Zappers, but if they guzzle batteries, you've just saved me money.
-
First Belt
Hardrada replied to Loudcherokee's topic in Purses, Wallets, Belts and Miscellaneous Pocket Items
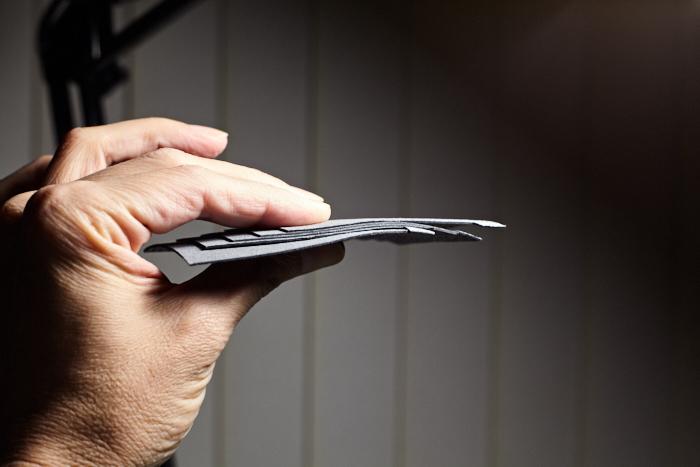
I apply Edge Kote AND Tokonole after. My process is: glass the edges (I don't sand them: don't like the mushrooming that sanding produces); then bevel them; then apply the first coat of Edge Kote and let it dry; then run 400 grit sandpaper in one direction with a light touch (I don't count this as 'sanding'); then apply a second coat of Edge Kote and let it dry; finally, I apply Tokonole and burnish with a cocobolo slicker. Check this out: -
First Belt
Hardrada replied to Loudcherokee's topic in Purses, Wallets, Belts and Miscellaneous Pocket Items
I'd advise not to use Pro Dye on the edges: not its intended purpose. I confirmed this with a local cobbler who said 'dye for the leather, Edge Kote for the edges'. He said that even though such advice meant losing my business because his stock was only dyes and no Edge Kote. One issue you'd run into with dyes is rub off (not so much with Pro Dye, which is spirit-based, but with the regular dyes...): imagine that on a dress/suit pair of pants. Also, as to your question: Pro Dye penetrates the leather in such a manner that I don't think my technique would work: the stain is, AFAIK, permanent. Dunno if Fiebing's Deglazer would help here—I've never used deglazer, so I'll let other members pitch in about that. -
First Belt
Hardrada replied to Loudcherokee's topic in Purses, Wallets, Belts and Miscellaneous Pocket Items
Have a sheet of shop towel nearby: tear small pieces from it and wipe off any paint runoffs as soon as you've daubed the edge (edge coat dries very quickly, hence you must act fast), using a single motion starting from the centre of the belt (where there is no paint) towards the edge and continuing into the area beyond the belt. Now, scrumple up the piece of towel so as to have the side with paint on the inside of the ball and a clean patch to the outside and ready for the next needed wipe off: this is why you need a full sheet and have to tear small pieces. If you weren't quick enough and the paint dried you can remove it with a piece of "glue eraser" (crepe used for soles): just rub it off (but be gentle so as not to scrape the leather—some leathers are more forgiving than others). -
It's also described in Al Stohlman's book The Art of Hand Sewing Leather (p.63) but he uses a piece of broken glass to even the edges out (hence the term 'glassing').
-
No. I glass them instead with a skiving knife: no mushrooming this way.
-
What are the leathers' weights?
-
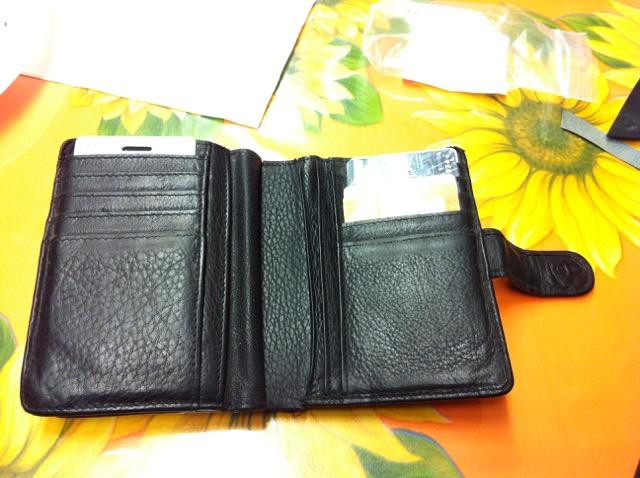
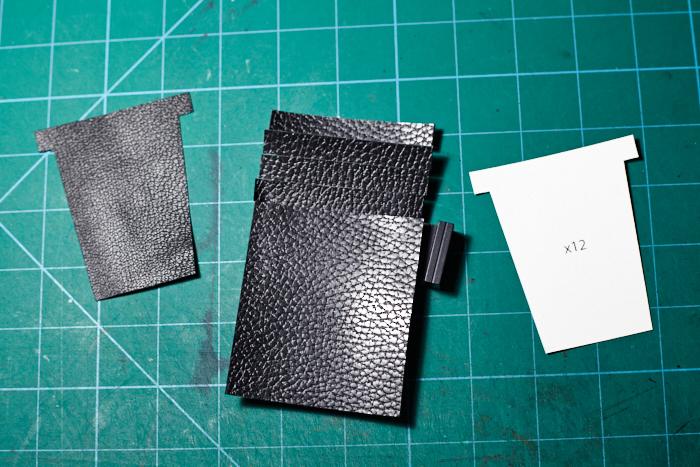
Well, still trying to kinda replicate this wallet: I've cut the pieces for the card pockets on the first (left side) panel out of 2 oz (0.90 mm) Walpier Dollaro , but I've already run into the Hamburger Wall: Mind you, there're still ~5 more layers to go below that, and there're FOUR card pocket panels. I'd end with a brick at this rate, and that'd be for an empty wallet. Is there a better way to do this? The "model" wallet 'cheats' in the sense that it doesn't use full leather pieces for the pockets: just a leather top sewn to a bottom part of thin fabric, but I don't wanna use fabric. The panel to the left is Alran chevre, 1 oz (~0.35 mm). I'm thinking of using that, but I dunno if it's too thin to endure constant use/wear. Any useful suggestions are greatly appreciated, fellas.
-
Been curious about those—both the hooks and the slings. Don't the hooks come out of the holes when the sling is slackened?
-
So, it really comes from feet. Yeah, it does smell of animal flesh/fat. Thanks for that info. I've just tested it and it seems OK.
-
What do you do when the edges remain sticky from the wax?
-
Never hardened anything myself, but this video got me interested. Maybe you'd find it helpful?
-
first ever knife seath
Hardrada replied to vgodley1's topic in Gun Holsters, Rifle Slings and Knife Sheathes
An alternative method, and one that I use since I glue the layers prior to punching holes, is to use the chisel normally without trying to force it to go through all the layers. Let it go as far as it will with the usual mallet blow, then, once you've finished making the 'half-holes', place the project on top of a cork board or thick piece of scrap leather and use the awl to finish the holes: just make sure the awl is perfectly perpendicular to the table. That's how I punch holes on weights >10 oz. -
first ever knife seath
Hardrada replied to vgodley1's topic in Gun Holsters, Rifle Slings and Knife Sheathes
Also, if using a chisel, don't use a 2-prong for straight lines; 2-prong chisels are for curves and turns and sharp points/angles. Use at least a 5-prong (a 7-prong would be preferrable) and, after making the first 5/7 holes with it, subsequently place the first two prongs of the chisel in the farthest** two holes and use that as an extra guide—yes, you'll be punching a -2 holes every time and it'll take longer to punch them all, but you'll get straight lines. One more thing: move your task lamp or position yourself and/or the project in such a way that you can see clearly the line along which you'll punch the holes and that you get as little shadows as possible from the chisel so that you can clearly see where the prongs are perforating the leather. It might also be useful to mark the holes with your chisel prior to punching them. Again, you'll take longer as you have to go around the project twice with the chisel, but you'll get straight lines. Once you've developed a rythm that works for you it'll all come naturally. ____________________________ **Or the 'last' holes. I'm assuming you're punching the holes away from you. -
RML has awesome service. The only thing that sux about buying from them is duties.
-
Capital! I'll try the heating up method. Thanks a lot, mates.
-
I see. I've never handled/worked with neatsfoot oil before, so I dunno what to expect. Even sans the freezing issue I didn't know what to expect. Only thing about it I know is that it darkens the leather it's applied to. This is gonna be interesting. Warm enough that you can put your hand in it? Or coffee-hot warm? It doesn't need to cover the bottle, does it? The pans I have are about 2/3 of the height of that bottle.
-
@#$%^&* Actually, no, there weren't any warnings: https://www.lonsdaleleather.com/supplies/pure-neatsfoot-oil Checking Tandy's catalog for their offerings has the "Freezing does not harm" icon. Weird. I took it out of the box and shook it, then left it to thaw at room temperature. It seems mostly liquid now, but there are some particles floating in it.
-
Does neatsfoot oil get ruined if frozen? I ordered a bottle from my supplier but at this time of the year it inavoidably froze somewhat during shipping.
-
Whoa! They're not mine! That's a Korean crafter there. I was just linking you to what I've found useful.
-
Yup. That's what I did when molding a leather case for my Zippo, and also when making a couple of end sleeves for my phone, to cover the cameras semi-permanently. (Jump to @ 1:05 in the video.) He used a similar method to make a case for an electronic gadget, so, if you wrap your watch properly, it should be safe:
-
I only have 2-prong and 7-prong. It might get tedious when punching straps, but 7-prong is a good all-round number when making smaller items like pouches and wallets. If all you make is straps then go for more, like a 10- or 12-prong.
-
Where did you find Dublin leather in Canada?
-
https://www.tandyleather.world/products/leathercraft-tools-book Yup. https://www.danswhetstone.com/product/bench-stones/ Soft and Hard in an 8 x 2 x 1/2 should suffice.
-
You will need a steel hammer, though: a cobbler's hammer with a smooth head to tap your stitching work. Needless to say, you should never use the cobbler's hammer to hammer anything else: if you scratch the head you'll be marking the leather when you flatten the stitches.