Search the Community
Showing results for tags 'dye'.
-
Right then, never thought such a request would happen here, but seems it has. A regular customer of mine has bought an old John Deere tractor. He wants / needs a place to store a soft bound wee book. Seems there might have been one on the tractor previously, as there are two holes on the right hand rear fender. Regardless, he was not after anything stunning, but when he brought the tractor round the shop so I could do measurements, I mentioned doing it in John Deere green with yellow stitching. Aye, he was sold! I've been on experimenting to get the proper green, but cannae get there. I've been mixing Pro Dye green with yellow and with spirits to find the green, but no even close. A entirely different shade of green. Have any of you lot (especially Americans due to the amount of John Deere users in the USA) a mix ratio for the stunning green colour? Looking forward to the responses. Cheers!
-
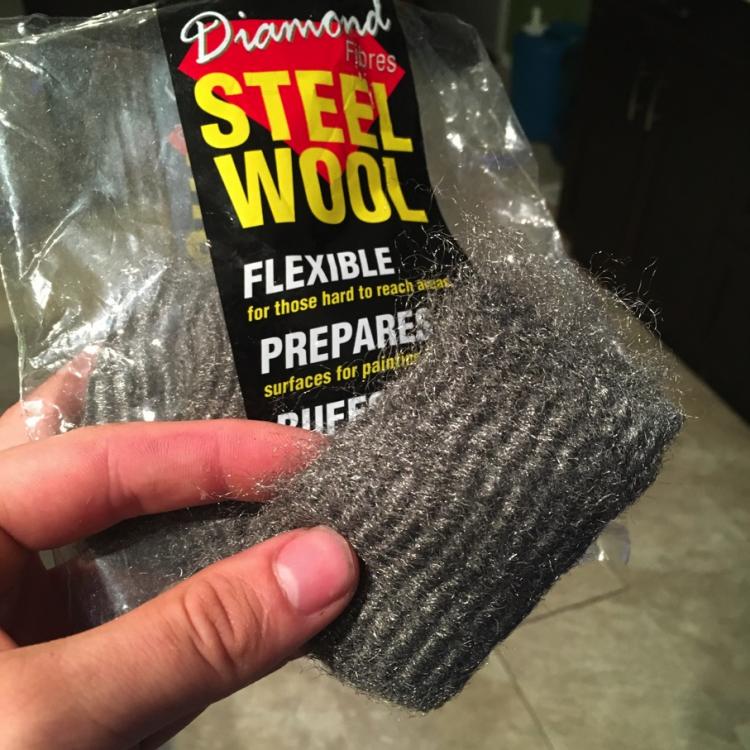
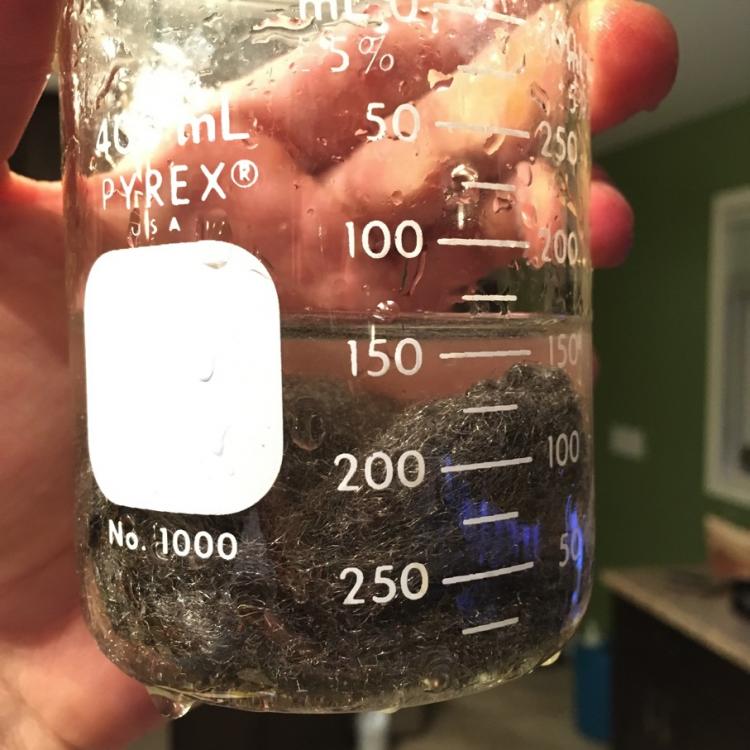
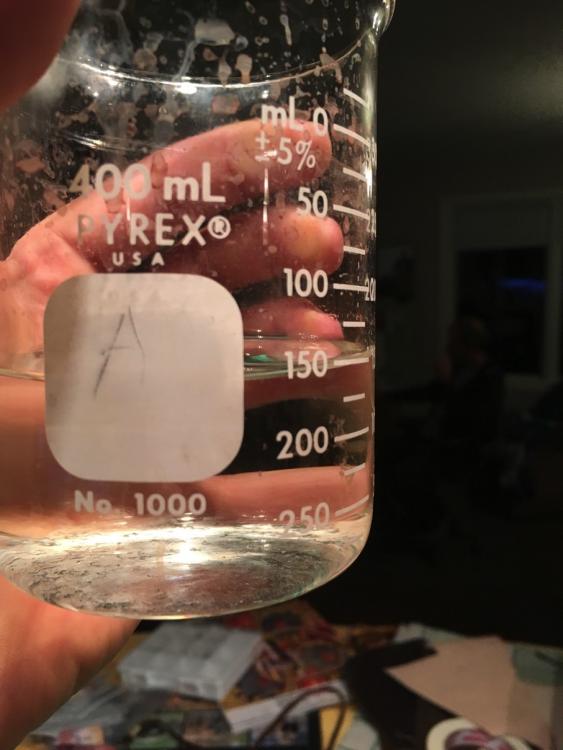
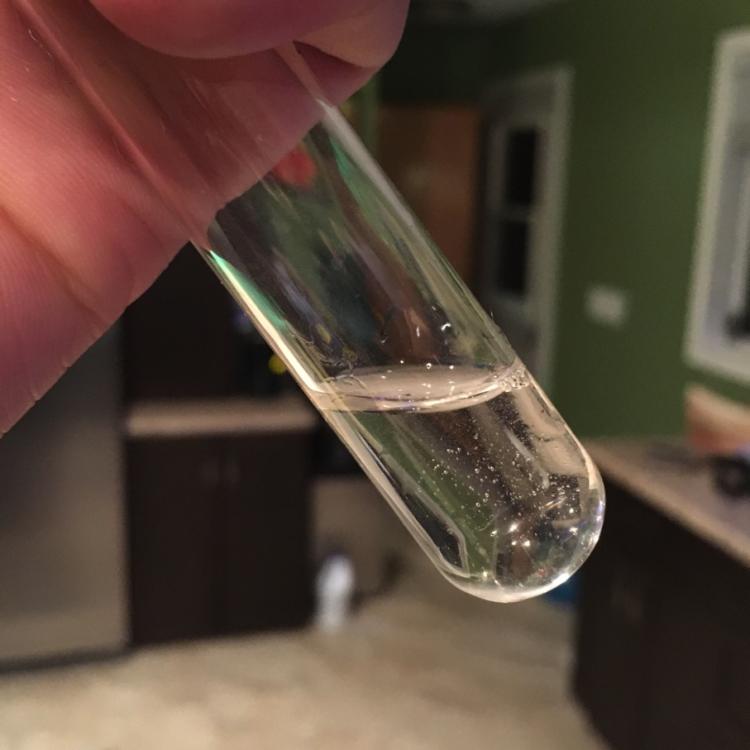
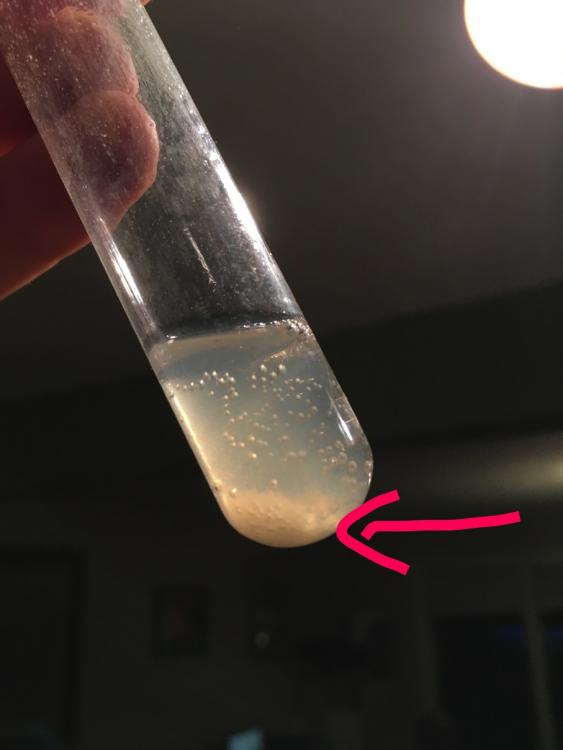
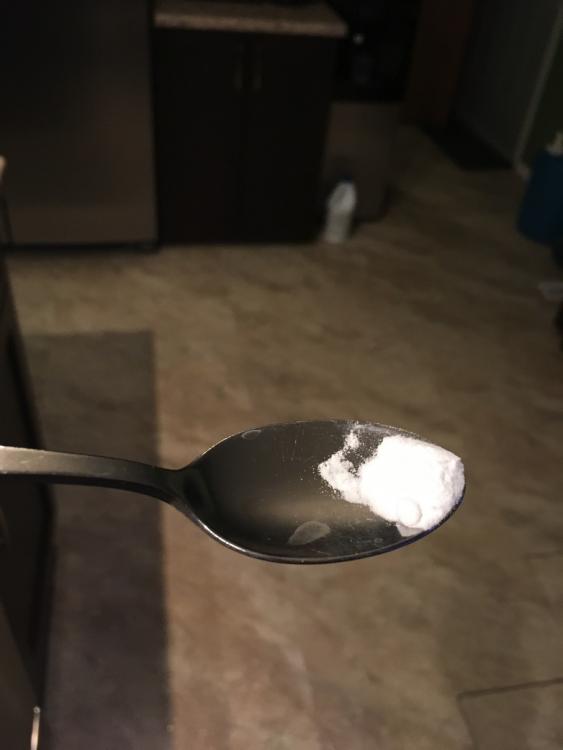
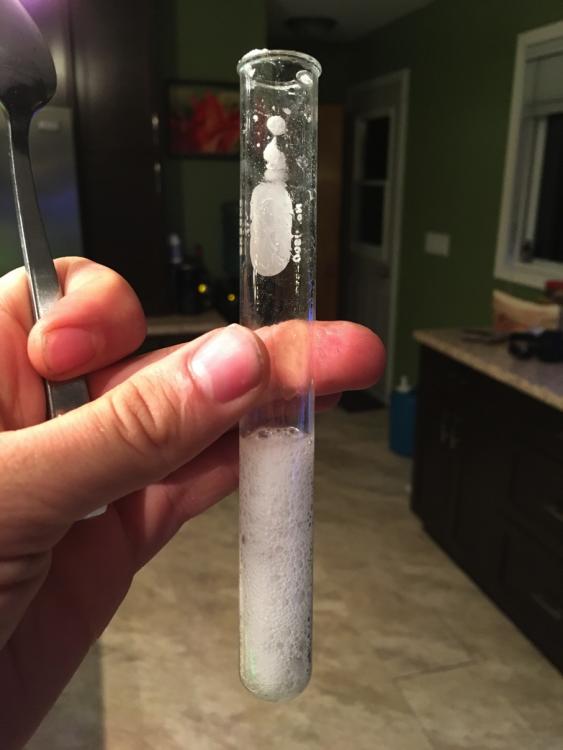
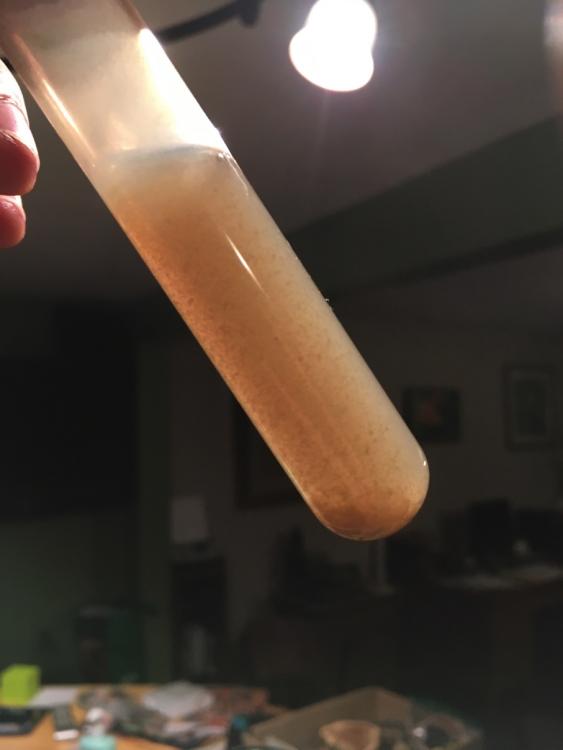
My all in one guide to Vinegaroon Hey everyone. I’ve been lurking around these forums for a while now and haven’t posted much, so I thought I’d finally make a contribution. I’m going to University for a Chemistry degree, and surprisingly some of the things I’ve been learning in my labs are actually applicable to my leatherwork! I thought I'd write up some of my observations and experiments with vinegarroon, to try and help shed some light on what is actually going on in the reaction. Please, read through and share any knowledge you have working with this stuff! (I know this is a lot. I was bored just typing it. You can skip to the bottom if you don't have time to read it all) Background Vinegaroon, or ‘roon, is a homemade black ‘dye’ that has been used by leatherworkers for centuries. It is also used by woodworkers to ‘ebonize’ wood, and was used since the 5th century as ink, called ‘iron gall ink’. It is not actually a dye, but a reaction between ferric acetate and the tannins that naturally occur in leather and wood. Tannins content varies between hardwoods and softwoods, and can be boosted by brewing a strong black tea and wiping it on the wood. I assume that this is also true of leathers. I have a few junky tandy's sides that are pale in appearance, and they seem to be low on tannins because roon has less of an effect on them. ‘Roon is used by many leather and wood workers but understood by few. It can be very useful alternative to commercial black dye in areas where dye is unavailable, too costly, or undesired because of environmental reasons. Also, because it is fundamentally different than other dyes, it will not bleed or crock (rub off) onto fabric. Pros: -easy to make with household materials -available in places where dye is not, or shipping is too expensive -nearly free -does not bleed or crock like other black dyes Cons: -often does not make a deep enough black colour without lots of neatsfoot oil added afterwards -can make your product smell like vinegar -acidic nature can cause issues with metal hardware in contact with the leather, might also degrade then leather after long periods of time Typical Recipe: (not recommended by me) Put some old rusty nails into a jar of vinegar and let it sit for a week, or a month. Filter it through cheesecloth and wipe it on your leather. This produces a nasty, smelly mixture of a whole bunch of iron complexes and compounds. The active ingredient, iron acetate, is in there, but along with a whole bunch of other junk you don’t need. It doesn’t have to be this way. With some chemistry and a little bit of research into the mechanism here, I’ve made a crystal clear, mostly odourless solution that only takes half a day to make. How I did it: I bought fine steel wool from the dollar store, which came in small bats. Any steel or iron will do, but fine steel wool has the greatest surface area so it will react the fastest. Metal shavings/powder would also work, but I’d think they would just clump on the bottom of the jar and prevent the vinegar from reaching the bottom layers. I washed one bat in soapy water to remove any oils left over from manufacturing. Some people have used acetone, which would work well, but seems a bit over the top when soap is cheaper. I pulled it apart and placed it in a beaker of regular vinegar, so that all the wool was submerged. You don’t need very much steel wool at all, even a quarter of the amount I used would be enough. The amount of metal actually being dissolved is in the order of milligrams or even micrograms. You probably shouldn’t keep a lid on it, because you are producing gas in the reaction. After a few hours, small bubbles form on the steel wool, causing it to rise to the top of the solution. I would mix it gently to dislodge the bubbles and keep it submerged. Every few hours I would use an eye dropper (so that I didn’t have to pour it out) to take a bit of the solution and test it on some leather. The darkening effect increased slowly over time until full strength was reached after about 12 hours. Still, I left the wool in there for 2 days to see if it got any stronger. Next time I won’t leave it in so long. After 2 days, I removed the wool. Since none of the wool was ever exposed to the air above, there was no rust in the beaker and I was left with a nice clear solution that didn’t smell much worse than straight vinegar. This is my vinegaroon solution. It turns leather black, is fairly stable, and is still acidic. The final product: a clear, nearly odourless solution of vinegaroon. Neutralization (optional): Next, I tried to neutralize the solution with baking soda to see if that changed the effectiveness of it at all. I took a small test tube of the ‘roon solution and put a spoon tip of baking soda in it. Obviously this will make it fizz up like your kid’s science fair volcanoe project, so I added it slowly. I didn’t have any pH paper to test the acidity so what I did was add an excess of baking soda (seen on the bottom of the tube), and then re-added the acidic ‘roon solution dropwise until there was no excess left. These images show the neutralization process, if pH paper is unavailable. A base (sodium bicarbonate/baking soda) is added in excess, which is seen in the bottom of the test tube by the red arrow. Then, the acidic vinegaroon solution is re-added slowly until this excess base disappears. The resulting solution is assumed to be neutral. This neutralized roon solution has the exact same reaction with the leather as the acidic solution. However, it was not as stable. After a hours sitting or a few minutes shaking, the solution turned into a cloudy grey-orange sludge. This is because the oxygen in the air oxidized the Fe2+ ions into Fe3+ ions, which are not soluble and have a rusty colour. Neutralized roon is good for immediate use, but turns nasty after a while What is happening? (skip this section if you don’t like chemistry) The iron is dissolved by the acetic acid and becomes a free-floating iron ion, in the +2 oxidation state, called Fe2+ or Iron(II). Hydrogen gas is produced in the dissolution process but in such small amounts that there is nothing to worry about. This ion is colourless and soluble in water, which is what we want. Furthermore, when this ion is in an acidic solution, like vinegar, it is relatively stable. Some of the ions complex with the acetate, which further increases its stability. When this mixture is applied to the leather, the iron ions interact with the tannins to form an iron-tannin complex, which is black. Oxygen messes with this system. Obviously there is oxygen in the atmosphere and dissolved in your solution, and this can oxidize the iron ions – it will take them from the 2+ state to the 3+ state. Fe3+ or iron(III) is NOT what we want, because it is orange and gross and not soluble in water. If this forms, it creates an orange/brown powdery solid that sinks to the bottom of the jar. To prevent the oxidation of the iron in solution, we need to keep the pH LOW and keep the oxygen out of the system as much as possible – by not pouring or shaking the solution. Now, the acidity of the solution is what keeps it stable – I’m assuming that you could store vinegaroon for a few weeks or months if you kept a lid on it. But the acidity is also what makes it dangerous for using with metal hardware. So what I’ve done is neutralized the solution with baking soda, just before applying it to the leather. The neutralized solution is just as effective, but noticeably less stable. The nice clear solution will turn orange overnight if untouched, or in seconds if shaken. So there you have it. Here’s a summary of what you SHOULD do: -keep the oxygen out of the system. Oxygen is your worst enemy, and turns this pure, clear solution of iron acetate into a sludgy, brown, stanky mess. -keep the solution acidic until you need to use it, then neutralize it if you need to before applying -use steel wool, as it has way more surface area than the same mass of solid iron And what you SHOULDN’T do: -don’t use rusty metal. It wouldn’t make a huge difference, it would just be introducing iron(III) into the solution which you don’t want. -don’t stir vigorously or pour the solution if possible -don’t use lots of metal, cause you only needs a little -don’t wait for a week, cause full strength is reached in less than a day -don’t put a lid on it until you’ve removed the iron, cause you’re building up gas in that jar -don’t worry about anything exploding either, there’s not that much gas -don’t filter it! Pouring it would introduce too much oxygen into the system. If you have stuff that you need to remove, it would be better to suck the ‘roon out with a turkey baster or something. What you could do differently than me: -using stronger vinegar, ie pickling vinegar, would speed up the reaction slightly and probably produce better results, since the pH would stay lower. Normal vinegar, however, is fine for most uses. -If you want to ensure that you have neutralized the solution, or gain a greater insight into the reaction process, pH paper would be very useful. -The solution could be neutralized with other bases, I only used baking soda because it was within an arms reach of the vinegar. Using sodium hydroxide, for example, wouldn’t cause it to bubble so much. -The solution can also be heated to speed the reaction, although I personally wouldn’t bother -Perhaps the best thing you could do is to calculate just how much iron will react with the vinegar and use slightly less than that amount of steel, to ensure that you have vinegar in excess. This will keep the pH from rising as vinegar is consumed by the reaction. This could be calculated stoichiometrically, or possibly by weighing accurately the mass of steel wool before and after to find out how much was consumed. I would assume that it wouldn’t be very much at all. Resources: The main reason why I found it so hard to find information on this reaction is because I initially had no idea what to search for. “vinegaroon” only can up with a few result, and most of them were not scientific explanations. I soon found out that it is more commonly used for “ebonizing wood” and that yielded a few more results. Finally I came across some scientific papers for Iron-acetate and iron-tannin complexes. Here are links to most of the pages I found helpful in my search: http://chemistry.stackexchange.com/questions/35351/iron-chemistry-acetates-for-ebonizing-wood http://chemistry.stackexchange.com/questions/5027/how-does-the-mordant-ferric-acetate-interact-with-tannins-when-ebonizing-wood https://en.wikipedia.org/wiki/Iron_gall_ink https://pubs.usgs.gov/wsp/1459d/report.pdf Thanks a lot for reading that, if you made it all the way through! Ask me any questions or share your experiences with roon below!
- 54 replies
-
- vinegaroon
- roon
- (and 10 more)
-
I'm looking to buy an airbrush for single color sprays onto leather. The one airbrush that seems to be the best fit for my work (cuffs, belts, and other small items) is the Thayer & Chandler T89K Omni 4000 http://goo.gl/MCGpT. With this I plan on using fiebings leather dye http://goo.gl/K59Ut. If someone can confirm this as the correct choice or point me in the right direction that would be great. Cheers, Benji.
-
I have just dyed a purse with All in One. Before dyeing I conditioned it with Fiebing's Leather Balm with Atom Wax, but now I think I didn't condition enough. Can I re-condition after it dries? Do I repeat the Leather Balm? I also have their Saddle Oil with silicone and lanolin, and some liquid mink oil. Advice would be very appreciated.
-
Hey guys I make embossed belts with block dyed two tone patterns, my process is dye base a color say red, then block dye with black. Let dry come back the next day and two coats of resolene with buffing in between, but I've experienced some of the black still rubbing off and fading how should I fix this? I'm using near fiebings leather dye (alchohol) non diluted. I was thinking of dyeing black first maybe so it penetrates then going over with base color, im worried it will still rub off and darken the base color as it seems like the black is the hardest to absorb. is there any way to make it absorb easier, i have tried diluting it but hasnt seemed to help that much.
-
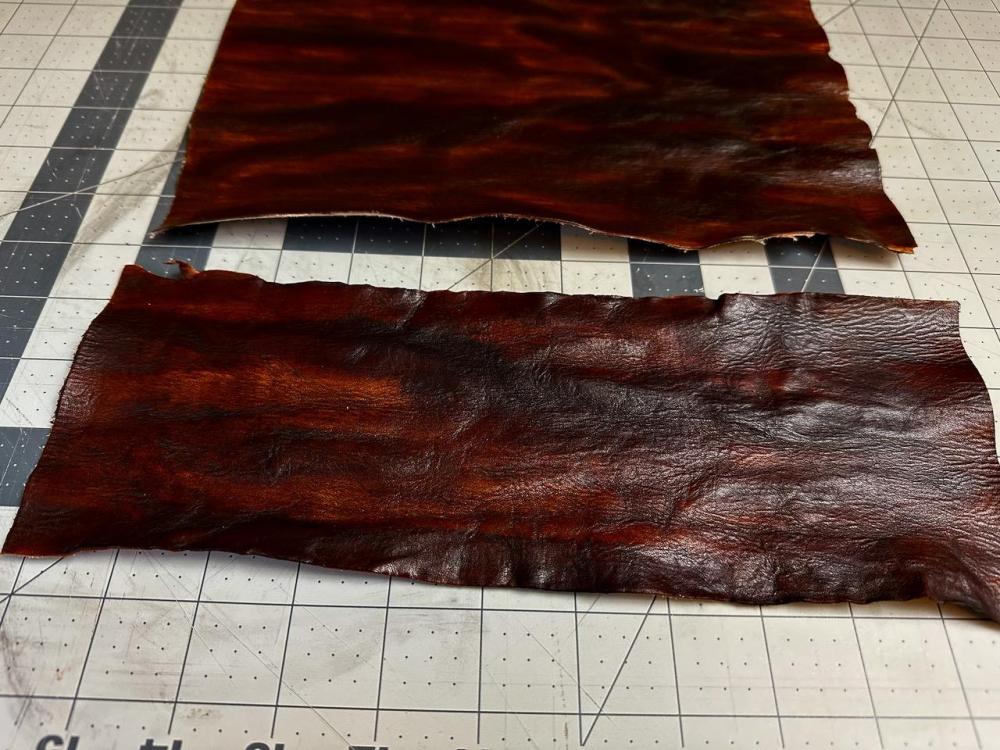
I'm playing around/experimenting with a technique I found in a book. These are thin veg tan (1mm) that I wetted and wrinkled, and then dyed (Fiebing's Pro Dye, dark brown), intentionally uneven. This will become the outside of a wallet. The book didn't mention sealer, unfortunately, so I'm trying to figure out what to use to prevent dye rub off. I initially tried Fiebing's Leather Balm with Atom Wax on a sample, but I noticed what appears to be wax settled into the tiny creases. It looks a bit like when you wax a car, but can't get the wax out of a trim part, whiteish residue. Also, overall blueish tint. Any suggestions for what would seal the dye without this whiteish residue issue? I prefer a matte finish that doesn't look like finish. Would an oil of some sort prevent dye rub off? I don't think waterproofing is an issue since it's a wallet, and won't be subject to weather.
-
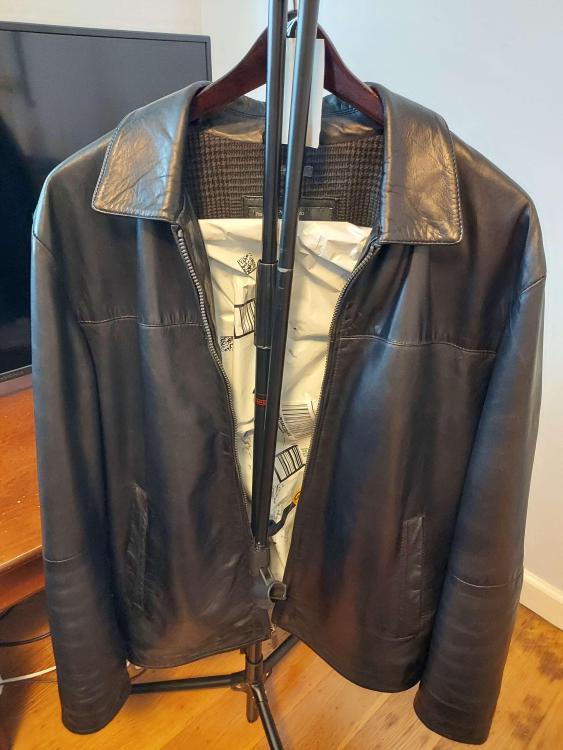
Hi all! I'm new to the community here and new to leather work/restoration in general. I got a very soft old Perry Ellis lambskin black leather jacket which needed to be redyed. After some research I chose Fiebings pro dye black for the job. The re-dye went okay and I've also conditioned with Bick 4 but now I need to make sure there's no rub-off before I start wearing it. Plan A was to just buff it until there's no more rub-off but I've done a ton already and there's no end in sight, plus the leather is old and delicate and it seems like it may not hold up to much more vigorous buffing. Plan B, which may seem like the obvious choice to more experienced people, is to apply a sealing acrylic finish. I was resistant to this because the leather is super soft and seems pretty delicate and I worry that putting a layer of acrylic over it would ruin it. Also I feel like the gloss of an acrylic finish might not look too good on this surface (though I know diluting it can help on that front). I don't see any way around it so I'm planning to apply some Fiebings Resolene diluted with water to 50/50, or if it would work, I might even try diluting it further to more like 1:2 for a more matte finish. My questions are: 1. Is the acrylic topcoat the right/only way to go? Can a soft old lambskin jacket like this hold up to that? Or is there another/better option? 2. Can Resolene work at lower concentrations for a more matte finish or do I need to stick to 50/50 3. Bonus kind of unrelated question: that wrinkly collar is a little annoying, is there anything I can do about that? Thanks so much in advance! P.s. I know I may have over-applied the dye and there could be other things I could do differently in the future to avoid this problem, but I'm mainly just interested in how to proceed from where I'm at. Thank you!
-
I dyed one of my best saddles with fiebings pro dye dark brown, and it turned almost black. I’m so sad and it looks hideous. Is there any way to lighten, bleach it or take the dye out? I would love to save it ❤️❤️❤️
-
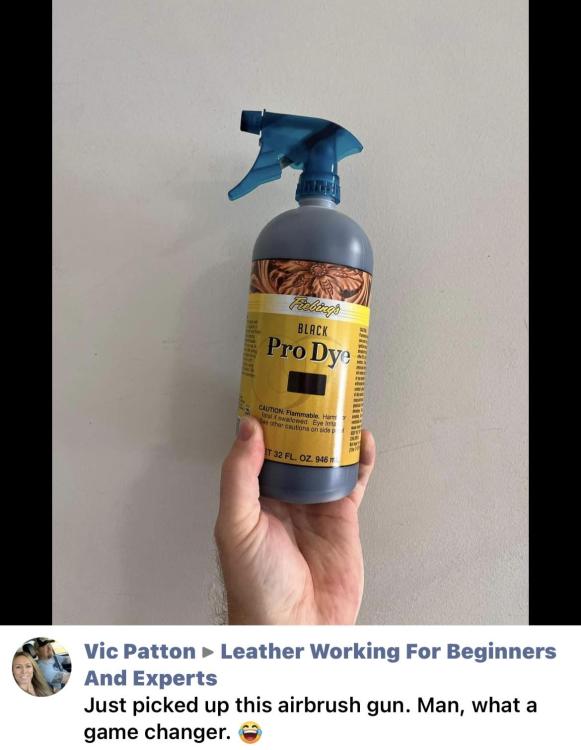
Has any one tried this method? Found this picture on Facebook, the owner might be on here, I'm going to find a finer spraying nozzle and give it a go!
-
what is the best way to clean my brushes after dying? used 90% alcohol and murphys soap, but what is the best?
-
Hi everyone! First time visiting Leatherworker.net, so please bear with me if my post is in the wrong thread, or if my problem is not suitablefor this site. I'm at my wits end here, so I'm hoping someone can shed some light on whats going on here: I decided to try to dye a pair of painted whole cut oxfords, in an attempt to make them darker. The leather is originally painted, medium brown. I'm dying them with a very dark brown, Saphir Teinture franscaise. (I cleaned the leather with Saphir Renomat before applying the dye). After applying dye in three rounds, the leather (surprisingly) seems to take the dye well, darkening the color evenly. But on both shoes there is an area of about 1x2 inches that doesn't seem to take the dye. This area remains the original color (but with a super matte surface). When applying dye to the area the leather immediatly absorbes the dye and dries up. On the rest of the leather the dye takes 5-10 minutes to dry/absorbe. I've tried dying the problem area with additional two rounds of dye, but it just keeps absorbing it immediatly, without any change in color. What's going on here, and what can I so to solve this? Any tips or thoughts will be greatly appreciated. Thanks!
-
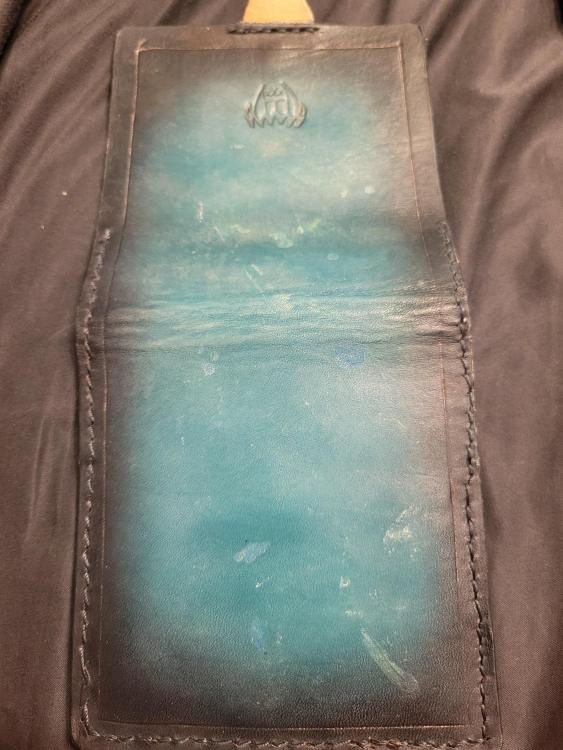
Hi everyone this is my first post ever on here and I'm hoping to get help. I've been leather crafting for a long while and I can't figure out how to prevent "spotty" dyeing like in the picture. It doesn't always happen but I can't figure out how or why it happens when it does. In this picture I used Angelus Jade color dye and airbrushed it on. All the white spots seem to be where the dye didn't absorb in. I did use acetone to deglaze it before I dyed it. Has anyone else ever had this problem? And is there a way to fix it or even prevent it from happening again?
-
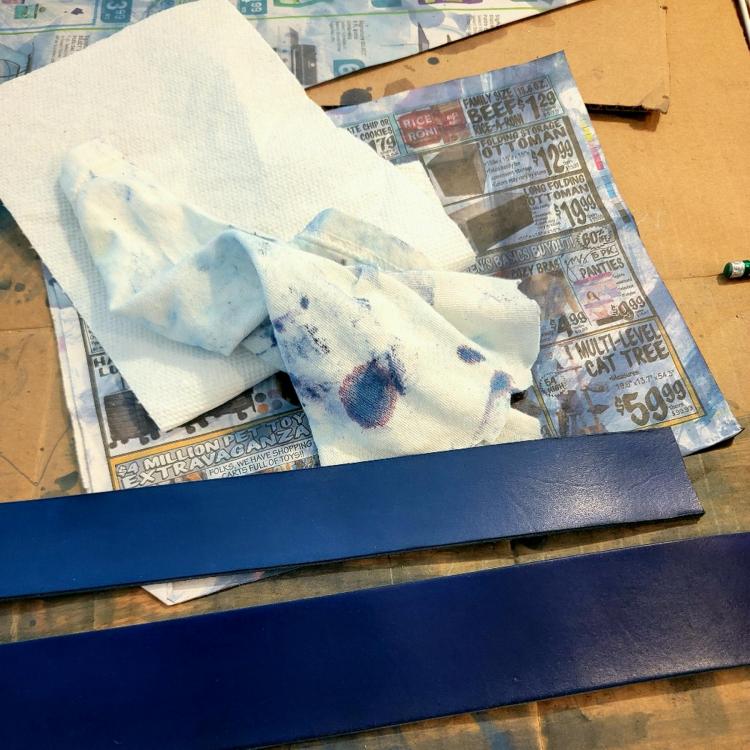
I am using leather that I bought from the same company in two different widths. I am using Royal Blue dye diluted 1:4 with denatured alcohol. Same amount of coats on both pieces. The smaller strap is the color I'm going for. Both deglazed before hand. I had some bad luck wetting the leather, neetsfoot, etc. So I just deglazed and dyed.applied both the same with a sponge or dauber. I noticed that on my rag there, it seems there is a bit of pink/red almost leeching out of the diluted dye. That would make sense because red + blue = purple. But why would that even happen anyway? The flesh side looking closer to the shade I was chasing. Does anyone have any insight to what could be going on here? I wasted so much leather chasing that perfect color. I had it mixed in a plastic disposable Tupperware type container. Thanks!!
- 3 replies
-
- dyeing leather
- dye
-
(and 1 more)
Tagged with:
-
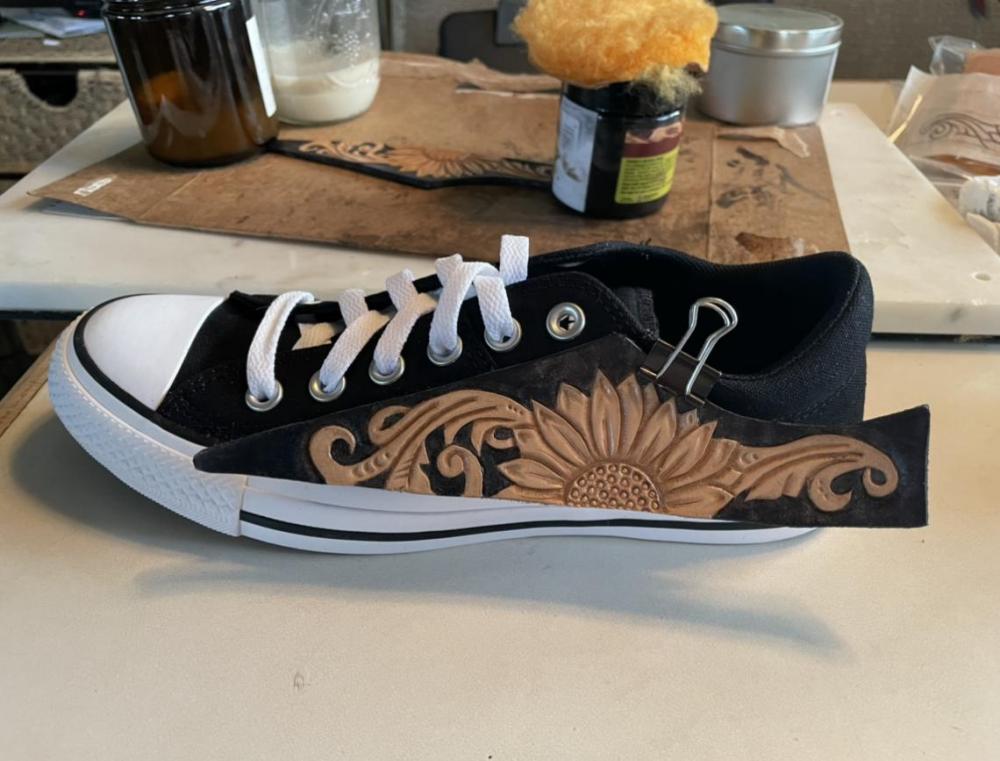
Hi! I know this has been discussed a bunch so I apologize for any redundancy but I still have a question. I’m making tooled panels to go on a pair of converse, using premium veg-tan from Hide House. -Tooled, cleaned with rubbing alcohol (didn’t have deglazer and figured it was close), -Dyed the background with fiebings black water based dye. I did three coats and dried overnight. -Lightly oiled(olive oil), dried for atleast half an hour. -Applied Tankote and the dye is rubbing off-and transferring onto the undyed areas, not all of it but definitely getting splotchy if I rub it too much. I tried to delicately apply the tankote in hopes of sealing it and not disturbing it. Now that it’s dried overnight it feels sealed and doesn’t SEEM to be rubbing off, but worried it will if they get wet at all. Questions being, I was reading resolene may be more appropriate for this application? More waterproof as well(seeing as they’re going on shoes)? Also do I need to buff the leather and get off any dye that wants to run(and at that point can I even touch it up since it’s already got tankote on it) or should I just seal it with a 50/50 resolene(or tan kote if that’s more appropriate) and it will stay put? Planning to antique as well but waiting to sort out the dye issue before I go any further. Appreciate any advice, thanks so much for your time! photo attached, go easy on me it’s only like my third time tooling something
-
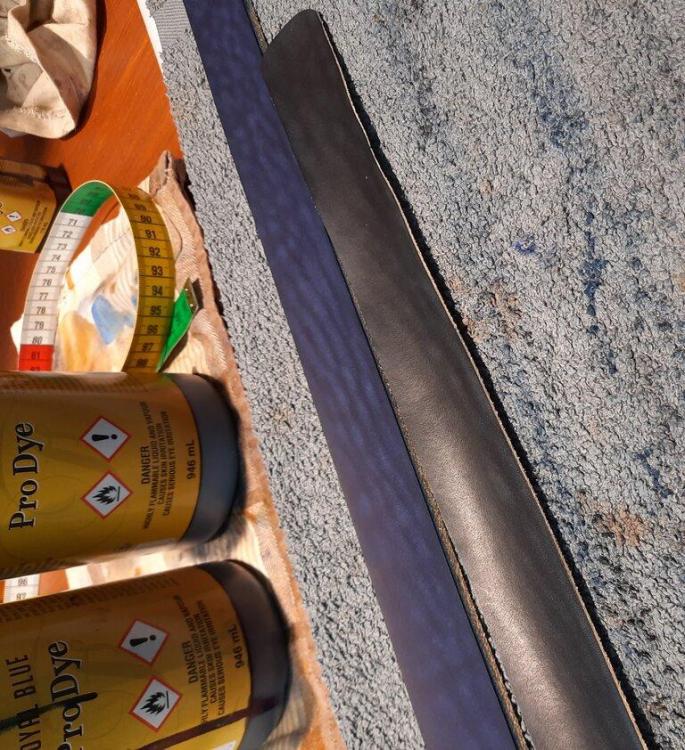
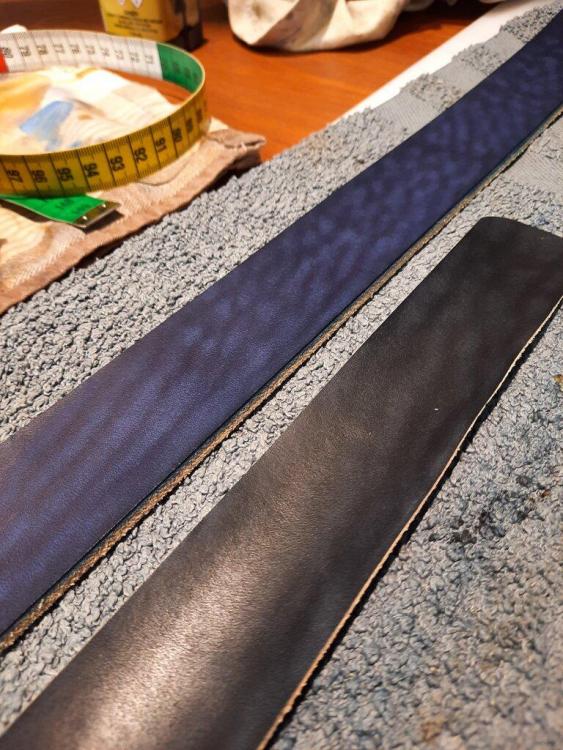
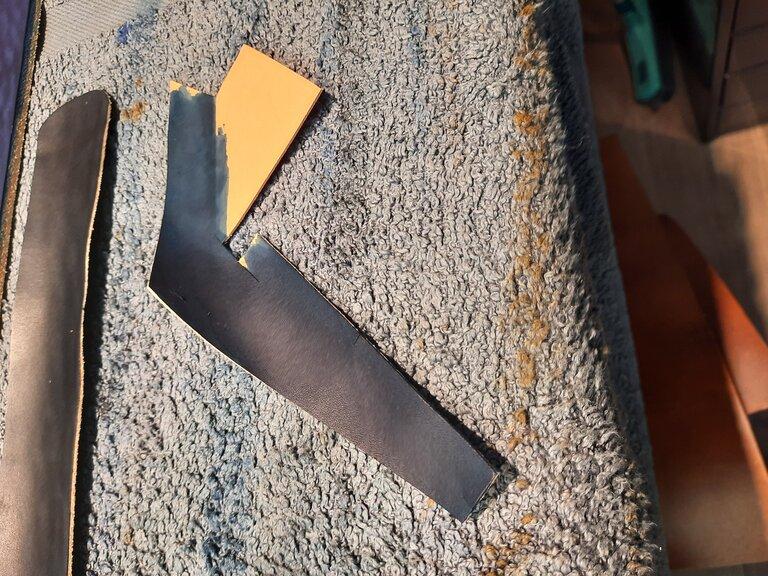
Right then, ordered some vegtan butt, which arrived this morning. It appears spot on and I've never had an issue with this tannery before. I cut off two strips for a belt in the making and dyed both. I immediately noticed an odd colouring and marbling. I just completed a dark blue belt about two weeks ago without issue using a different leather. It near on appears purple and this marbling effect... I did a test piece of the blue and it looks as it should. I need to contact the tannery, obviously. This marbling effect... is that from the tannage or the bull itself? The fact that dark blue (Pro Dye) is leaving this a slight purple, it makes me wonder on the tannage. I am unsure what caused this, hence asking here. Cheers!
-
Hi, I work for a company outside of the US that manufactures products that are made from leather. Up until now we used to by the processed leather after it was dyed and now we are looking into doing the process in house . We have tried a few ways of dying the skin black and met with companies in Europe but didnt reach the result we were looking for. We were told that there is alot of companies in the US the specializes in these kind of things and have a lot of knowledge. Since we are a big company we are looking to work and purchase on a large scale once we find the right company to work with. If anyone has any insight on this topic or know any good companies in the state that specializes in this that we can meet with, I would really appreciate it if they could send me in the right direction. Thanks!
-
Hello all, I have been using fiebings pro oil dye on all of my dyed projects. I do like the way that it sits in the leather, but I am the type of person that would much rather use a more natural alternative when it comes to most methods. I have heard about using cold black coffee to darken leather, as well as multiple light coats of extra virgin olive oil left out in the sun. I am more keen to these types of methods. I was wondering if anyone knows of, or has had any experience with, making their own plant based leather dyes? I have heard of people using organic material such as: onions blueberries cedar walnut husks alder blackberries elderberries fern fronds etc... I do have access to these items, but I am unsure of the process in which to get the pigment out of the item, as well as applying the dye, and storage. Edit: Do you think this method would work for dying leather? http://pioneerthinking.com/crafts/natural-dyes Thanks! Zayne
-
Hi, Leathercraft is a new hobby for me, so I'm acquiring tools as I go. My first set of leather stamps just came in, and I'm itching to use them. The project I have on the bench right now is a checkbook cover made from a 5 oz veg tan. It is coming together nicely, but a border stamp would look great on it. I've already dyed the leather. (Fiebing's pro dye if that matters.) Am I too far along in the process to add that stamping? I dont want to ruin what I've already done, but I have the new tool itch Thanks
-
Hello! Extreme newbie here. I'm wondering if there is a difference between using a few coats of oil or using a brown dye to achieve a dark brown look than the original veg tan natural color. Is one a superior method? Thank you for any and all help.
-
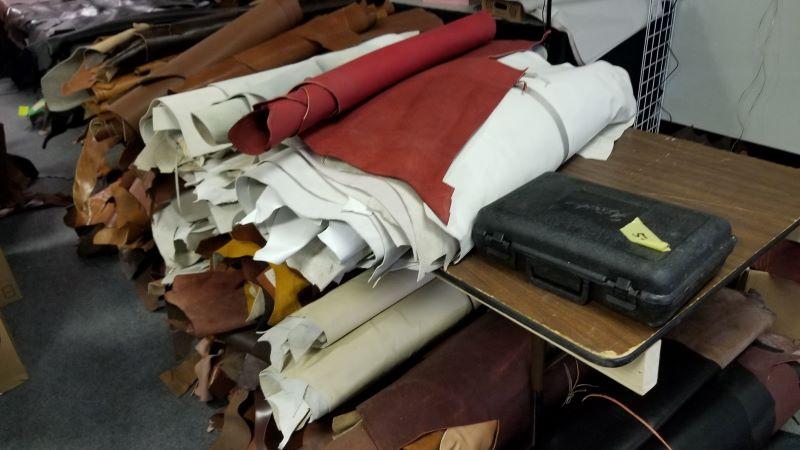
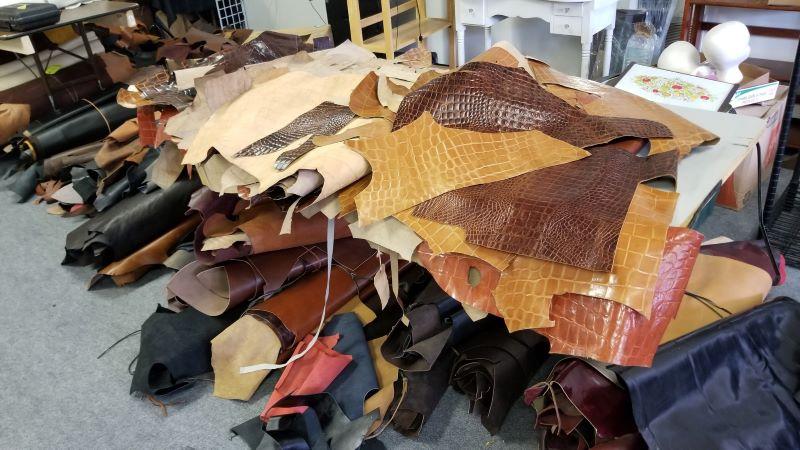
Put my hand up at an auction last week, bought 4 tons of leather from a Leather Factory in Lynn Ma that made high fashion handbags, portfolios and other leather goods for the travel and fashion industry. Really an amazing collection of Weights, tanning methods colors and textures. Small scraps to whole hides, various species. I am not an expert in identifying leather so if you are in the area please bring your expertise and come check it out. Prices as low as $2 per pound and $2 to $7 per square foot depending on weight finish and condition. When I say some thing for everybody I am not exaggerating. Nubec, latigo, prints, raw, oil, colors chrome etc. You can see photos and message me here at FB market place. https://www.facebook.com/marketplace/item/386611275340297 or call or txt at 6o3 fivefive3 l49five
-
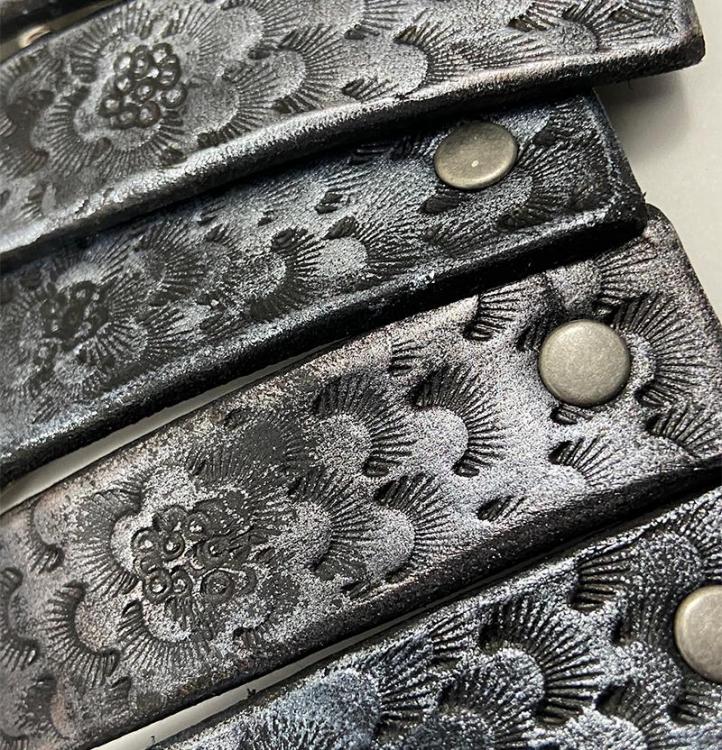
I make jewelry/accessories and am trying to optimize my process to make things more consistently etc. Starting with embossed veg tan leather. I currently am using mostly tandy black dye (I am not partial to it -- would be happy with anything affordable that I can buy in bulk). I then apply a sheen coat of a metallic angelus paint with a roller, so the black low areas show up nicely. Then I have been applying tandy ecoflo with a dauber but find it messes up the paint layer. I have read about this in other strings (thank you!) and am trying to resolve. Suggestions I read about include using an air brush, which I may consider in the future. (I already am playing with tests using a simple spray bottle for comparison and it does speed things up when I have a lot of small pieces). I also saw there was a debate between ecoflo, resolene, and a mop & glo suggestion (that I haven't yet jumped on). Specifically what I'm wondering is if I can just seal the DYE coat before I apply the paint, and then skip sealing the paint layer? Will the paint layer be safe and ok for use if it is unsealed? Angelus paints are acrylic but they sell their own acrylic sealer which they say prevents scratching. (Their target customers are mostly custom shoe painters, which is not what I'm doing, so I don't know if this issue is relevant for non-shoe products!) Anyone have experience with angelus sealers to know if they also dissolve acrylic paints? Thanks.
-
Hi and happy new year! I came across this leather shown in the picture. Any idea about what leather is it or the technique to achieve this two-tone look (tan + yellow)? Is it a tan leather painted with yellow (acrylic?) dye or some yellow leather dyed brown? Or some pull-up leather? Or a natural veg. tanned leather dyed with tan and yellow dyes at different areas? Any help with this mystery leather would be very appreciated!
-
Having trouble figuring out why my nice white thread discolors as I sew dyed projects. Think I have allowed plenty of drying time for the dye. Help?
-
Hey guys, me and my husband got bit and have been hooked on leather crafting. It started as a hobby a few weeks ago but we both found a passion in it. A few of his buddies from work want some stuff for Christmas so we want to make it look more 'professional' and last better. We picked up a basic tool set and some stamps. But we are pretty clueless when it comes to how to finish our leather. We have a Tandy's about two hours away we are going to next weekend to pick stuff up, but I wanted to get some recommendations on products from Tandy's you guys like. I've seen a lot about the Clear-Lac/Neat-Lac, saddle lac, tote lac, ect. We know we want to do a lot of antique finish but according to Tandy's website you dye, use a pro resist, antique finish, then neat lac. But won't a resist keep the antique from absorbing? Also, what is the proper process? So far we follow this- cut, groove, bevel edges, sand, burnish, tool/carve, oil (let soak overnight), then sew together. Is there a better method and how to do we finish? I posted my first project I did, a sheath for my throwing knives. I did the art then colored it with regular acrylic paint from Hobby Lobby (which I'm sure you probably shouldn't use). We are looking at getting the Eco flo glue, fiebing dyes, fiebing all in one antique finish, fiebing pro resist, eco flo neat-lac, and neats foot oil. Is there anything else we should get? I'm sorry for all the questions. Just want to make sure we are on the right path


