


Samalan
-
Posts
1,587 -
Joined
-
Last visited
Content Type
Profiles
Forums
Events
Blogs
Gallery
Store
Everything posted by Samalan
-
Hello and welcome ! I to am from Mass and have lost all sense, well it starts with the time. only know one other member from MA .
-
Businesses are a money eating machine,it will take a lot of money making machines to feed it , its a very difficult circle! . sorry but its all about the money IMHO.
-
Welcome Andrew thank you for keeping us safe. You will find everything you ever need to know about leather right here.
-
Simple Basketweave Belt
Samalan replied to LederRudi's topic in Purses, Wallets, Belts and Miscellaneous Pocket Items
Very Nice Clean Job! -
Chan Geer Notepad Cover
Samalan replied to Bennyg11's topic in Purses, Wallets, Belts and Miscellaneous Pocket Items
looks good ! -
I will i'll have to do it when my son comes over i have no idea how to put pic on the computer lucky i can turn this thing on ,but there is a lot of very nice tools thanks for the suggestion. YinTx
-
Very nice job!!! now on the pressure part NEVER allow that, it's a bag not a heart pump!. that is of course unless you like the pressure , then that's a different thing . looks great nice stitching and design .
-
Nice tool use it and when you do say hello to an old friend . its funny almost every tool i use i say hello, sometimes ill sit in the shop and look at the tools i have in the thousands .one guy gave me his great grandfathers saddle makers tools in unbelievable good condition, when i ask him for a price he said just use them some of them i have know idea what thy even are, thy came in trunks with hand written letters from 1890 and leather samples. buckles i cant name it all here lets just say a lot funny part i don't even know this man my son told his new doc i do leather work and the doc said would your farther like some old leather working tools and wow . Thanks for showing it that's very cool.
-
Nice Job !
-
JLSleather Thank you for your comments , it sounds heavy but it seams not to be, this holster is three years old the man wears it every day the 2 layer bonded and compressed hold like iron.
-
Black dye
Samalan replied to TLP's topic in Dyes, Antiques, Stains, Glues, Waxes, Finishes and Conditioners.
In the sun it's a very dark olive. Yes use the finest steel wool you can find, ad a whole ream of it to one gallon white vinegar let it sit for three weeks or so , it is nasty stuff, have fun. -
Black dye
Samalan replied to TLP's topic in Dyes, Antiques, Stains, Glues, Waxes, Finishes and Conditioners.
Roon is good but not really black ,this is a gun belt i did in roon it's a lot of time and work to get this stuff made and to work right ,but that's just my opinion .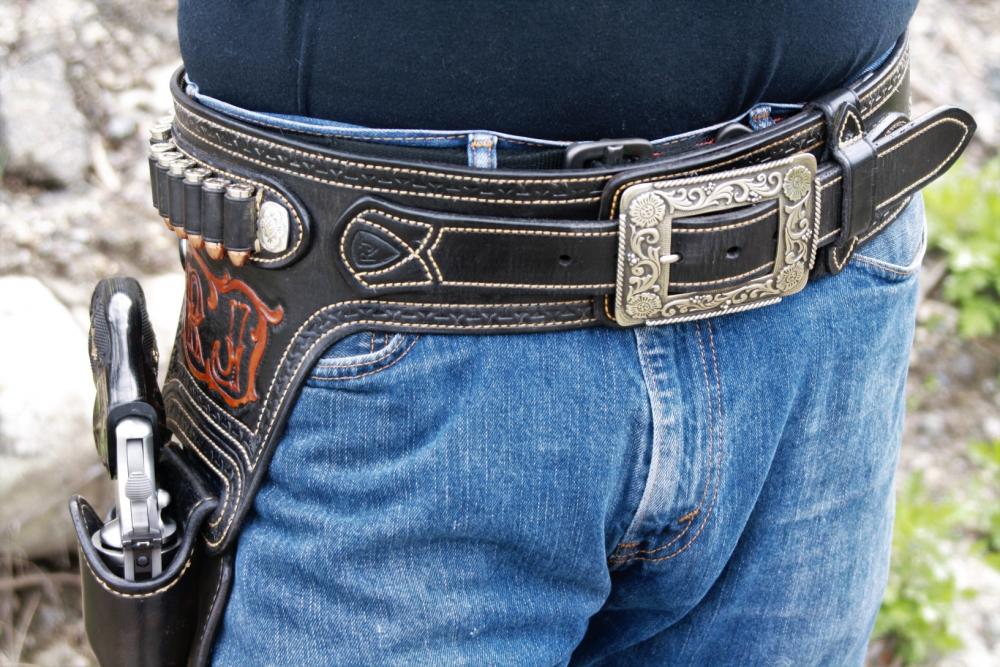
-
At my wife's daycare i do a tool class for the 4 year old's . One day i did a class on hammers one of the mothers said to me how many hammers dose a man need, then told me how mad she would be if her husband had more than one hammer.So i showed her the hammers i used for the class around 20 of them with explanations for all of them, she said i never knew that, while looking each one of them over again and again . this was just one story i like to tell if someone brings up hammers . Northmounts explanation is all you should need it's right on .
-
Very nice!
-
once i was stitching a bass bag for my friend bag slipped on to the go peddle that was a close one never thought i would get hurt on a sewing machine .
-
Really it was just 8, stitches to be truthful it didn't bother me. but that could be due to the fact i felt like an ass.
-
i was giving a band saw safety demo in Jr high, teacher talked to me just for a second . you know the rest of the story teach was very upset .
-
A Few Holster I Just Finished
Samalan replied to Rohn's topic in Gun Holsters, Rifle Slings and Knife Sheathes
WOW ! that basket weave looks real, Nice work Rohn. -
How to remove rusted seized needle plate screws?
Samalan replied to Kryptonite's topic in Leather Sewing Machines
The best penetrating oil i have ever used is a mix of 1/2 Break fluid 1/2 acetone very slight tap's very tiny hammer . -
Hi and sorry for the time it took me to get back to you . Yes you understand how the prosthetic work's the molding materials used i got from" Reynolds advanced materials" Boston Mass . I used Alja Safe to get the molds for her hand's then used a very fast setting epoxy i'm not sure but i think it was a 3000 set's like a rock in seconds . hope this helps and thanks for the question .
-
Cowboy holster
Samalan replied to LonesomeLeather's topic in Gun Holsters, Rifle Slings and Knife Sheathes
Nice job! -
Custom armguard for injury.
Samalan replied to immiketoo's topic in Collars, Cuffs, Leashes and Leads
Nice job ! feels good to help people with things we make bet this guy loves it . -
Holster and Gun Belt
Samalan replied to Rolandranch's topic in Gun Holsters, Rifle Slings and Knife Sheathes
that's a beautiful job love, it makes me want to try carving -
You know Chan Geer uses a glass slicker be four stamping , his stamping is world class.must be something to it.
-
Anaconda Holster
Samalan replied to Samalan's topic in Gun Holsters, Rifle Slings and Knife Sheathes
Thank you for the nice comment .
