-
Posts
1,195 -
Joined
-
Last visited
Content Type
Profiles
Forums
Events
Blogs
Gallery
Everything posted by Red Cent
-
Ford soured me from buying Ford. Bought a brand new E350HD 12 passenger with a 6.0 PowerStroke. Little did I know the trouble with the motor. All the class action lawsuits ain't over yet.
-
-
http://www.harborfreight.com/catalogsearch/result?q=dead+blow+hammer
-

Bandoleer Holsters
Red Cent replied to RVM45's topic in Gun Holsters, Rifle Slings and Knife Sheathes
-
"...........mags are backwards......." Not necessarily. Insert the mag with the rounds pointing forward. Or is that what you think is wrong? The first holster looks to be made of a really soft and thick leather. From what I see, much too soft to carry such a handgun. The loop on the back is not thick enough to carry the handgun. Looking at the front side of the holster, I would cut a semicircle belt loop starting very close to the inlay stitching and going down and around. ".....the pistol slide around on the belt and hang loose from my side." Again I would attribute the problem with the leather. If you use 8-9 ounce veg tanned leather and once you wet mold fan dry the leather and it will not sag. May I ask what leather are you using?
-
I have changed to dyeing first and then apply NF. I was running into dark spots along the edges if I oiled first and then dried. Always waited to next day and leather was hung high to dry. Now the color is more even. "Resist" is a sealer of the leather. Terminology is used when doing multiple colors close together or when you dye something. We mix an acrylic sealer with water to seal in the dye. This "resists" the dye from getting on clothes. A lot of us use a floor shine product. Mop & Glo is the name or something like it. Heck of a lot cheaper than Resolene, Satin Sheen, or other "Sheens" .
-

Question For Cas/sas Holster Makers
Red Cent replied to Modad2010's topic in Gun Holsters, Rifle Slings and Knife Sheathes
(2)El Dorado rig? John Wayne holster? Right and left? Billeted ends? ends of belt sewn on? -
First time for me. Thought I had seen them all. Neat, but.....................how secure is that thing? Interesting.
-

Ranger Belt
Red Cent replied to goodfella's topic in Purses, Wallets, Belts and Miscellaneous Pocket Items
Must be for a left hander That is very nice work. -
About the only problem like yours is when I cannot get a thick piece of leather flat as in the closing of a western holster. I finally started soaking the fold, got everything flat and sewed. Now the reverse "only" thing is puzzling
-

First Holsters
Red Cent replied to thejaxxxon's topic in Gun Holsters, Rifle Slings and Knife Sheathes
If I am building, say a pancake holster, I cut and temporarily glue the two pieces together. I bevel the edges and sand very smooth. Sometimes I will put a stitch line on the front piece top and bottom (where the gun slides in and the barrel opening). Put it back together for good with glue. Then I stitch the normal stuff around the perimeter. Then I wet the holster, place the gun in the correct position and use a food vacuum to quickly get a good mold of the gun. After setting for while I take it out of the vacuum bag to dry or, maybe some more detailing. Now you have a perfect outline and will know how to stich. Sew 'er up, insert the gun and let 'er dry. Somewhere in there I dye the pieces. Kidding. I always dye before I glue. Forgot to add when I put the two pieces back together for good I will touch up the edges with a band sander or any of the aforementioned tools. -

First Holsters
Red Cent replied to thejaxxxon's topic in Gun Holsters, Rifle Slings and Knife Sheathes
Camano wins (beat me). I will leave my post even if it repeats. Thejaxxon, it is a start. First (no order) the edges. Once you cut and, I guess, glue and sew, you need to smooth the edges. Take off the "chopped" look. I do it with a band sander and/or a small drum sander mounted on an old grinder and/or a Dremel tool with a drum sander. Once smooth, you need to burnish. Barely, barely dampen the edges and rub with canvas, piece of old towel, or buy a hand burnishing tool. The edge should turn glass smooth. Then dye the edge if possible. Rub/burnish the edge again. I am guessing that it is hand sewn. I don't hand sew. Anyway, get the stitching closer to the handgun. Snug=retention. You have discovered if you try to mold raw veg tanned leather it will mark bad. Actually, you are burnishing that spot. Now if you are going to die the holster that won't show other than the bumpy molding around the trigger. Camano, please post one your pieces for thejaxxon. -

First Fixed Blade Sheath
Red Cent replied to DTrap's topic in Gun Holsters, Rifle Slings and Knife Sheathes
"6 layers of 8oz thick and 7 layers where the belt loops are on the back." Dtrap, are you sure? Six layers is about 3/4" of leather. Great looking sheath. -

Flat Back Holster Help
Red Cent replied to 40Rock2's topic in Gun Holsters, Rifle Slings and Knife Sheathes
cgleathercraft, are you molding the front piece only? -

Some Personal Rigs, Sig P238
Red Cent replied to chiefjason's topic in Gun Holsters, Rifle Slings and Knife Sheathes
Nice stuff Chief. When I do a mottle look, they ask me what went wrong . -

Revolver Holster Questions
Red Cent replied to cleanview's topic in Gun Holsters, Rifle Slings and Knife Sheathes
Chief, that works to a point. The SASS leather guys never mold (Mernickle, Kirkpatrick, Red Cent ). The flat sided "pocket" will almost always exert pressure on the cylinder (just on the edge) and, to some degree, on the tip of the barrel. Most of us never store the gun in the holster. Some will place a tennis ball in the mouth of the holster to retain the big hole for re-holstering on the move. But that's another story. -

Revolver Holster Questions
Red Cent replied to cleanview's topic in Gun Holsters, Rifle Slings and Knife Sheathes
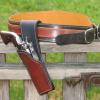
There are some "tricks" in providing tension. As a long time competitor in Cowboy Action Shooting, IDPA, IPSC, and others, you can build a holster using certain points to retain the handgun. Would you think this has retention? Sure it does. You can run hell bent for leather and the revolver will not come out. But it does not look it, huh? -

S&w Model 19-4 Dummy Gun
Red Cent replied to Bigpaws's topic in Gun Holsters, Rifle Slings and Knife Sheathes
Twin Oaks, one would have to cut off the cylinder arm and locking lug to put those under the barrel. Are you thinking "N" frame? Please expand on your first sentence. "A 3/8" socket extention with a 1/4" socket extension taped to the bottom.............." -

S&w Model 19-4 Dummy Gun
Red Cent replied to Bigpaws's topic in Gun Holsters, Rifle Slings and Knife Sheathes
http://www.bluegunstore.com/SandWKFRAME4.aspx This will work. Strap a pencil to the top. http://www.knifekits.com/vcom/product_info.php?cPath=41_585_633&products_id=6135&osCsid=ohftgemqp5afauje3uf0t84ub1 Same -
http://www.schmetzneedles.com/learning/pdf/leather-needles.pdf
- 28 replies
-
- stiching machine
- stitch
- (and 6 more)
-
Anyone ever heard of the term? "I haven't seen that from the WC I purchase. I also have them "plate" the leather. The way they explained it, plating compresses the fibers and makes the leather more stiff and dense. I haven't noticed any "mushiness" at all. If anything it's actually a little more toward the "really firm" end of the spectrum." http://forums.1911forum.com/showthread.php?t=337238
-

Contact Cement And Sewing With Machine Question?........
Red Cent replied to Gregspitz's topic in Leather Sewing Machines
Don't use the thin stuff. I use/sew anything from 2 layers of 8-9 to 2 layers of 8-9 plus 2 layers of 6-7. I glue the outer and liner, use a heat gun to "glaze" the glue, put it together (you had better get 'er right the first time), roll with rolling pin, square edges with a belt sander, hand sand, crease and sew. I won't fold the holster until the next day.


