-
Posts
1,091 -
Joined
-
Last visited
Content Type
Profiles
Forums
Events
Blogs
Gallery
Store
Everything posted by DJole
-

Dying stamped letters
DJole replied to Frodo's topic in Dyes, Antiques, Stains, Glues, Waxes, Finishes and Conditioners.
Always do a test piece on a piece of the same leather the project is made from! -

Dying stamped letters
DJole replied to Frodo's topic in Dyes, Antiques, Stains, Glues, Waxes, Finishes and Conditioners.
I have used permanent Sharpie pens to color fine lines like you describe. There are also re-fillable dye pens which might work for your project: (https://www.dharmatrading.com/tools/angelus-dyeliner-refillable-dye-pens.html) -
I recently did a project using some round linen thread, from a company named Since: https://www.amazon.com/Since-Leather-Thread-leathercraft-0-45MM-90/dp/B07H4THKRV/ref=sr_1_1?keywords=since+linen+thread&qid=1568090850&s=gateway&sr=8-1 I have also used a thicker linen thread from Royalwood. They are a basket/beading supply company, mostly, but they have a large variety of waxed linen thread in various sizes and a lot of colors: https://www.royalwoodltd.com/cat14-17ar.htm This thread is a bit more fiddly to hand stitch with -- it's easy to stab your needle through the thread rather than alongside it, but if you take care, it works just fine. I did my own wallet with the Royalwood linen, and 10 years later I had to do some restitching along one side that got a lot of wear. It held up pretty well.
-
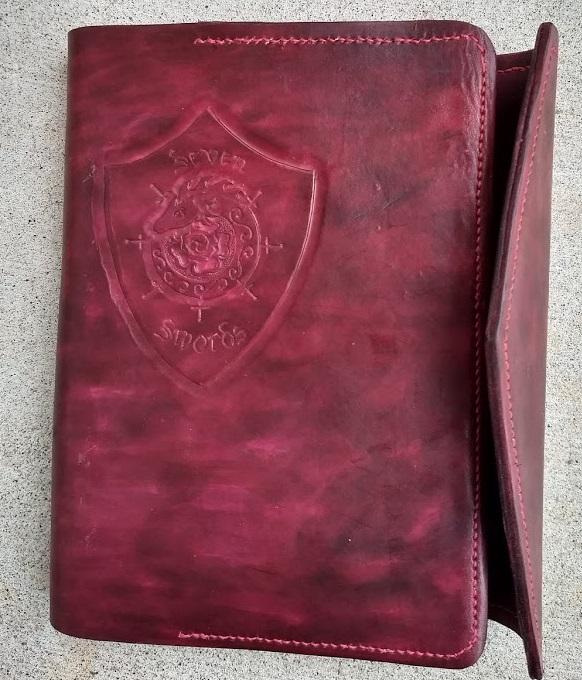
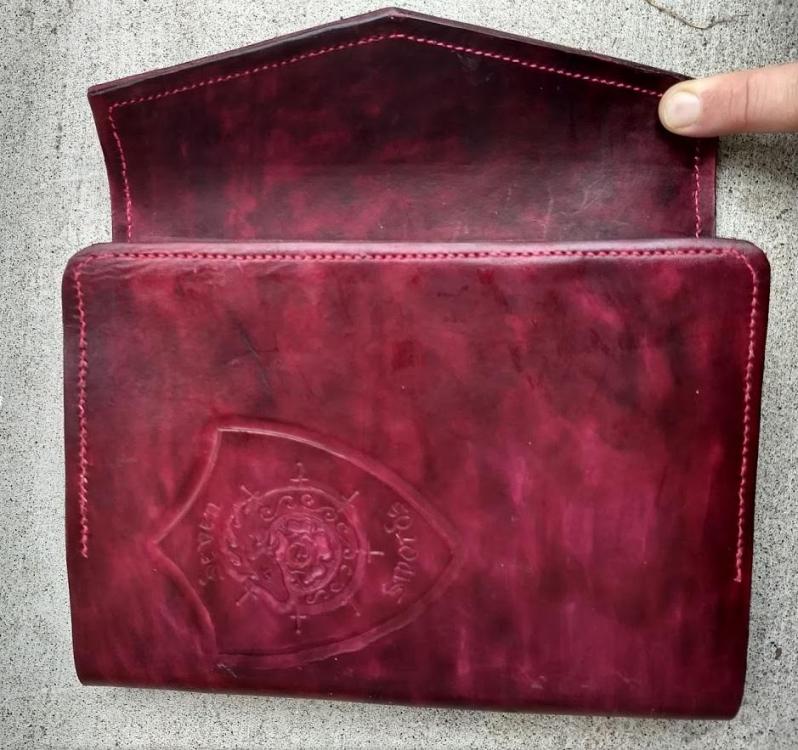
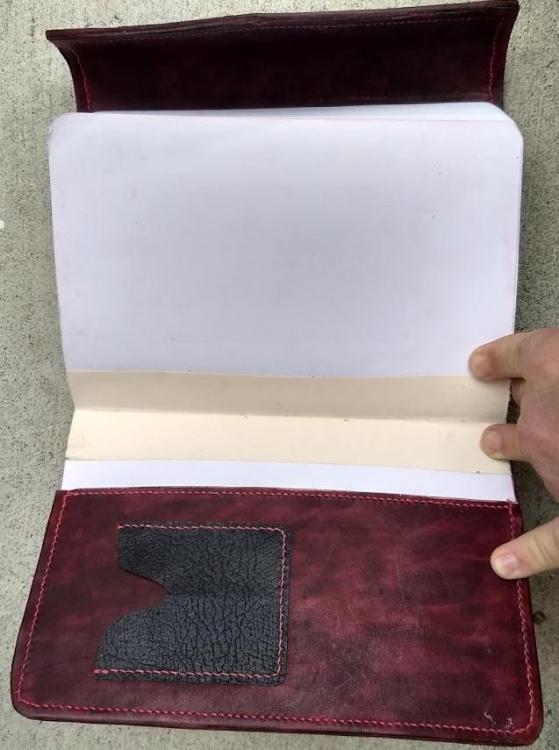
This is a project I did as a special request from my longsword school. The logo for the school is tooled onto the front. The dye color is Angelus Oxblood (requested by the school). (I took the photos before applying another coat of dye, so it looks a lot less patchy now.) The red thread is "Since Leather Linen Thread for leathercraft M40/0.45MM (red, 0.45MM-90/SPOOL)" ordered from Amazon, sewn using 3 mm stitching iron (JapanGoods) and John James 002 size harness needles. The outside leather is a good quality tooling shoulder from Tandy (about 3mm thick), and the inner leather is a 1 mm thin leather I've had for years now...probably from Tandy. Edges slicked using clear Tokonole. This was more complicated than it may seem, since the request was to make this a permanent book cover, rather than a slip-on cover. So the edge stitching goes through the plastic cover of the blank book as well as the leather. I had to make certain that the leather could be glued together around the edges to hide the white cover. The third photo shows the black pigskin card pocket, and the reinforcing strip of book binding cloth. The only things I have left to do is punch a hole in the flap and attach a leather tie strap of some kind (as commissioned).
-
A quick look at Angelus dyes (https://angelusdirect.com/collections/angelus-dye-1/products/tan-leather-dye) also shows a tan. Purchaser reviews posted there indicate that at least one user considered the Angelus tan also too orange when applied full strength. So it looks like reducing the dye strength might be the answer here. (Angelus also sells a "neutral" or colorless dye reducer-- <https://angelusdirect.com/collections/angelus-dye-1/products/neutral-leather-dye>-- It's formulated for Angelus and may not work as desired with Fiebings products.)
-
The original is an interesting shape! You say that's the original hardware on those bags? What is the bag, and what is the time period for them? Maybe there is a re-enactor's group that has a source for that hardware.
-
Is this what you are looking for? https://www.buckleguy.com/feet-and-studs/?sort=featured&page=2
-

I Want to Make a Sporran...
DJole replied to PappyJoe's topic in Purses, Wallets, Belts and Miscellaneous Pocket Items
Here are some other sporran building guides that may help you out: 1) http://www.werewolf.ca/LIBRARY/_HERITAGE/Formal_Sporran_Pattern.pdf 2) http://www.nwta.com/wp-content/uploads/2015/02/291sporr.pdf 3) -
Brettun's Village up in Maine will sell you a piece of a size you want: The "I Only Want a Piece of Leather" Page <https://www.brettunsvillage.com/leather/piece_form/>
-
It is beautiful. That's a very lovely pattern, and the tooling is excellent. Nice stitching, and great color choices.
-

Recent Projects
DJole replied to stormcrow's topic in Purses, Wallets, Belts and Miscellaneous Pocket Items
Two awls way up! Lovely work with a high level of design and craftsmanship, visible in those sweet edges and sharp stitching. Those are wallets that you can be proud of making, and people should be proud to own. -
I think it's a marshmallow press, used to hold a marshmallow over a campfire...
-
Critique -- it's at your house, not mine! But seriously, that's a pretty good job. Smooth lines, good stitching with enough leather around them, and the stamping is all right. It's very hard to get repetitive patterns like that exactly lined up and spaced correctly-- only purists and pedants would point out the very small inconsistencies.
-
Angelus has an Orange dye, as well as a Honey dye -- I haven't used either of them, so I can't say how close they are to the color you are looking for. Check online here: <https://angelusshoepolish.com/collections/leather-dye>
-
Is this the design you mean? <https://www.stecksstore.com/craftool-153r-leathercraft-tool-stamp-68153-02-by-tandy-leather/>
-
Welcome, AbbyR18. You might benefit from watching some of Ian Atkinson's videos. The ones I linked below are from his website (https://www.ianatkinson.net/leather/videos.htm). He does a great job of explaining what tools you need and why, and also showing that not everything you need must come from a leather supply store. Beginners’ Videos Top 25 Recommended Leatherwork Tools (45 mins) The Tools You Need for Leatherwork (15 mins) The Hardware You Need for Leatherwork (30 mins) Information About Dyeing Leather (45 mins) Choosing the right type, weight and quality of leather for your projects (35 mins) Hand Stitching Leather (1 hour 35 mins)
- 7 replies
-
- tooling
- swivel knife
-
(and 2 more)
Tagged with:
-
How interesting that the Netherlands has a market for Western (USA) style riding tack! Welcome to the forum, Mathilde!
-
That's nice stitching -- the spacing and tension are all equally balanced. I like that you re-purposed lower grade leather into a useful item. And it will take a beating, and you won't be sad because it's not top dollar leather!
-
I found that I am much more likely to mess up with the stitching gouge than with the dividers. Just one slip and WOOPS. But the dividers are much more forgiving.
-
Remember also that wet leather will stretch a bit and form to shape. I just completed a couple card slots where I over-trimmed the pieces, and I could JUST BARELY slide the cards in, even though the stitch line was just barely on the edge. But then I wet the piece down, put the cards in and shaped the leather a bit and let them dry in the slots. Now they work great. You can also skive the leather to reduce bulk.
-
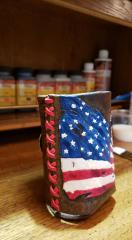
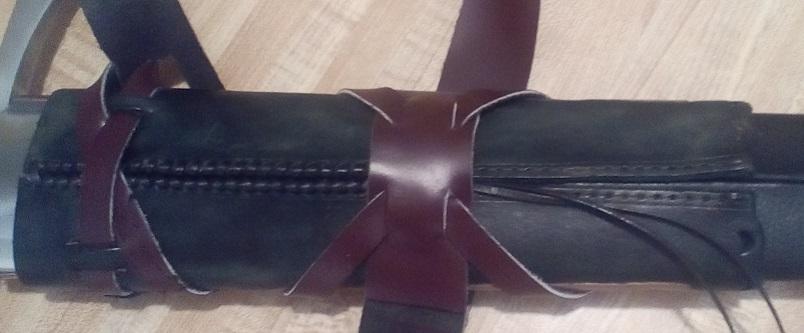
Ah-- I need to specify: the sword has a scabbard already, leather over wood. However, there was no suspension fittings or belt attached to it. So what I made is kind of a hanger, which was made to fit tightly over the scabbard. (See here for the full piece.) (Also, the sword isn't sharp -- it's a metal simulator, or waster.) Looking at your staff handle, I wonder what the color is? Is that a dye you applied or something else? The baseball stitch works really well for tightening leather around things, like baseballs, staffs, steering wheels, sword scabbards...
-

Master Saddler and Professional Saddle Fitter
DJole replied to MasterSaddlerKate's topic in Member Gallery
Welcome to the forum! I'm curious -- why did you move to the USA, and why to that area of Illinois? -

66632026_1575681789223728_7118707950075510784_n.jpg
DJole commented on cmdavis's gallery image in Gallery- Our Leatherwork
-
Nice work! I did a similar thing on a sword scabbard I made a while back, using flat lace instead of thread like you did:


