


DJole
-
Posts
1,091 -
Joined
-
Last visited
Content Type
Profiles
Forums
Events
Blogs
Gallery
Store
Everything posted by DJole
-
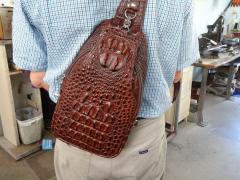 That is a lovely piece-- the texture of that crocodile grabbed my attention right away, and I like that color, too.
 -
Nice work -- but you only show one side! I want to see the other side, too!
-
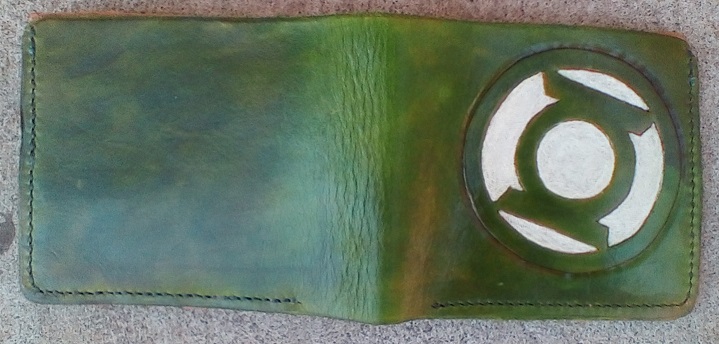
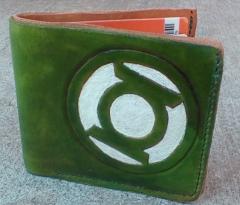
This is a practice piece, looking closely at patterning, and stitching. And it's green -- because I wanted to use some of my nice Angelus green dye and some Forest Green linen thread. My brother-in-law is a Green Lantern fan, so he gets first crack at it, but if he doesn't want it, I'll find another home for it. I learned some important things with this project: 1) I get straighter stitch lines if I don't try to make holes in all three layers at once. I laid out the lines and (using my 3 mm stitching chisel) made the holes on the top layer only, then I marked the ends of the next line on the next layer down. I then made a nice straight line going from one set of marks to the next, and then made holes along that line. Same for third layer. 2) Make the inner piece slightly bigger than I plan for, because trimming to fit is better than trying to get it exactly right. 3) cutting card slot pieces is exacting work. 4) skive, skive, skive!


-
From the album: DJole -- Completed Work
detail of the outside of the Green Lantern wallet, showing design and stitching. -
From the album: DJole -- Completed Work
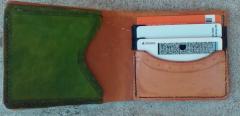
The inside of the Green Lantern wallet, showing the inside card pockets. -

From the album: DJole -- Completed Work
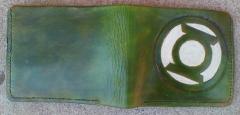
The Green Lantern wallet, folded. -

From the album: DJole -- Completed Work
the card slots inside the Green Lantern wallet. -
From the album: DJole -- Completed Work
The Green Lantern wallet -

From the album: DJole -- Completed Work
The Green Lantern wallet -
You might also find what you need at Brettun's Village: https://www.brettunsvillage.com/leather/hideindex/ They stock sole bends, and they also will cut you a partial hide if you don't need a full piece.
-
Using a GRINDER?! Egads.... good thing you rescued this antique beauty from its tormentor!
-
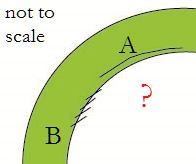
I'm working on an idea for a wallet. I'm thinking about using a nice piece of soft green garment leather for the outside, with a cutout "window" showing a white background (a nice piece of white garment leather). Both the green and the white background will be stitched to a thicker piece of tooling leather. I'm thinking about the best way to stitch it, after gluing it down, considering the following diagram: (A) represents the normal saddle stitch, close to the edge. The edge of the green is not underneath the thread. (B) represents the other possibility, where the stitch passes over the edge of the green, locking it down and precluding the possibility of the edge being pulled up as the wallet goes in and out of the pocket over years of use. Is this something anybody here has experience with? There are two other possibilities: 1) Forget the inlay idea, and just tool the design into the leather. 2) Keep the inlay idea, but cut it into the tooling leather instead, dye it green, and then stitch the white background behind the tooling leather. What do you folks think?
-

My first four wallets.
DJole replied to HamiltonLeather's topic in Purses, Wallets, Belts and Miscellaneous Pocket Items
Lovely work! I like the curved lines for the inlay. Too beautiful to hide in a pocket! -
It's hard to stamp after you mold the leather into a shape. It could be done, but it would require a molding object rigid enough to stand up to repeated blows and to make crisp impressions. Plus, you would now be working in 3-D, instead of working on a flat surface. So stamping or tooling is going to come first, before you mold the tooled/stamped leather around the object.
-
Dragon Vanity Tray
DJole replied to stormdevil's topic in Purses, Wallets, Belts and Miscellaneous Pocket Items
Nice work -- Great design on the dragon and the color work. I really like the wings turning to birds. I can't imagine trying to cut that intricate design by hand-- I need a laser, too. Anybody got a spare one? -
I find that the woodcut matches my abilities. I'm not up to the realistic, more natural looking modeling, but woodcuts are pretty straightforward: where there's a cut in the wood, there's a cut in the leather. It's basically outlining, with thick and thin lines, background and foreground. Not much 3-D modeling needed, but there's enough there for the tooling to work.
-
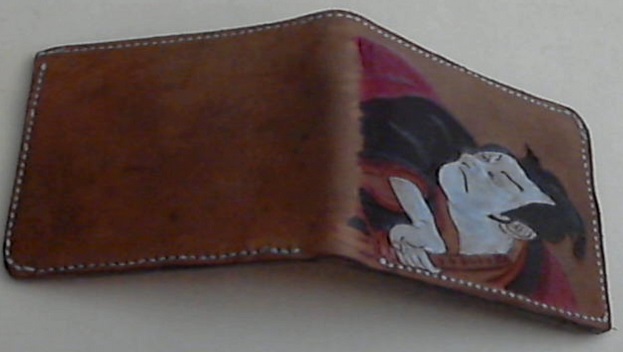
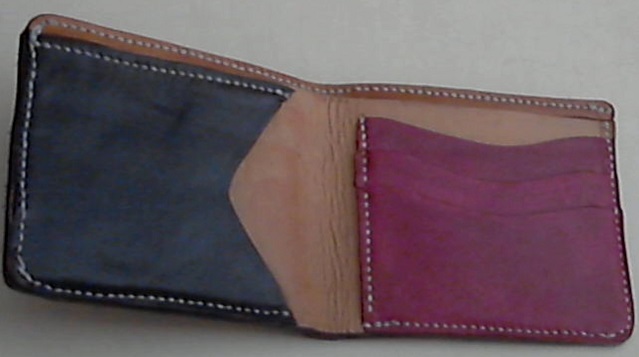
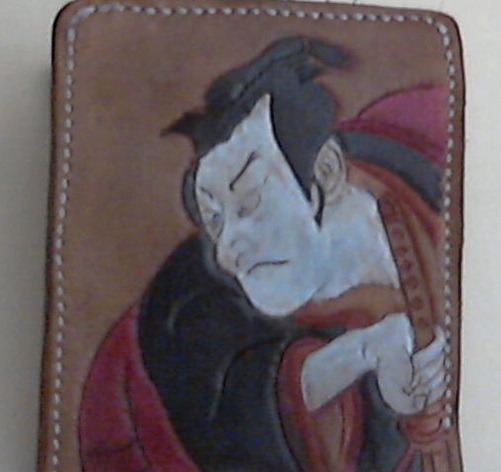
Got it all stitched up and ready to roll: There's our front Samurai, with Antique black all around him, which matches the worn, pseudo-historic look of the white-dyed skin. Inside the wallet, with card slots. I'm not sure what happened down in the lower left corner -- one hole short on the inside, but not on the outside! So I took an extra stitch through one hole, and the outside looks fine. The outside of the wallet, with the edges all blacked (permanent Sharpie marker makes it so easy!) and slicked with gum tragacanth. So now it's all ready for its new owner! I hope he likes having a one-of-a-kind wallet like this!
-
For my tooling things, I use something similar to this, with modular compartments so I can change the sizes to fit the tools. My modeling tools, awls, swivel knife, sharpening stones, lacing and stitching chisels, and burnishers all fit here. However, this only holds half the tools--- the bigger tools (mallet, L square, strap cutter, rivet assortments, thread and needles, sharp tools) are in a box. And the leather dyes are all in their own box!
-
Western purse
DJole replied to farns005's topic in Purses, Wallets, Belts and Miscellaneous Pocket Items
The blue fringes are surprising touch of whimsy-- a nice idea! Can you do a closeup on that tooled flap? Western floral isn't my thing, but I still love to look at and learn from good tooling, no matter the style. -
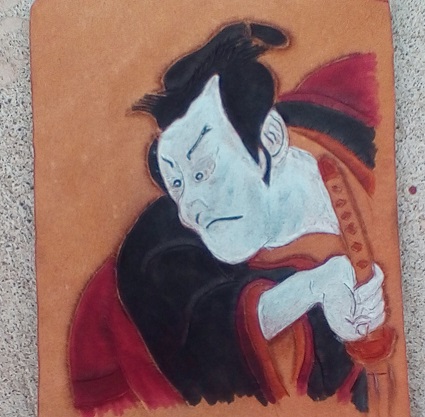
Here's a work in progress--- this is the outside of a wallet, using a historical woodcut as a design. The dyes are Fiebing USMC Black, Fiebing Red, Angelus Tan, Fiebing White. I like how woodcuts translate to leather. I was also pleased by how the white turned out -- it looks antique here.
-
If it's not a raised letter, perhaps using the inverted carving technique would work? The line would still need to be wide enough to do this, though, and that doesn't seem to be your case here.
-
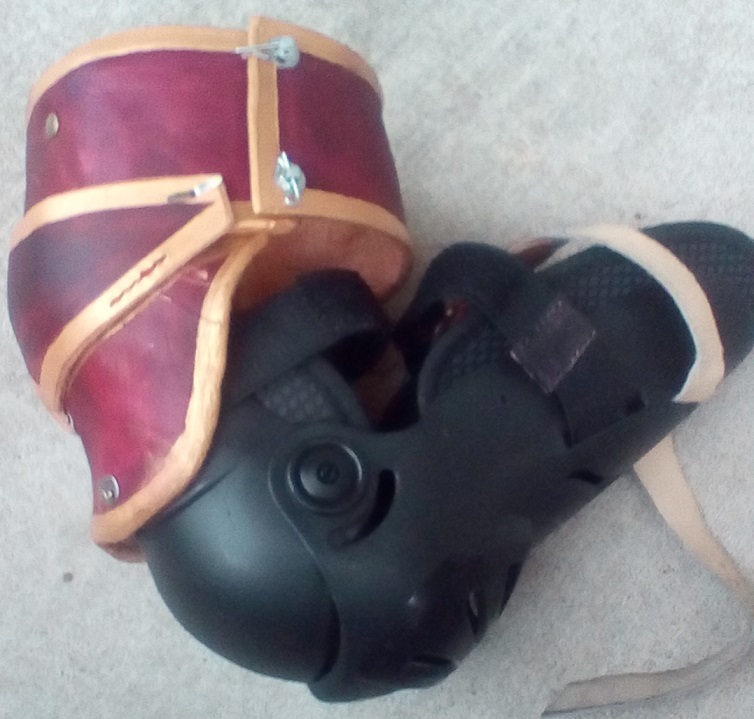
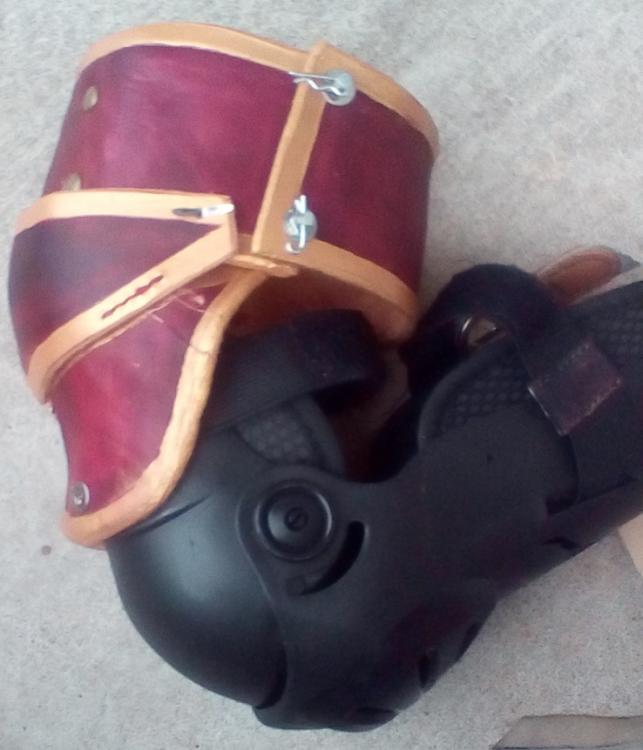
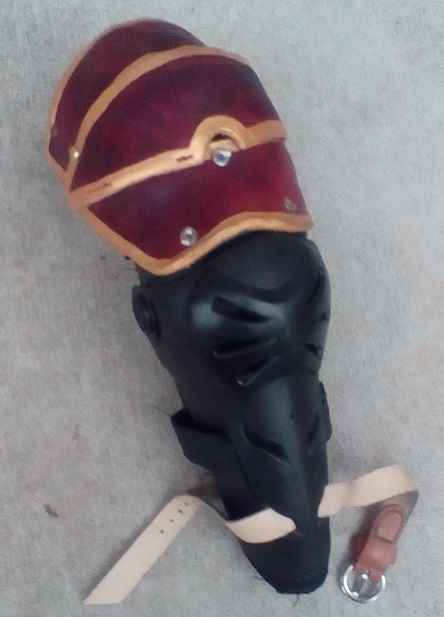
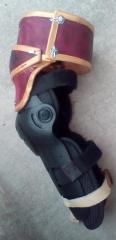
I've been working on augmenting my existing arm protection, which is adequate for nylon sword simulators, but I want more for steel. Plus, armor is cool! This is the whole shebang together: Leather: unknown source -- I have a variety of veg-tan leather, and these pieces are from the bellies I got last year. Dye: Angelus Burgundy, and gold Acrylic paint. The arm guard is meant for motorcyle use, but it covers all the bone points of the elbow and has a nice 90 degree articulation. But that 90 degree caused problems in this design -- originally there was just one piece riveted to the plastic plate. But I found that I need the arm to close to a more acute angle than 90 (30 or 40 degrees), so the elbow kept popping open and locking. Oops... So this is my solution-- I cut the piece in half, and added an articulating lame at the back. So now I get this: Note the lugs just under the circular pivot joint -- those are meant to only go 90 degrees, yet they can pop out under stress. The articulated lame lets the arm bend more: You can see the cracks in the cuir boulli leather -- there are just so many variables that make it a risky proposition. The surface here is rigid, but the leather underneath is not. The lame is water hardened a different way-- I got it wet, shaped it and dished it (onto the plastic here) and then let it dry in the sun. I am lot more satisfied with that method (I've used a wall heater in the winter to do the same thing). I used split rivets to fasten the lower leather piece to the plastic (easier to remove them in the future) after drilling three holes in the plastic. The rerebrace is closed using cotter pins -- eventually I may have additional holes so that I can close it tighter if I want. And inside, held on by the bronze covered rivets, is a Kydex plate (.080 thickness), heated into a nice U shape with a heat gun, adding a layer of plastic rigidity to the leather. Here's a shot of the backside: The cutout over the split rivet will make removal a lot easier. The articulating lame is sewn to the lower plate, and riveted to the upper plate. After I put the articulating rivets in, I'll test this Wednesday night and see how it goes. I may also take the heat gun to the plastic "dish" pieces and flare them out so they'll "catch" on each other, preventing any pop-open.

-
From the album: DJole -- Completed Work
-

From the album: DJole -- Completed Work
I augmented the arm guards I use for longsword fencing -- now I have a functional rerebrace that covers the upper arm. The picture doesn't contain the final rivets, but the articulating lame is in the right place. -
Tools From My Grandfather - When are they from?
DJole replied to CanuckAmuck's topic in Leather History
Your brown block seems to be a sharpening stone of some sort, for the swivel knife or other sharp tools. I don't recognize the hardness or the grit, but my guess is it seems to be a fine grit Arkansas stone. Is that wooden handled tool an edge creaser?

