


DJole
-
Posts
1,091 -
Joined
-
Last visited
Content Type
Profiles
Forums
Events
Blogs
Gallery
Store
Everything posted by DJole
-
the 253 area code represents -- hi there from Tacoma! 1) Ecoflo dyes are water based, so it's hard to stop them from bleeding, even with a finish coat of some sort on them. There is a lot of discussion over what types of finishing products work best for what application. I'm afraid I can't contribute much to that discussion. If you're a fisherman, and you plan on carrying this wallet around into wet places, you'll want to be certain the colors won't run or fade once you drop your wallet into the river (or in a Seattle rainstorm). 2) You need to stamp or tool first, because the dyeing process you use will affect the image (for example, an antique dye finish will look different from a solid color finish). Stamp or tool first, then dye. I'm not sure if it's better to stitch first and THEN coat with the finishing water resistant product, or if you need to do that and THEN it's okay to stitch. I'll let people with a lot more practical experience weigh in on that. 3) Mink oil works for boots, but I'm not sure you want that on a product you'll be sticking in your pocket, or carrying money/cards/etc. around in. Think of it this way -- you have to keep reapplying the mink oil, right? you know how it makes your boots a bit slippery and smelly? Yeah, I don't think that's a good wallet finish, even in logger country! ;-)
-
It's a joke-- the thousand dollars was the price of the Welsh course, which was the reason I went to Wales (not just to get a tshirt!). I actually hiked from Bangor to Llanfair P. G., and then I continued on to Bryn Celli Ddu. That was quite a bit of a walk, I must say! I did get a ride back to town from a friendly surfing lad who'd been over near Aberffraw, and that was very helpful. The ability to make custom bags is one of the things that attracts me to leather work -- you can put in the features and design elements that you want. I love your design concept for a lap-top desk/ computer case. (I can't just call it a bag, since it's so much more than that!)
-
Beautiful North Wales! I enjoyed a bank holiday weekend up in your part of the world back when I was studying Welsh for a summer at Lampeter. I have a treasured t-shirt from Llanfairpwllgwyngyllgogerychwyrndrobwllllantysiliogogogoch-- I call it my thousand dollar shirt! But enough about Wales -- that's a nice first effort bag! (But it's hard to see the details since it's photographed on that darn brown table in what appears to be ambient lighting) I made a bag for the same reason you did. I need to rework my handle, though... someday I'll get around to it.
-
Can you give more specific details about the armor? (i.e. is it LARP armor, historical armor, SCA heavy weapons legal, SCA rapier legal, etc.) It's also helpful to know which piece of armor you are trying to make -- body armor, arms, elbows, helmet, etc. Narrowing it down can help us help you out!
-
Welcome to the forum. There are many experienced, friendly folks here to help you guide through the ins and outs of leather work! If you're interested in hand-stitching, you need to find Nigel Armitage's YouTube videos on handstitching (search for Armitage leather, or follow this link.) Another friendly British leatherworker, Ian Atkinson, has some hand stitching videos that are helpful also: <http://ianatkinson.net/leather/videos.htm> Both of them have very good instructions with clear video footage. Make sure you have at least a couple hours to spare before you check out those links!
-
You were channeling these historic knives, apparently: <http://www.knifenetwork.com/forum/showthread.php?t=33543>
-
I'm one of the few who didn't buy one of those to use when i was first starting out. But that's because a pack of needles and a roll of waxed thread was cheaper!
-
If you watch Armitage Leather's YouTube tutorials, you can see what the awl is for <Google it on YouTube>. Basically, you are trying to keep the hole as small as possible, just enough for the needle and thread to pass through. The awl makes the smallest possible diamond shaped hole. Stitching punches (or irons or chisels or whatever term you use) can be used to mark the leather where the hole will be made, or they can be used to actually create the holes. There are two camps in this debate-- the purist says mark, then use the awl to actually create the holes as you stitch; the others say use the irons to create the holes before you start stitching. (I personally have not done it the first way yet; I would need a stitching pony or clam to make it work correctly.) Yes, the sewing tool is way faster than 2 needles, but it creates a lock stitch, which will open up 2 stitch lengths when or if the thread breaks. The saddle stitch in the same situation only opens up 1, so it's more secure. Like this, as Al Stohlman illustrates: So it just depends on your personal preference and how much time you want to spend stitching. It's an aesthetic choice, which may matter to you or the people who get your leather stuff. Many here on this forum prefer the old-fashioned, painstaking 2 needle saddle stitch, for various reasons. But if I were out in the field, and had to make a quick repair on something, the sewing awl might be the best way to get it done and get going again.
-
Norm? There ain't no "norm" for guitar straps! That's some nice work on there -- I really liked that Dragon strap; the design really appealed to me. Your "Horror Row" strap is an unusual design--- the subject matter isn't my cup of tea, but the execution (heh...no pun intended) is very good.
-
I stand corrected -- apparently the number of surviving scabbards (a rare find, I believe) that are leather is greater than the wooden scabbards. I wonder also if it's a difference in earlier vs. later medieval swords, or even location? Wood would have been cheaper and more plentiful than leather back in medieval Europe, but if you had a sword back then, leather would not be a problem for your budget.
-
You might be able to get a helpful shoe repair person with a hefty machine to stitch it for you, depending on the thickness of the leather, rather than hand stitch it. You don't have to dye it if you don't want to -- you should realize, however, that treating your leather to protect it will change the color somewhat. That's what leather scraps from the same piece of leather are good for.
-
You could do an art piece. Here's one that I did: <http://djole.altervista.org/djole/Publications/Leather/NativityPix/LeatherNativity.htm>
-
The odor of leather is a known intoxicants -- long term exposure to it makes you want to purchase more of it and add it to your leather stash. Beware! Children of America are being led astray into the dangers of leatherwork even as we speak! ;-)
-
The contact cement holds everything together while you stitch. The welts are leather, too. Usually sword scabbards (historically) are built from wood, which is then covered with leather. That doesn't mean that you can't have an all-leather scabbard if you want-- just realize that it's going to be rather floppy rather than rigid, and won't provide as much blade protection as the wooden scabbard. Looking at your sword, I guess you aren't looking at strictly historical scabbards, so you can do whatever you'd like, as long as you like the results! Here's one site that discusses how to construct one type of scabbard: <http://www.yeoldegaffers.com/project_scabbard.asp> (I am informed by experts that the stitches used there are not historical, in case it matters). Some other things you might need: Are you going to dye the leather? If so, there are many threads on this forum discussing dye types, dye colors, and so on. It seems like you're going to hand stitch this -- if so, you'll need to get expert opinion (not mine-- I am no expert on this!) on what thickness and kinds of thread will be good for this. You'll need some kind of finish to protect the leather from rain and sun (and dirt, and mud, and etc.) I remember reading somewhere that if you make an all leather scabbard, you shouldn't store your sword in it over a long period of time. The chemicals won't be friendly for your sword.
-
That looks like a great opportunity for people who live in the LA area, Jess. I hope you and the right leather worker can get connected!
-
Have you contacted Osborne for advice? Check their Website. They might be able to help. I know that I can't give you any tips!
-

First two bags
DJole replied to Bogwot's topic in Purses, Wallets, Belts and Miscellaneous Pocket Items
I like the idea of the side handle on the shower bag. I'd like to see a clearer shot of that! Some nice clean design there-- the folks on this forum do inspire each other to up their games! Off topic from leather: Where in N. Wales do you live? When I was studying Welsh for a summer down in Lampeter, Dyfed, I took a bank holiday to see Snowdonia, Caernarvon, Bangor and Anglesey. -
Maybe this book will work for you: https://www.amazon.com/Leatherwork-Manual-Al-Stohlman/dp/B000HM96YW First published in the 60s, it's basically a leatherwork "course," with pretty basic instructions to the basic tools, heavily illustrated with drawings and black and white photographs. Here are the chapters: leather (overview of what it is) preparing the leather for tooling and transferring the design the swivel knife the basics of using standard "floral" style tools (camouflage, pear shader, beveler, veiner, seeder, backgrounder) leather fabrication (cutting, snaps, linings, thonging chisels, skiving, gouging) structural assembly (6 types of lacing) dying and finishing the leather. three projects (key case, billfold, handbag) However, it does NOT discuss stitching at all. It's not comprehensive, but it's the basic background. I found a copy at a used bookstore; the lacing directions alone were worth the 8 bucks I paid for it. I list it here because it's inexpensive and assumes that you don't know some of the basic info. A more contemporary and highly recommended text is Val Michael's The Leatherworking Handbook. <https://www.amazon.com/Leatherworking-Handbook-Illustrated-Sourcebook-Techniques/dp/1844034747/ref=pd_sbs_14_img_0?_encoding=UTF8&psc=1&refRID=T3T2T5QJFXVTX3NX8XVQ> Color photos and very high quality work -- it's a nice book, an updated version that covers much (and more, actually) of what Stohlman's old book does, with less "old-fashioned" design (and stitching information).
-
Hmm... any indication of pay scale or rate?
-
Lovely tooling there, great stitching and nice accents with the "dots." That's a lot of work to tool and dye inside the knotwork lines, and it looks great! The only thing I can say here is that the flat ends, where the wrist and elbow go, are going to dig into your arm. I have some bracers from long, long ago which have the same problem. A concave curve to those edges will help avoid that.
-
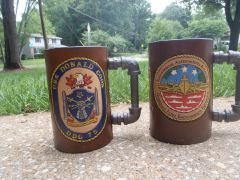 I love those pipe handles!
 -
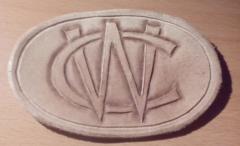
From the album: Works in Progress
the oval medallion with my friend's initials. I like how the design turned out! The beveling isn't bad, either. Each time I do it, I improve.... -
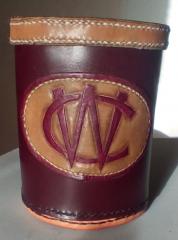
From the album: Works in Progress
A desk accessory for a co-worker. Using my Japanese stitching chisels for the first time...they're great! -
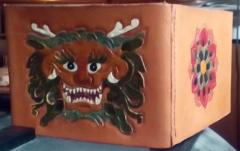
From the album: Works in Progress
This is a project in progress. It's a leather box, with this demon face on the front and a lotus flower on the other three sides. I'm still trying to figure out how to do the top and bottom. It's built around a paperboard box, for rigidity and strength. It's a good size for a Magic:The Gathering player...if anybody knows one who would be willing to lay out the bucks for this! -
I have used acrylic paint, no specific brand preferred (my artist wife has a bunch of various paint colors and brands available). I prefer dyes, but when you need white, you have to use paint for it. I haven't had any issues with flaking or peeling, but the painted pieces aren't wallets that would rub constantly on cloth. I have some wear on a rapier hanger which has gold paint on parts of it, but that's to be expected since it is part of a sword belt that is worn while rapier fencing. Have a good flexible sealant over the acrylic, and that will help.