DJole
-
Posts
1,091 -
Joined
-
Last visited
Content Type
Profiles
Forums
Events
Blogs
Gallery
Store
Everything posted by DJole
-
 Perhaps Angelus dyes has a better brown? I don't have a brown from them to show you a sample, unfortunately.
 -
Hello fellow Washingtonian leather artist! I'm down by Tacoma.
-
Applause! That's a lovely piece of work! I'd love to see a photo of the other side, too. I bow down to your skills! The textures of the hair and twigs are spot on.
-
Yes, I (for one) would LOVE to see more of that lid, from different sides and angles. My mind boggles at how much time it must have taken to do that.
-
I second your notion of taking a picture to find out what you still need to do! It's amazing how we can look right at a project, spending hours on it, and miss something that should be obvious! I bet taking pictures at every stage of the project might help catch my problems while I can still fix them! As for your blackbird, yes, I think leaving the background alone is the right thing to do. Also, the dye on the cattail looks unfinished, kind of blotchy. Is that a deliberate design choice?
-
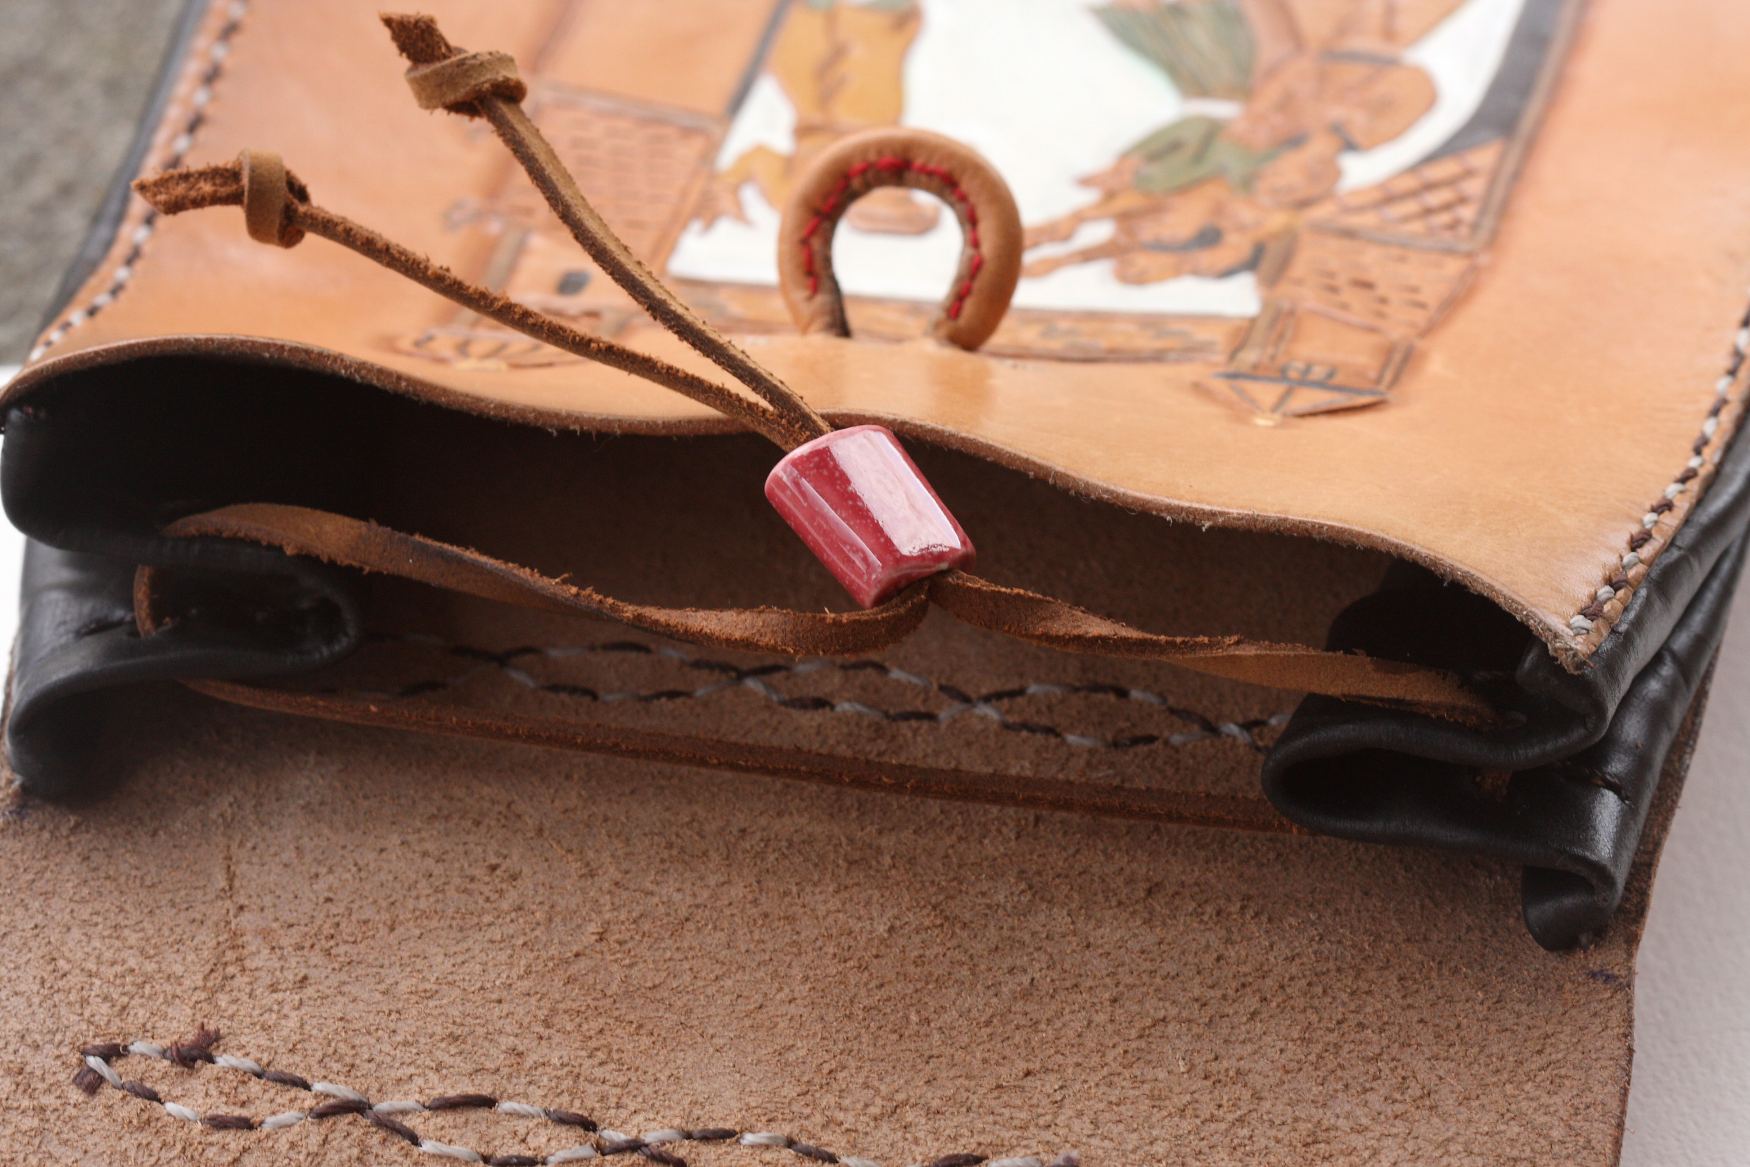
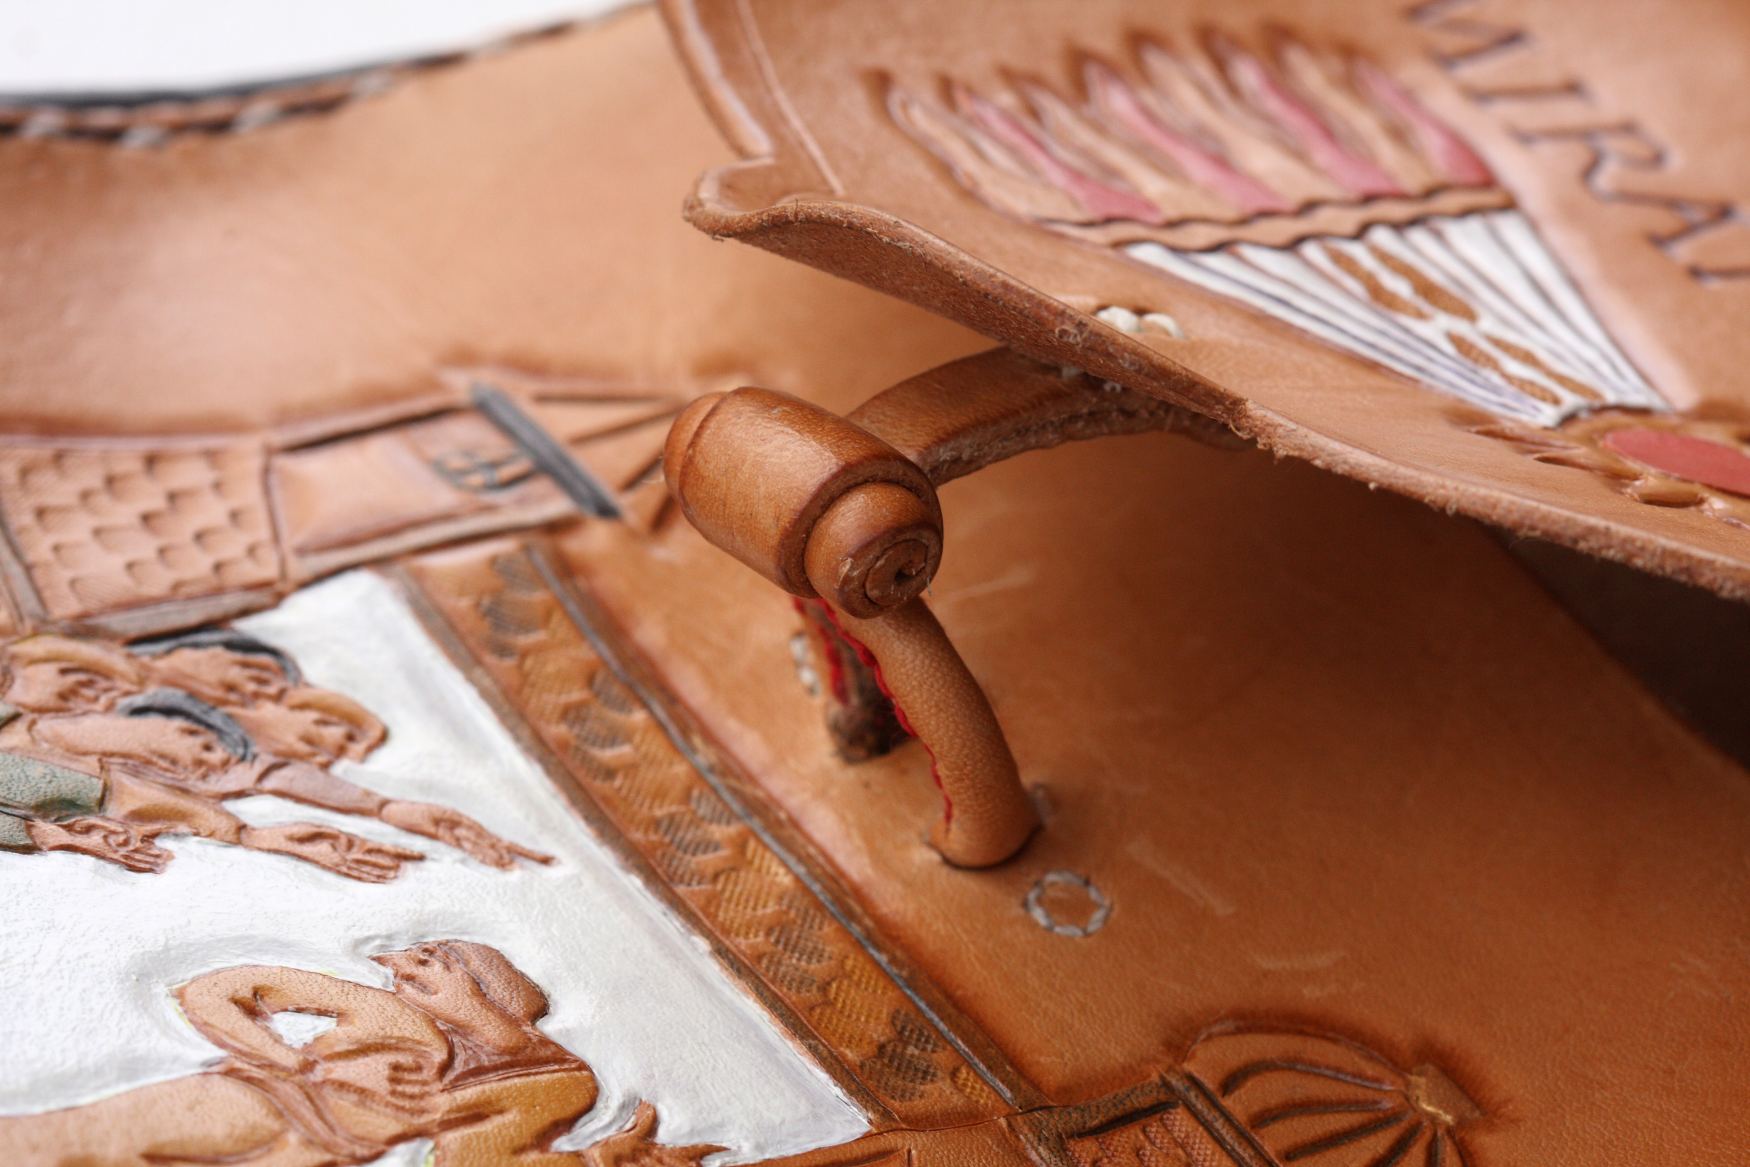
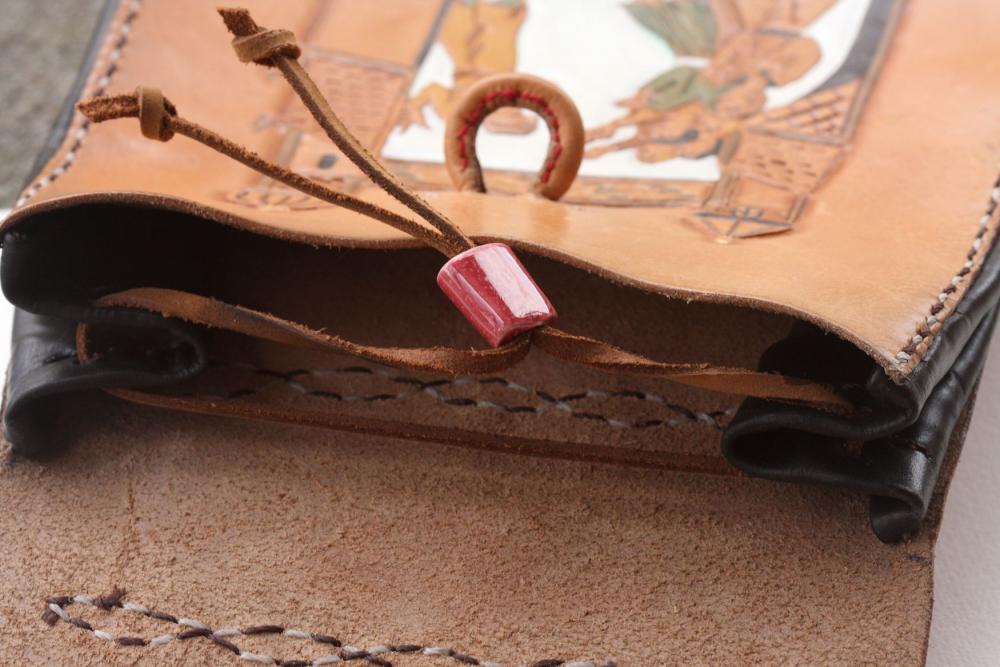
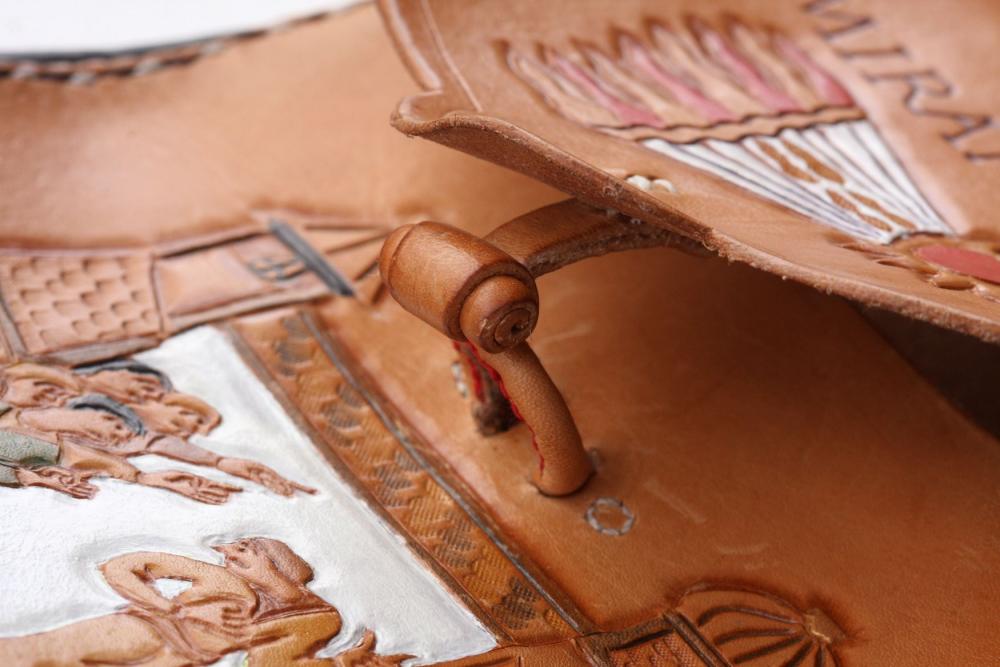
I used a leather toggle and loop to close a pouch. Maybe something like this? It's likely too light for a heavy thing like an axe. (In the first photo, the red bead is a slide toggle to tighten the pouch. It does NOT go through the loop!) Here's the leather toggle and its accompanying loop. The loop is shaped like a greek Omega. There are two slits on the face of the pouch that the "feet" pass through to the inside, and the circular stitches mark where those "feet" are sewn to the pouch.
-
Perhaps colored Sharpie markers (which use a permanent, spirit-based ink) may work for you? I haven't ever used them, but I have heard that they can be used.
-
NEW Tandy Stitching Pony only $22.99 !! Amazon
DJole replied to myjtp's topic in Leatherwork Conversation
An unusual piece of hardware design. I can't figure out, from the photos, just how that cam lock *closes* the jaws together, since it's not clear how the end opposite the cam lever is attached to the wood. -
16113447_372651259778746_6741332933234812411_o.jpg
DJole commented on Youri's gallery image in Gallery- Our Leatherwork
 Nice design that matches the metal parts. Lovely medieval look going on here. Who made the buckle and strap end?
 -
That is VERY nice work! The color and finish and attention to detail are excellent.
-
Created my first tooling pattern...
DJole replied to Tjstewart's topic in Floral and Sheridan Carving
Here's 3 cents of thinking for you: It looks flat. Not enough tooling to make everything look dimensional. What you have there seems like a shader and veiner and beveler just stamped on top of the design. That's not a design problem, but I think the design is affecting how you are using the tools. Perhaps make those shaded (with the pear shader) areas bigger and more subtle, taking the time to tool the whole space rather than just the center. It looks like the beveler was used to outline rather than actually bevel or create a 3-D image, except in that center leaf vein. That looks much more dimensional than the other edge bevels. I'm not a Sheridan nor a floral style tooler, but I think the overall design is too linear rather than circular or spiral. Most of the horizontal lines in the center, between the two end flowers, are too gently curved. The curves need to be sharper, and overlap more. -
Ah, I didn't think to look at where you are posting from! Whoops... Well, a quick search finds some Canadian sources for you: <http://www.longviewleather.com/angelus-dyes/> in Alberta Amazon.ca has Angelus dyes for sale also. Look on this thread for some more possibilities:
-
 That's some nice color work! The modeling is good, too.
 -
Those are pretty good lists. They are very similar to Ian Atkinson's list: https://www.youtube.com/watch?v=X1pAMZQpYFA
-
You need to go look at Angelus leather dye (https://angelusdirect.com/collections/angelus-dye-1) Their Rose and Light Rose might be the pink you needed. I have a growing collection of their dyes, since they come in a wide variety of colors which cuts down on the mixing, and I think they match Fiebing's in good results. I only keep Eco-Flo stuff around for working with kids.
-
That's going to be sheath that will hold up to hard outdoor use. Good construction and a well-though out design. What's inside the small external square pocket near the firestarter? a sharpening stone?
-
Passport Wallet
DJole replied to Bigfoote's topic in Purses, Wallets, Belts and Miscellaneous Pocket Items
Nice crisp outlines, and pretty smooth bevelling down the lines on the compass rose. I like that reverse carving caribou, too! -
My first leather made item!! Mora sheath!
DJole replied to bushlover's topic in Gun Holsters, Rifle Slings and Knife Sheathes
Using a welt is a good idea, so the knife edge, as it's pushed into the sheath, won't cut the stitching. The bottom of the sheath, where the point of the knife is located, may need a rivet to keep the stitching from cutting or tearing. You might want to spend time looking at other people's knife sheaths, to see what they did with the point. The stitching does look like it is too far in from the edge -- it's more of an aesthetic problem rather than a design problem. It's a nice first project, though-- the basics are pretty solid! -
Dyes: I don't like the water-based "eco-" dyes. They aren't as rich in color, and the colors bleed (not just when they get wet) unless you really get serious with the water-proof treatments. Fiebing's spirit based dyes are good. I also highly recommend Angelus spirit based leather dyes. Angelus manufactures a nice variety of colors with shades and tones that are different from Fiebing's dyes. For example, Angelus has a lovely Rose dye which is a vibrant pink; they also have some other reds I am fond of (Burgundy and Wine-tone, for example.) Just remember-- the dye will look different on your leather, so try to keep a scrap sample around to test dye colors on. If you're using a kit, that might be hard to do. I have a strip of leather with all of my sample dye colors on it in squares, as a helpful reference. Finishes: It really depends on what you like, and the purpose of the project: a slick, glossy water-proof finish? A matte finish? Something more natural? Whichever one you like, there's a different treatment to get it. A checkbook cover will need some kind of finish, because of how much handling it will get, but it probably won't need heavy waterproofing. I don't know much about how to get the results you might want-- I would do further research myself on this forum.
-
Good question-- It's going to be hard to give you a number because leather thicknesses and so on will change that. I used pigskin on my trifold wallet, and I eyeballed it rather than measuring and cutting to measure. I did the tooled leather outer layer first, then used a section of pigskin that was longer than the wallet. I folded it up with the pigskin inside, marked the amount that stuck out, trimmed off the excess, and went on from there. Then I attached the pockets.

-
How far away are you from the folks at Brettuns Village leather (website: http://www.brettunsvillage.com/) located in Maine? Perhaps you might contact them and see if you can get the leather quality you want. I haven't bought leather from them, so I can't vouch for their products or reliability.
-
Bible cover?! heh! I can see how this might appeal to some. That's some very nice figure work-- the shading on those skulls is delicate shading but you pulled it off. I wonder if it would have been possible to use two different reds at the same time on the roses for a stronger 3-D effect. They look a bit flat, whereas the skulls do not. As another poster mentioned above, a lifter might help those petals pop off the surface.
-
You've got good stuff going on there. I recognize a lot of the shoes and stitching techniques from various texts on early European shoes. A nice shot of your tool kit, too! I really like the alternating lacing on the yellow shoes in the 4th picture down-- it's a catchy design feature. Is there a historical shoe with that lacing?
-
So that's some kind of plastic bladder? Maybe one of these will work -- <https://www.google.com/search?q=plastic+wine+bags&espv=2&biw=1920&bih=950&source=lnms&tbm=isch&sa=X&ved=0ahUKEwj10-72tfDPAhWpj1QKHXJ7CnIQ_AUIBygC>
-
Nice work! My own interests in design and style match what you've done here, and I like it. That knife sheath is lovely! As far as execution and workmanship, nothing seems to be out of place there, either.