.jpg.d60258221c476480a6e073a8805645bb.jpg)
YinTx
-
Posts
3,794 -
Joined
-
Last visited
Content Type
Profiles
Forums
Events
Blogs
Gallery
Store
Everything posted by YinTx
-
I'm impressed you were able to line up the stitches on the dividers with the tooling decoration on the outside so well. I've struggled with that effort myself! YinTx
-

Just some recent stuff
YinTx replied to DustinSmith's topic in Purses, Wallets, Belts and Miscellaneous Pocket Items
Absolutely cool! I love the LV bag shoulder straps! YinTx -
So yes and no, but long story short, experimenting is how you get the effects you want, which you have already inadvertently begun. Applying darker dyes in the areas you want dark, with a dry sponge over already dyed (say light brown) leather is one way to get this effect without the rub-off of antiques. Also, you could apply TanKote unevenly and allow to dry thoroughly as a resist to antique, which will prevent the antique from staining the leather under the TanKote, and result in similar looks. Use TanKote again after a few minutes of dry time, with a soft rag and work off the antique more in some areas less in others. Let dry and seal with TanKote again or Resolene. Many ways of going about this. Some just use dye with an airbrush. That is quite a lot of tooling and your basket/scale stamping looks spot on. Nice work! YinTx
-
A ball and a stick, that is all we used to need to entertain ourselves for hours on end. Nicely done! YinTx
-
I think one of the biggest issues is where you said: I am picturing a lot of antique gel sitting on top of leather for a long time, and drying out. Then you add a solvent to this (ie resolene, leather balm), and yep, it starts to come off! Not the best way. You should apply it, maybe let it set for a few minutes, then wipe off as much as you can with clean rags/towels/sheepswool, whatever. Let it dry some more, then wipe on TanKote or some other finisher that will further remove more antique gel. Wipe off a lot of that also. Let dry completely, then seal with resolene. Also trying to add an acrylic finisher on top of wax is a bit backwards too in my opinion. The wax prevents the acrylic from binding with the leather, so it just comes off easily later. You may still be able to rescue this piece by trying to get as much of the gel off with TanKote or Resolene on a sheeps wool piece. The wax may inhibit this tho. Pictures will help us understand your current situation also. YinTx
-
Fly Fishing Wallet
YinTx replied to WalterF's topic in Purses, Wallets, Belts and Miscellaneous Pocket Items
This was top in my mental design. I imagine it will make closure a world different. -
Fly Fishing Wallet
YinTx replied to WalterF's topic in Purses, Wallets, Belts and Miscellaneous Pocket Items
Oh. Oh no. no... no no no no ...... no no nnooooooo!!!! dammit. Also, I've already redesigned this thing in my head, so now I'll add a ring for a lanyard. Thanks for the tip! Now to put together 2 hours of time so I can actually make it... YinTx -
The post looks like a sam browne stud, maybe that will help with the search. The other part if you can't find it may be able to make it easy enough...nifty for sure. YinTx
-
I have a few sides of Horween Dublin, would not have thought to make a case like that out of it, I'll have to give it a go, yours came out really nice! What weight was it and what did you line it with? YinTx
-
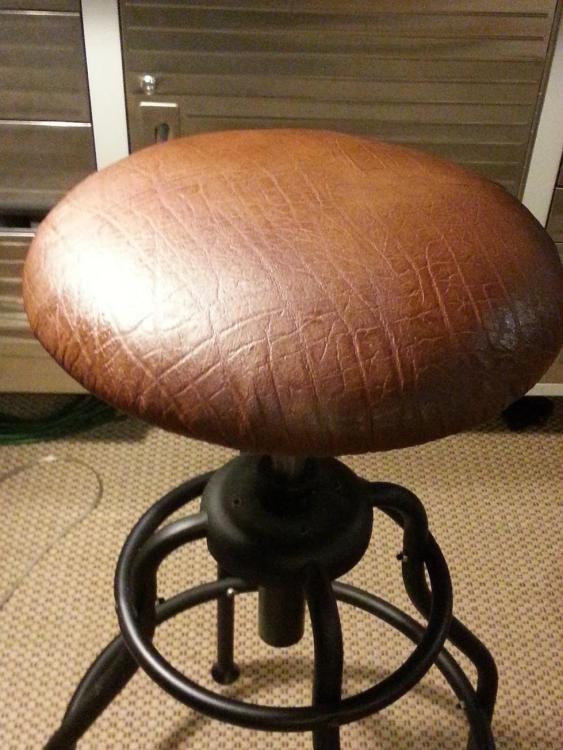
Thank you! I have about 8-10 other chairs that need covering now... suspect I'll be fairly good at it when I finish! YinTx Just wanted to post a pic of the second version sitting on top of the first version for comparison. Literally only 1" more of foam, most of the difference comes from not pulling the leather tight. As I mentioned, not near as pretty, but way more comfy. It'll probably be the one I use for the tooling bench instead! YinTx

-
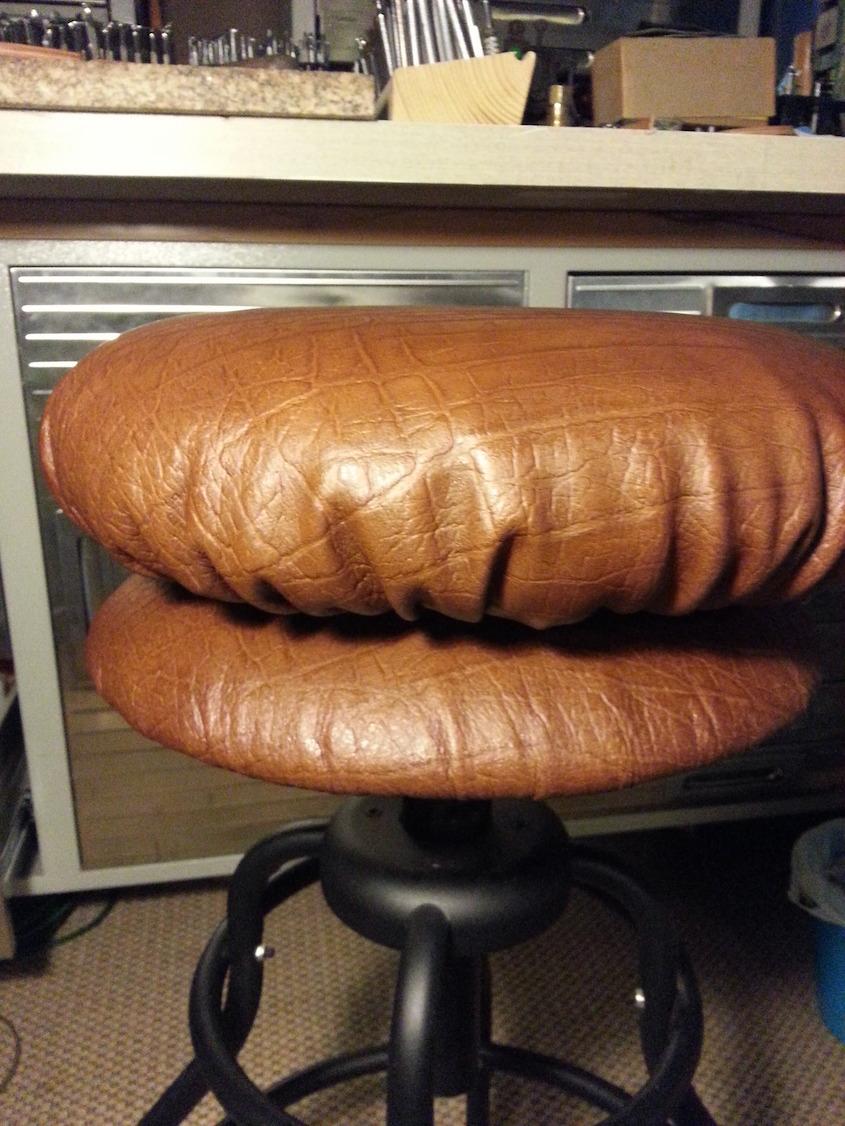
I did like the grain myself, which is why I chose it despite my misgivings over the firm hand and the result that would have on the finished piece. It was in a lot of leather I bought from a fellow LW here, so I have no idea where it came from or what it is. The original seat had what looked like a hard foam polystyrene block with a 1/2" soft foam topper covered in plastic. It was miserable to sit on, and cut the circulation off of your legs in no time flat. The new one is super comfy since I used routered 3/4" ply to replace the metal, and used 2" high density medium firm foam topped with 1" Dacron. Version 2 I made with the same, and topped the foam with another 1" high density lower firmness (softer) foam and didn't pull the leather as tight. Also did a surround of 1" of the firm foam so you can't feel the plywood anywhere. It is not as pretty since there are resulting wrinkles, but even more comfortable. Kinda peeved at myself for taking this long to replace it! YinTx
-
I have one of these, been using it for years with no issues. it seems ymmv tho. YinTx
-
That is big. Lots of tapping in there. Looking good! YinTx
-
erhm... where's moonbug bay?
-
Very nice work. At first I was thinking some Elmore and Taos influences, but maybe more Apache influence? Will be interesting to see how you integrate your style in leather work! YinTx
-
Welcome! In Texas too. Any pics of your southwestern jewelry? Enjoy the leather journey, it is endless and filled with forks in the road, detours, etc. YinTx
-
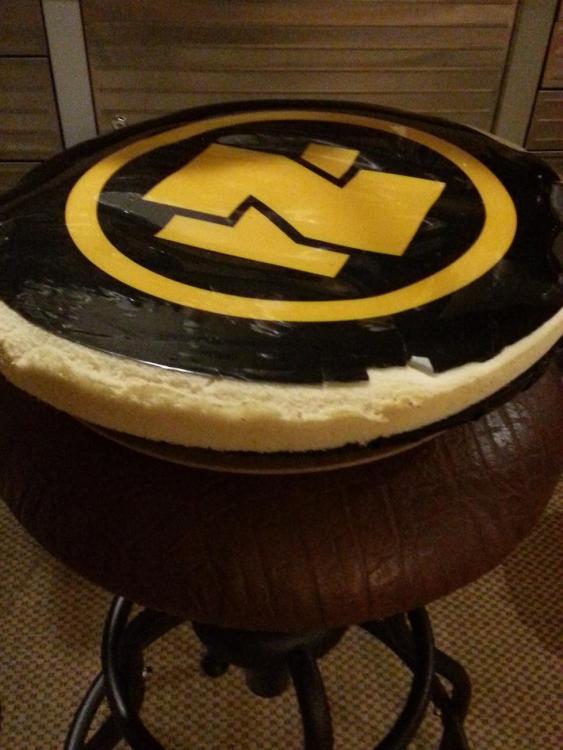
It probably wasn't necessary to use adhesive, but it did make life a little easier so the foam didn't shift on the wood base. I used Camie 373, intended for foam, cloth. https://camie.com/high-performance-adhesive The outer layer is wrapped in Dacron, so no adhesive there. The second stool I just finished I used a second thinner softer foam on top, and a wrap of foam around the edge for a more cushioned look and feel. Those layers for sure benefited from the adhesive! Would have been a real challenge to assemble without it. YinTx
-
after untold $$ spent on tools to cut wood, sand wood, router wood, drill wood, staple leather to wood, and materials like high quality foam and Dacron, I have a new seat. Actually two, but here is one. Before and after.... YinTx
-
Thats awesome! I tooled a boxer, but I failed at coloring, so the second version just got antique. Great job on everything! YinTx
-
Those are awesome, proportions just right. Don't know if mine would be as recognizable as yours are! YinTx
-
Yeah, I missed the 10-12oz detail, that is pretty heavy. I've been making round knife sheaths from 9 oz, but knife sheaths from 10 oz would work nicely, I think Don Gonzales does his from 10 oz. A splitter will help you if you want to be making other things out of it. Alternatively, if they are shoulders, there is a market for them, even I'd buy several! YinTx
-
You should be able to cut off the shoulder and have enough for the belts. Then, anything that you can make with shoulders: note books, note pads, wallets, eyeglasses cases, phone sleeves, valet trays.. list goes on! YinTx
-
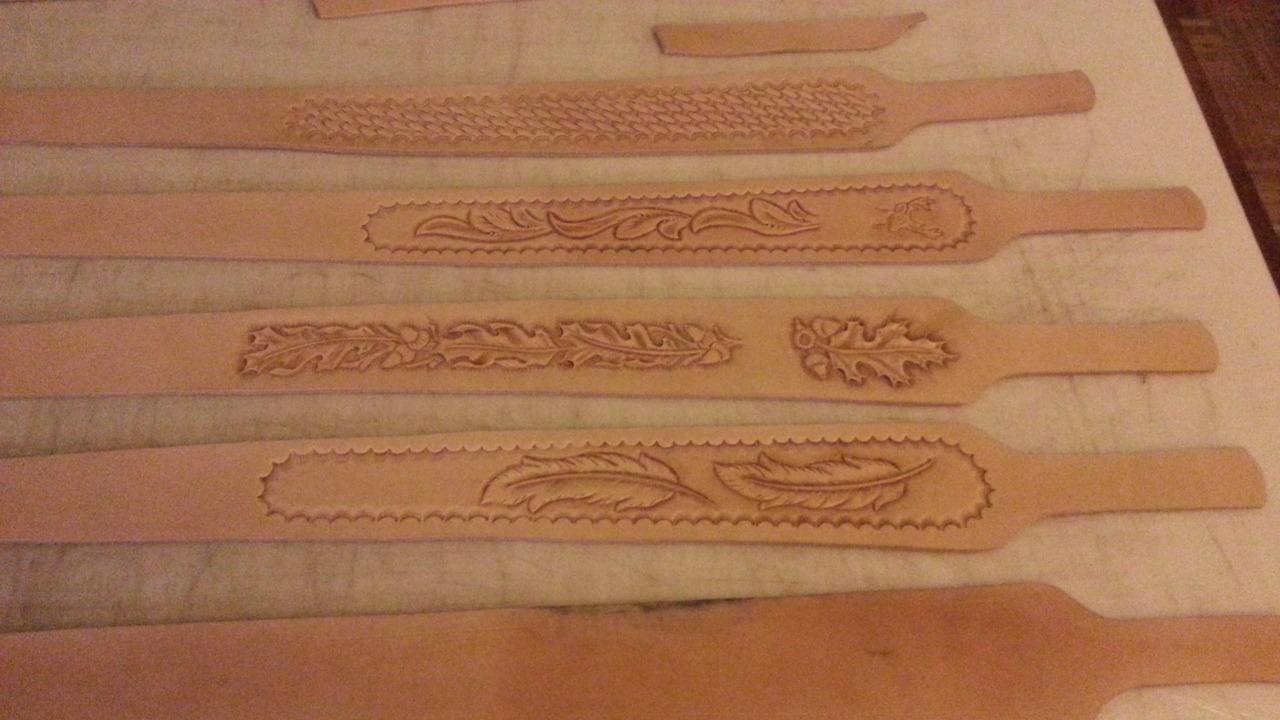
+1 for Sergey. You can find them on ebay, amazon, Springfield leather, and direct from the man himself. They typically have a "key" that allows them to fit into the previous impression. Even the ones that don't are pretty easy to line up. - my experience is with his unusual geometrics, I don't have any of his plain basketweave stamps. However, he does make basket stamps with multiple impressions, this really really helps - makes the job faster, and those 4 marks are perfectly aligned! YinTx edit: I just checked out his site, looks like the baskets are groups of 3, some of the other geometrics like scales etc come up to groups of 4 in a single stamp.
-
Thats awesome! YinTx
-
Nice set ya got there!
YinTx replied to immiketoo's topic in Purses, Wallets, Belts and Miscellaneous Pocket Items
I just read that title with a Canadian accent. had to add an "eh" on the end too. not sure why. , eh? Nice work tho! YinTx