


fredk
-
Posts
5,967 -
Joined
Content Type
Profiles
Forums
Events
Blogs
Gallery
Store
Everything posted by fredk
-
yeah but its fun, interesting and satisfying when its done edit: umm, do I see another chewed up screw head? 3rd photo, bottom right,
-
It is an interesting piece Having both mm and oz on the scale might it be post-WW2? Maybe 1960s? I have a few old English leather work books of WW2 and immediate post-WW2 era and they measure leather in ounces. Its not till the 1970s books I see leather measured in millimetres edit to add; btw that chewed up screw head above the MM annoys me. I'd take a fine file to it and smooth it out
-
When I attach the the thin leather lining I 1. cut the lining close to the size needed 2. on the inside of my main piece I draw a line where my stitching will be, allowing for a trim cut - lets say, 6mm in from the edge, allowing 1 or 2mm trim 3. I draw a line between the stitching line and the edge, in this pretend case it would be about 3 or 4mm from the edge / 3 or 2mm from the stitching line 4. after I glue the lining on and before the glue has fully cured I use a very sharp knife to trim the lining leather to that intermediate line and peel away the excess 5. if or when I skive the edge before sewing the lining leather just gets a touch. 6. I glue and sew the next piece to the first. The edge of the lining is hidden but caught in the sewing 7. at an edge where there is no other piece to be sewn on, like the outer edge of a bag flap, I skive the edge of the main piece back about 10mm then just glue the lining leather to it. making sure that the edge is full glued down, then I trim it to tidy it
-
Sprat can adhesive. Has the main advantage of being able to cover a large area very quickly 1. a light spray coat of adhesive. 2. let it 'flash' off, ie let the solvent evaporate, takes just a minute 3. check tacky of adhesive, not wet just sticky 4. lay material on 5. use a brayer to press and flatten the lining material Only a light coat of adhesive is needed. It just needs to hold the liner in place, there is no stress on it
-
It was the best part of 30 years ago, before I started leather working/crafting but I'm 99% sure it was a veg tan. The care instructions were for a veg tan leather afair
-
One other aspect; sometimes, just some times, the flesh side of leather can act as an abrasive over time. I had limited experience of this with two different bags. One was for fishing equipment. The enamel coating on some reels was abraded off over time. The other bag was a very top make. I got one on the recommendation of a friend. We each carried our camera gear in our bags. Again, over time, the enamel coating on camera bodies and lens barrels was abraded off. Not only was this unsightly but it lowered the re-sale value of the camera equipment. It didn't matter to me as I used my cameras until I killed them but my friend up-graded about twice a year, thus he lost a lot of trade-in value. I get thin leather which is about 0.5mm to 0.8mm thick. I glue this to the inside of the main bag leather. That thinness doesn't worry anything when doing gussets and such
-
Not only aesthetics, but more of a 'finished' look. I keep quite a range of thin skiver leathers in numerous colours for lining shoulder bags. Once, when I made a simple one for someone she looked inside, saw the raw, but neatly finished interior of just the flesh side of the main bag leather and said ' you've not finished it then?' and ever since I've been gluing a thin skiver leather to the interior flesh side.
-

Converting the operating voltage of an Enduro servo motor
fredk replied to williaty's topic in Leather Sewing Machines
Don't forget chaps that the UK mains electricity has a different alternating rate than the US mains electricity. UK= 50 hertz and US = 60 hertz. This can affect how some electrical items will run I know you are going from UK 220/240 to US 120 but when we moved from the US to the UK we used transformers for some electrical items and they ran differently on the UK 50 hertz cycle -
Gesso is very fragile after a while. I can and will crack off its substrate after time. Its a bane of art restorers My 'floor polish' on its own, with or without dye, is too thin as a 'paint'. It will seal the edge and several coats will build up something like a painted edge but then it too becomes rather un-flexible. Perhaps if a neutral filler such as talc is added to it as well to give it some body it might work. I occasionally use the 'polish' with talc added as a fine line filler on my model aeroplanes
-
Gesso is a paint with a filler, such as talc or gypsum which artists paint on their raw canvas before painting. As it has a filler it can be put on to canvas, and historically onto shields, thickly and built up to give a 3 D effect
-
Shure, I will I'll PM you my address
-
When my father sort-of gave up making cabinets and things for sale he went into 'hobby' mode. He then spent most of his time making wood stands for his woodworking machines and boxes or cabinets to hold all their removable parts
-
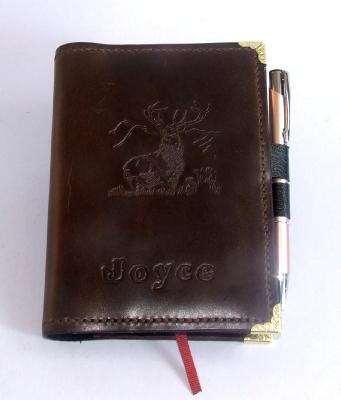
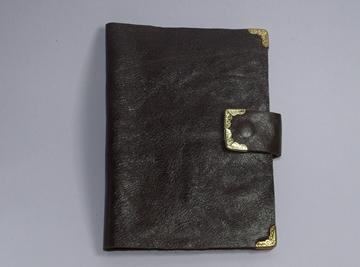
More sage wisdom, Get to know one or two leather suppliers. in a business sense. That relationship will work well for you in the long term. Ask those suppliers if they have any old or odd leathers they need shot of. I mean, I once got a big hide from Le Prevo real cheap because the way it had been stored part of it got darkened by light and another part was dusty dirty. It cleaned up well and once dyed the colour was all the same Ask for what I think you call 'close out' (?) leather. Sometimes a place has only one or two certain hides left. Too few to offer up on their website maybe but they might sell them off a bit cheaper to get room for a new order - I've got leather that way (I also got my Cadillac Coupe DeVille that way! ) Chrome tan has its place but certain leathers are suitable for only certain things. Chrome tan was great for this hat But its no good for covering a game board I've made book covers from both chrome and veg tan leathers Chrome Veg If you are really skint, get along to some 'thrift' stores. See if they've got in some old furniture that is no good to sell and they're going to dump. Some of it might have leather on it which you can cut off and re-use

-
I think the splitter sold by Le Prevo is by 'Ivan' Check their price before you buy
-
No formula, but I think I've noticed that the further from the back-bone you go the greater the shrinkage rate. ie, at the back-bone = very minimal, by the belly = more shrinkage. I do very little tooling but some stamping. I've limited shrinkage by keeping the casing to the very minimum, just sponge wetting the surface mostly and by changing from water/alcohol based dyes to oil based dyes
-
1. don't buy pre-cut blanks or pieces. Buy the leather by the square foot. It works out waaaaaay cheaper in the long term. Buy from a seller who quotes $X per square foot, not from a place that prices $Y for approx A to B square feet because you'll most likely get a smaller piece for the money, thus the sq ft price will be higher 2. shop around to buy that leather, you can get quality leather from many places and prices can vary as well 3. If having to pay shipping or delivery to you consider investing and buying in more than you need now. Its the same delivery charge from my supplier for one piece of hide of 20 sq ft as it is for three hides that size
-
LARD
fredk replied to Alexis1234's topic in Dyes, Antiques, Stains, Glues, Waxes, Finishes and Conditioners.
Here 'shortening' is a blend of lard and vegetable oils. Where lard is quite hard 'shortening' is softer. I guess it could be used, in very limited quantities, as well -
LARD
fredk replied to Alexis1234's topic in Dyes, Antiques, Stains, Glues, Waxes, Finishes and Conditioners.
Good quality lard is the rendered fats from either cows or pigs. Unless its marked as pig lard its usually from cattle. Its one step less pure than NFO. When making NFO some fats solids need to be taken off, this is the same as purified lard. However, much lard you buy for cooking has additives in it. Additives such as salt and food preservatives. If you want to try lard get the fats from a local butcher then render it down yourself. You'll get tallow and lard and a thin oil. Tallow to to make (very stinky) candles, lard and oil suitable for cooking. I think that applied lightly and well rubbed in lard will be alright on leather -
Advice from a good attorney (we call them solicitors here) is worth the money they charge. That one has saved you a lot of money, grief and hassle down the road
-
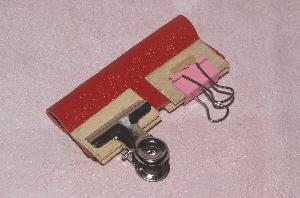
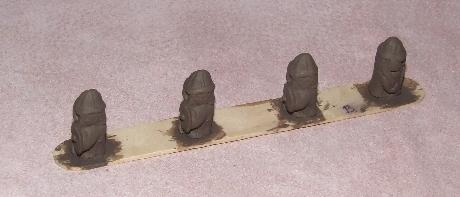
The theme is split off from Sheilajeanne's 'Tandy Pro Stitching Chisels' thread as it was tending to wander off the topic. Whatever you call them; Lolly, popsicle, tongue-depressors, they have a multitude of uses in leatherwork From simply stirring and applying glues to use under the jaws of clamps to stop the clamps marking leather. You can get these bits of wood in several widths 1. about 5 or 6mm wide - known as coffee stirrers. A lot of these are actually made of grass, aka bamboo 2. Standard lolly/popsicle sticks - about 10mm wide 3. Standard wide - about 14mm wide 4. Extra wide - about 18mm wide 5. Standard slim - about 8mm wide. I usually have plenty of #1, #2 & #4 about the working desk I check and keep good straight sticks to one side. They are useful for quick rulers. eg, If I want to mark a stitching line 6mm from the edge I just use a coffee stirrer, or, when I make draw-string bags I fold over the top 10mm, this can be quickly marked using #2 I keep bent sticks for breaking or cutting up for pieces to go under clamps. This will stop the clamps marking the leather and also spreads the clamping pressure Other uses, in another hobby I glue wet & dry grit paper to the sticks for sanding sticks I also use them when painting my Hnefatafl men. 4 on an 18mm wide stick One thing I can't really show you; I have no access to wood-turning. I wanted a wood cylinder to make dice cups around. I glued about 160 coffee-stirrers around an old paint spray can until I got a good depth of wood and the diameter of cylinder that suited me. The coffee- stirrer 'slats; are now covered in a masking tape so you cant see them right now otherwise I'd show a photo A piece of stick carefully worked and sized can be glued in between two layers of leather to give support around a hard-to-open snap/popper and what do you use Lolly/Lollipop/Popsicle sticks for?
-
Here is real test used to find if a person has homicidal or psychopathic tendencies A woman attends a funeral of friend. Whilst there she meets a man and after spending some time with him she finds she really likes him. The next day the woman goes out and murders another of her friends Why? If you give the expected answer; I'm staying well away from you!
-
Well. thats 2m 37 seconds of my life I'll not get back.
-
How to remove the fibrous rear layer from ostrich leather
fredk replied to wheeldawg's topic in How Do I Do That?
Have you tried just shaving off the worst then pasting/ gluing the rear of the piece? -
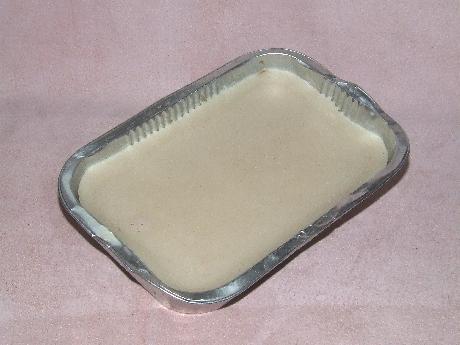
Very carefully, I started with a smooth cut jewellers file, on each side and the angles of the tip of each prong. Then I progressed to a used * card & grit nail file. After this I used a slip of a broken 'India' stone from my sea-fishing days - that was used for sharpening the hooks. * used cos its very, very smooth, almost just polishes the prongs BTW. I've been experimenting with this, as a punching block for stitching chisels only Its a flat block of wax, about 4 inches x 5.5 inches by 1 inch deep. Made from all the scraps from incomplete burnt candles and some wax I had left over from when I made candles to sell. I think I heed to add some carnauba wax into it to increase its hardness. When I find a: a bigger tray and b: more wax I'll remake it with a bigger surface area. It does multiple things - it'll take the stitching chisels points without damaging them and also they get a wee bit of wax on them, for lubrication. Its almost self-healing - after doing some punching the surface is a bit chewed up with holes but I just put it onto a little electric cooking ring I have, heat it up and the wax melts and smooths out and a short time later its ready for use again.
-
I rarely use steel based rivets anymore. I use pure brass ones. They cost only a few pence/cents more. No more problem with corrosion You can get brass rivets with various platings, eg black, gun metal, antique copper.