


fredk
-
Posts
6,000 -
Joined
Content Type
Profiles
Forums
Events
Blogs
Gallery
Store
Everything posted by fredk
-
Advice from a good attorney (we call them solicitors here) is worth the money they charge. That one has saved you a lot of money, grief and hassle down the road
-
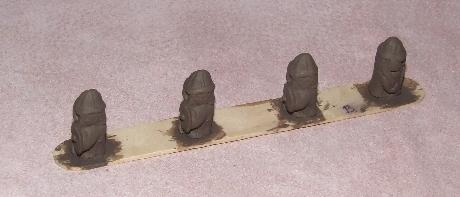
The theme is split off from Sheilajeanne's 'Tandy Pro Stitching Chisels' thread as it was tending to wander off the topic. Whatever you call them; Lolly, popsicle, tongue-depressors, they have a multitude of uses in leatherwork From simply stirring and applying glues to use under the jaws of clamps to stop the clamps marking leather. You can get these bits of wood in several widths 1. about 5 or 6mm wide - known as coffee stirrers. A lot of these are actually made of grass, aka bamboo 2. Standard lolly/popsicle sticks - about 10mm wide 3. Standard wide - about 14mm wide 4. Extra wide - about 18mm wide 5. Standard slim - about 8mm wide. I usually have plenty of #1, #2 & #4 about the working desk I check and keep good straight sticks to one side. They are useful for quick rulers. eg, If I want to mark a stitching line 6mm from the edge I just use a coffee stirrer, or, when I make draw-string bags I fold over the top 10mm, this can be quickly marked using #2 I keep bent sticks for breaking or cutting up for pieces to go under clamps. This will stop the clamps marking the leather and also spreads the clamping pressure Other uses, in another hobby I glue wet & dry grit paper to the sticks for sanding sticks I also use them when painting my Hnefatafl men. 4 on an 18mm wide stick One thing I can't really show you; I have no access to wood-turning. I wanted a wood cylinder to make dice cups around. I glued about 160 coffee-stirrers around an old paint spray can until I got a good depth of wood and the diameter of cylinder that suited me. The coffee- stirrer 'slats; are now covered in a masking tape so you cant see them right now otherwise I'd show a photo A piece of stick carefully worked and sized can be glued in between two layers of leather to give support around a hard-to-open snap/popper and what do you use Lolly/Lollipop/Popsicle sticks for?
-
Here is real test used to find if a person has homicidal or psychopathic tendencies A woman attends a funeral of friend. Whilst there she meets a man and after spending some time with him she finds she really likes him. The next day the woman goes out and murders another of her friends Why? If you give the expected answer; I'm staying well away from you!
-
Well. thats 2m 37 seconds of my life I'll not get back.
-

How to remove the fibrous rear layer from ostrich leather
fredk replied to wheeldawg's topic in How Do I Do That?
Have you tried just shaving off the worst then pasting/ gluing the rear of the piece? -
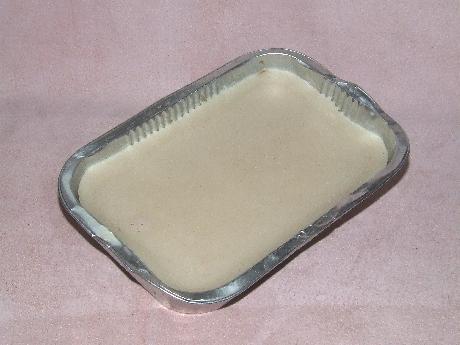
Very carefully, I started with a smooth cut jewellers file, on each side and the angles of the tip of each prong. Then I progressed to a used * card & grit nail file. After this I used a slip of a broken 'India' stone from my sea-fishing days - that was used for sharpening the hooks. * used cos its very, very smooth, almost just polishes the prongs BTW. I've been experimenting with this, as a punching block for stitching chisels only Its a flat block of wax, about 4 inches x 5.5 inches by 1 inch deep. Made from all the scraps from incomplete burnt candles and some wax I had left over from when I made candles to sell. I think I heed to add some carnauba wax into it to increase its hardness. When I find a: a bigger tray and b: more wax I'll remake it with a bigger surface area. It does multiple things - it'll take the stitching chisels points without damaging them and also they get a wee bit of wax on them, for lubrication. Its almost self-healing - after doing some punching the surface is a bit chewed up with holes but I just put it onto a little electric cooking ring I have, heat it up and the wax melts and smooths out and a short time later its ready for use again.
-
I rarely use steel based rivets anymore. I use pure brass ones. They cost only a few pence/cents more. No more problem with corrosion You can get brass rivets with various platings, eg black, gun metal, antique copper.
-
I have several sets of those chisels from China. Once sharpened and polished they are the bees knees. Nary a prob with them. I think I got them for about an average of £5 per set of 4 - a 1, 2, 4 & 6 prong. I bought them to see if they suited me. My intention was if they suited what I wanted I could replace with 'better quality' ones but they've proved to be excellent and not needing replaced. BTW, I punch through into a piece of scrap leather not any sort of board, if this makes any difference
-
You can't afford starting with leathercraft?
fredk replied to Danne's topic in Leatherwork Conversation
The largest hole punch I had was about 3.5 inches diameter. They are used for punching holes in special gasket material for mainly engine head gaskets on internal combustion powered vehicles, or for other fittings on the vehicles. In the vintage car world you need to make your own gaskets. On my 1930 Austin 7 there are several items which need gaskets and I need to cut and punch these myself as replacements are no longer available to buy. On some fittings oiled leather is the choice material for the gasket. -
Thanks friend. I'm rather caught up catching up with some resin casting at the mo, but I'll get on this asap
-
Making bulk stock for Belts What sizes to make?
fredk replied to mason1800's topic in How Do I Do That?
I believe we have discussed this before; there is a 'real' size' and a 'vanity' size. Vanity sizes are marked on men's & women's clothing without actually saying 'inches' I pointed this out to my son and he went thru his wardrobe of trousers and belts and found this to be so. eg. he measured up at a 35 to 36 inch waist. A lot of his trousers and some belts were marked 30, 32, or 34 - but no mention of inches. Only one pair of high quality trousers was marked 34 to 36 inches. Yet all his trousers fitted him comfortably. He was most annoyed to discover he was not in fact as thin as 32 or 34 inches. Since then he's been on a special diet and doing more cycling! -
-
I didn't realise it was so easy! I did this the other evening to a cap on a bottle of latex moulding rubber In the past I was cutting the outer shell off with wire cutters and pliers! But for the most part I've just been replacing the caps with others from other bottles
-
Only leatherworkers would get excited about an old rotary hole punch !
-
I do believe you are really enjoying all this creativity. I hope you get a decent price for these bottles. Now, I can see where the dragon scales are not tidy or are mis-aligned. But, you know what? I think it is all the better for that (I must get a dragon scale stamp some time) However. in this photo I did notice that you had a couple of gaps in your stitching holes lines - in the stack on the right. I hope you've noticed it yourself. Those gaps just might affect the sealing edited to add; PS; what thickness of leather are you using and what are you packing into the bottle to make it shape?
-
Try looking for vintage car - antique car to you, number stamping sets Number font styles change over time but that style was used in the 1920s - '30s for car body and chassis ident numbers. The usual size of the numbers is 1/8 inch. Modern fonts are plainer, like Arial font - 2 8 7 9 8
-
I have a 99K. Its a fine machine. I need to learn how to use sewing machines. The 99 has been only used once, recently, for putting holes along the edges of a wallet so I could hand sew it with fine thread My 99 came with electric motor but I converted it to hand-power
-
Bearing in mind that I've never done a basketweave panel, with or without a border; When I'm having to stamp a repeat in a straight line; I lightly scribe a line using a ball end tool, then I clamp an iron bar along that line. Then when I'm stamping I just have to worry about the spacing along the line. I have several pieces of steel bar of various lengths and widths but all 3mm thick for this sort of work. If the iron bar is going to be on damp/wet leather I back it with duct/duck/gaffer tape.
-
You can't afford starting with leathercraft?
fredk replied to Danne's topic in Leatherwork Conversation
I've thought hard about writing the following. I'm not posting as a troll. Its for your information. This will really annoy the US members In Northern Ireland US made goods are considered to be crap. Mention that its 'US made' and the advice is to throw it away and buy better quality Everything from vehicles to tools. Even US food is banned here because of its low quality US made things have an extremely bad reputation for being of poor quality and shoddy. Tool dealers I know and have dealt with have long since stopped importing and after-sales supporting certain US made tools because of their poor quality. Certain vehicle importers have stopped importing US built vehicles for the same reasons -
That is really nice. If I had something like that it would make me take up drinking beer just so I could collect the tinnies in it
-
fredk - this is in your playground ;-)
fredk replied to Constabulary's topic in Leather Sewing Machines
Nope. I'm not seeing what you are seeing I get; This listing is no longer available It may have expired or been sold. Take a look at these other items below. And different searches don't bring it up -
fredk - this is in your playground ;-)
fredk replied to Constabulary's topic in Leather Sewing Machines
Thanks for thinking of me Buts its sold maybe -
Smashed down tight the head of a ready-rivet would be no higher than what had been in. Plus the head would be a smoother surface than the edges of what had been there
-
On rebuilding' I would use brass double headed ready-rivets
-
I use small electrical side-cutters to crush the sides of the hollow rivet inwards. Often this works so I can pull the fitting off the leather quite easily. Or the side-cutters will be needed to hold the rivet and I drill the rivet. I usually manage to get the side-cutters inbetween the fitting and the strap, or between the peened over end of the rivet and the strap