


Dwight
-
Posts
5,248 -
Joined
-
Last visited
Content Type
Profiles
Forums
Events
Blogs
Gallery
Store
Everything posted by Dwight
-

Shaded Reflector box for a Laser Boresight. (Barely Leather Work)
Dwight replied to Littlef's topic in Show Off!!
I like it . . . good idea . . . but my boresight is bright red . . . I also have a backstop made of railroad ties . . . red shows up on it real well. But if I were you . . . I just might refine that thing a bit . . . Put it on etsy . . . I'd just about wager you'll sell a few of them. May God bless, Dwight -
I'm no "all leather" professional / professer / know it all. But if you are using veg tan . . . belts . . . holsters . . . knife sheaths and the like . . . Make the project with the exception of some snaps if you can put them on later . . . or buckles . . . etc. Take a bristle brush and give the project a light coat . . . hair side only . . . of genuine neatsfoot oil. Let it dry 24 hours. Then dip / dunk dye your project with feibings pro oil dye . . . diluted 50/50 with feibings reducer. You should like the result . . . I generally always do . . . I finish it with Resolene after a good buffing . . . May God bless, Dwight
-
Well . . . if you have a picture of one . . . it might go a long long way towards the understanding. I use 20 penny spikes for woodwork . . . railroad spikes on my forge . . . but do not spike my hair. Wouldn't make any difference any way . . . but none use a rivet . . . or screws. May God bless, Dwight
-
Some years ago I needed a couple of small stamps . . . wanted brass . . . Went on Ebay . . . wound up buying from a Hong Kong dealer for one . . . mainland China for the other . . . would rather have used US . . . but could not find anything here. Their detail is absolutely excellent . . . I sent them a picture . . . one had to have some detail removed by me . . . but I was seriously happy with both that I still have and have used for years. May God bless, Dwight
-
I did one . . . once . . . don't wear it often as it is kinda heavy on the noggin May God bless, Dwight


-
Take your tools to a auto parts store . . . tell em you want some black rubber tubing . . . Check the size with your tools . . . couple feet of it will last you almost forever. I have a bunch of tools with rubber on the handles . . . whole lot easier for 79 yr old hands to handle May God bless, Dwight
-
From what I could see . . . it all looked like it was there . . . only thing we could not see . . . the back was not shown . . . with the cover on it. Need to see the back with the cover removed. The real deal though . . . have him show you a piece of stitched leather . . . preferably two pieces of 8 oz glued together . . . flesh to flesh . . . sewn with 277 or 307 nylon thread. That should tell the tale. I would suggest that possibly the person bought it and never really used it much . . . maybe didn't even ever learn how to use it. The little plate and wire hook for the thread spool is missing . . . couple of inexpensive parts . . . but you don't sew without them. Plus he has the original shoe on it . . . one that for belt and holster and wallet making . . . is useless. Just a quick opinion . . . but google "image: tippmann boss" and you'll see the backside upper left where the thread goes . . . along with a wire that takes it up in the air and allows it to come down vertical to the machine. May God bless, Dwight
-
What he said is right on the money . . . no compound for me either . . . I saw the formula one time . . . don't recall the ingredients . . . but I voted against it. May God bless, Dwight
-
If you want to follow the advice of John Bianchi . . . one of THE top holster makers of the last 50 years . . . When you cut the piece for the outside of the holster . . . turn your pattern over and cut another piece . . . that is the inside liner. Been doing that for over 20 years . . . never been a problem yet . . . and I don't have to stock two different leathers. May God bless, Dwight
-
I've been lately able to get the thickness I like for belts . . . but when I can't . . . my little splitter I bought from Tandy some 10 or 12 yrs ago . . . is the go to route. I cut the blank long enough that I've got the ability to grab the end with vise grips . . . and I run the whole thing thru the splitter . . . gets as good an edge as any of the more expensive veg tan you might buy. The only thing is . . . ya gotta keep it sharp . . . and you need to grease it after using it . . . then wipe it down and run a 6 inch piece of scrap thru it before your belt blank . . . to take off any grease you missed. Slicking and sanding works . . . but THIS is so much better and easier. You will have to learn how to sharpen it and how to strop it though May God bless, Dwight
-
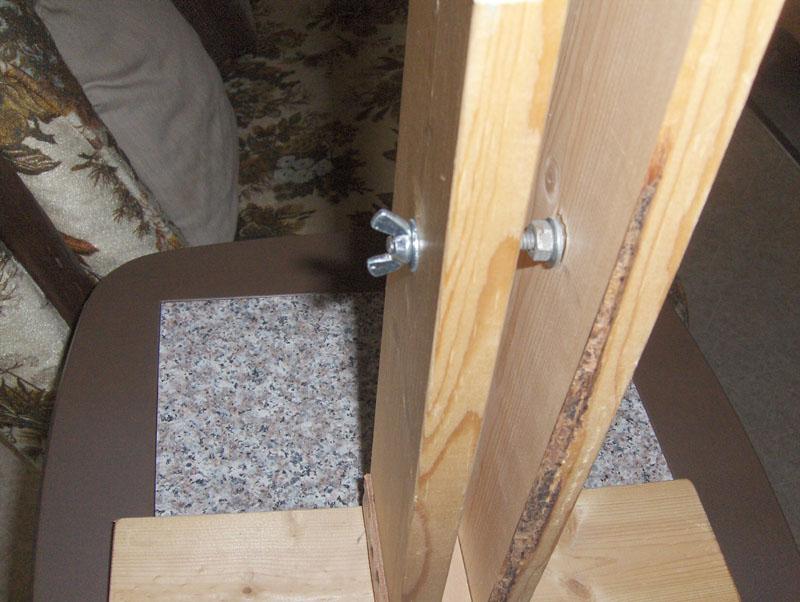
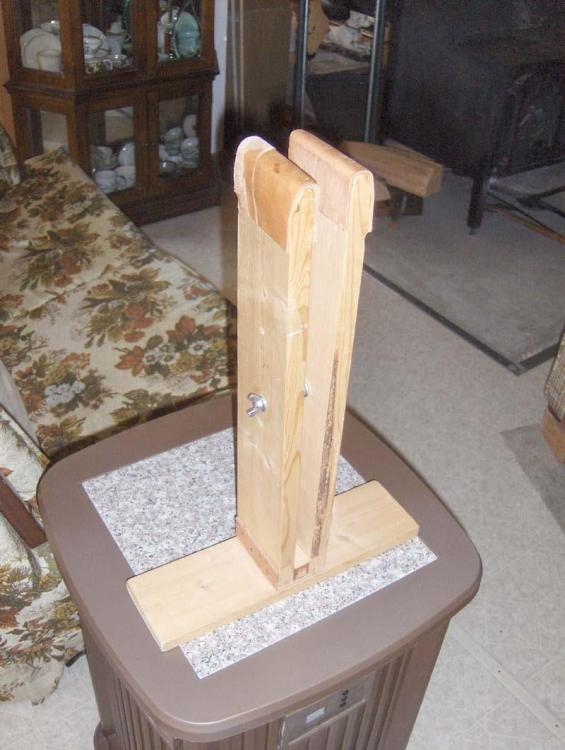
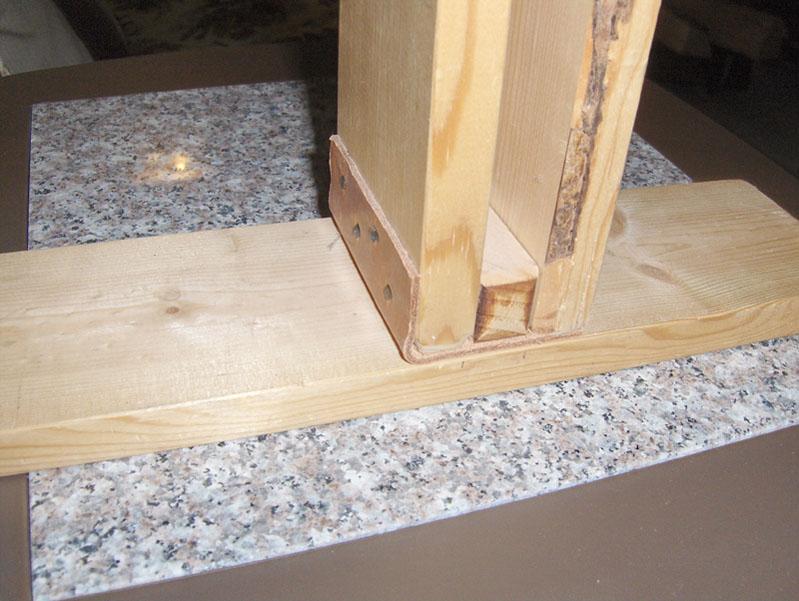
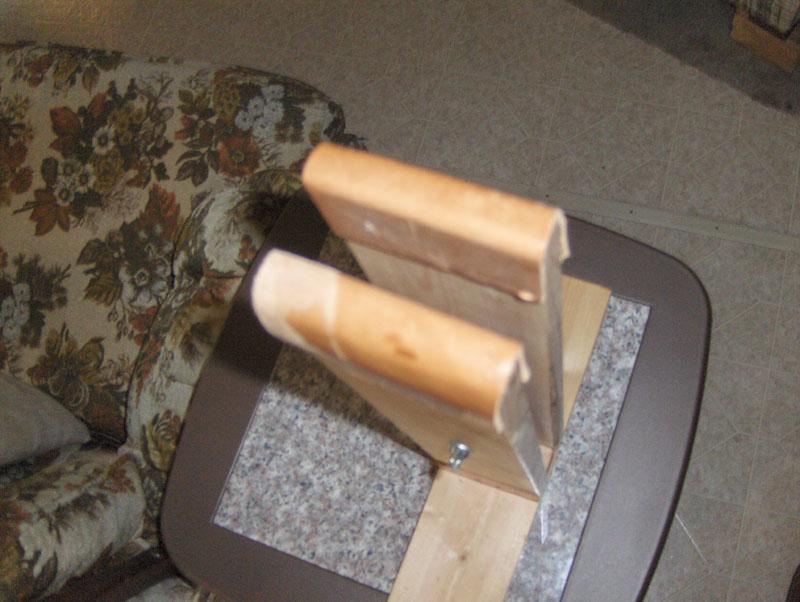
Here is what I did . . . simple . . . quick . . . no real big engineering involved. I sit down . . . each side piece goes under my leg . . . the middle piece comes straight up . . . stick in the piece . . . tighten the wing nut . . . stitch to your little hearts content. May God bless, Dwight
-
Excellent eBay seller! (what type of thread is this?)
Dwight replied to SUP's topic in Leatherwork Conversation
Can you take a micrometer and gently check the diameter of the thread ?? Looks awful big to me . . . but that may be a perception problem as I have nothing to measure it against. May God bless, Dwight -
OK . . . did you laser that bird on first? Looks good either way . . . but I'm just a wondering. May God bless, Dwight
-
I've done a ton of holsters in my 20+ years of leather working. Never had anyone want one for a derringer. This is a double barreled 410 / 45LC . . . over and under . . . double barrel. If you've done one . . . or have a pattern . . . I'd love to see your design . . . because basically . . . I'm stumped May God bless, Dwight

-
Dye Mixing
Dwight replied to Thanatos1's topic in Dyes, Antiques, Stains, Glues, Waxes, Finishes and Conditioners.
I did this successfully . . . ONCE . . . and that was several years ago . . . and it was for a personal item . . . for me. I took (I believe) . . . saddle tan dye . . . thinned it 50/50 like I always do . . . to make the saddle tan correctly first. I then took the black dye Feibings oil base black . . . thinned it 50/50 with thinner . . . THEN . . . I started adding the black to the saddle tan . . . then do a test piece . . . until I got the shade I wanted. Again . . . only did it once . . . was happy with the results . . . which was a medium grey color. The tan / brown disappeared once I got where I wanted with the grey. BUT . . . I mistakenly left the holster / gunbelt . . . hanging where excessive sunlight could hit it . . . and it bleached most of the black out. I'm still happy with it . . . but I did like the original grey I had better. May God bless, Dwight -
Saddle tan . . . my favorite color for any pretty stamping. May God bless, Dwight
-
From one transplanted (partial) Frenchman to another . . . welcome and glad to have you aboard. I am baasically a belt, holster, knife sheath, and gun case maker. I've done a bit of saddle repair . . . and a few spur straps . . . as well as chaps and chinks . . . but it is only an extracurricular activity for me. Most of my work follows the plain / practical idea . . . but if someone wants something fancied up a bit . . . I'll usually comply with his / her request. May God bless, Dwight
-
This is what’s it is all about,
Dwight replied to Stewart's topic in Purses, Wallets, Belts and Miscellaneous Pocket Items
Thank you . . . made my day . . . May God bless, Dwight -
kinda of an opinion thing but asking anyway
Dwight replied to ToddW's topic in Leatherwork Conversation
I've never had anyone ask me to make a glock holster in anything but basic black . . . Just my experience . . . May God bless, Dwight -
Looks good from here . . . May God bless, Dwight
-
Thanks guys . . . May God bless, Dwight
-
Just one quick note . . . when you go for example to Tandy's or other leather shops . . . the cheap stuff will be Neatsfoot oil "compound" . . . which is a conglomerate of oils. Buy the pure neatsfoot oil . . . it's a bit more expensive . . . but it's the good stuff . . . May God bless, Dwight
-
Got a friend who needs a metal stamp made . . . The circle diameter needs to be 5/8 (maybe a tad on the plus side) He wants to stamp walking sticks with it. Anyone out there up for a job like this?? May God bless, Dwight

-
Good way to go is find something you need to do . . . and do it . . . post pictures . . . ask for comments. Generally speaking most folks here are gentle . . . but honest in their admiration and / or criticism . . . The old saying goes something like . . . "most of our good decisions come from experience . . . and experience comes from bad decisions" My first holster I made . . . no one on here has or will see . . . it was that ugly . . . but looking at others . . . I was able to see what I did wrong. It's at the bottom of my holster box . . . rarely eve sees daylight. Jump in . . . join the fray . . . and "glad to have you" May God bless, Dwight
-
A few years back I was having trouble with my light tan dyes . . . not being even . . . especially saddle tan. I don't recall the impetus that moved me to try oiling first . . . I did . . . have NEVER had another problem like that since. I use a cheap pig hair brush from Harbor freight . . . put on a very light coat . . . just enough to make it look wet . . . Let it "dry" for 24 hours . . . the dye goes on perfect . . . every time. I don't always oil for black . . . it depends on the leather . . . But if it is anything other than black . . . it ALWAYS gets oiled first. That is for all my holsters . . . belts . . . sheaths . . . and gun cases . . . which is mainly what I do. May God bless, Dwight

