.jpg.d60258221c476480a6e073a8805645bb.jpg)


ljk
-
Posts
201 -
Joined
-
Last visited
Content Type
Profiles
Forums
Events
Blogs
Gallery
Store
Everything posted by ljk
-
machines on craigslist: what can handle 12oz net thickness?
ljk replied to berninicaco3's topic in Leather Sewing Machines
I don't know. There was a period about 10 minutes when my you tube and leatherworker went crazy. Then it cleared up. -
machines on craigslist: what can handle 12oz net thickness?
ljk replied to berninicaco3's topic in Leather Sewing Machines
Being a upholsterer, leatherworker, and cordwainer I recommend the 1541s or the consew206rb4, both are horizontal axis compound feed machines with safety clutches and have large M bobbins. The juki shows as belt drive if used be sure it's not a factory machine they run those things to death. Being made in Japan a plus. The Consew has a pinion gear drive and I have never had to adjust, just add grease. I don't know the country of mfg. of the 206rb4. The main problem with used machines are bad adjustments on feed dog, inner and outer foot balance on feet. When you got that seatcushion under your foot and run out of bobbin, just reach under replace without moving the cushion. On vertical axis machines you have to get to top loading bobbin and than have to hold thread to prevent the terrible thread jam. Remember if it's use'd there is a reason. Good dealers are an exception. Good Luck -
First Show, thoughts and questions...
ljk replied to austinious's topic in Marketing and Advertising
Back in the 80's I went to a pioneer -craft show. There was a lady with a white rabbit in here lap, she was pulling the fur to make spinning yarn. When I went on the bike circuit selling my leather products, patches and doing sewing I always put my machines up front. If I was doing a zipper on a jacket or a boot that would really draw a crowd. If they were waiting, their partner would than look around and maybe buy something like a deerskin purse. Now I admit that only 20% of the crowd where potential customers for handmade USA products. You need good shows with honest promoters. That;s the hard part. I believe the good stuff will stand out. Put a shoe patcher out front learn to treadle you will get attention. -
Time to comment. I've had a 206 since 1976. Here's my experience with bobbins. The spring you talk about tends to provide some side load. If you have a needle break it can hit the case and bend it'. I've no back lash problems, I do upholstery and leather, speed is not my friend. For high speed on my commercial embroidery machines I use magnetic bobbins exclusively. Watch how tight you wind your bobbin, This can warp the sides. It will still insert but will turn uneven. Bobbin cases can warp. There cheap now, not 45 years ago. Pay attention to your bobbin, blow out lint especially the tension spring. Make sure your 206 is timed correctly and the bobbin case is not touching the hook. If it is you may not hear it and that needle can simply tap away doing doing damage. FIL-TEC magnetic bobbins are available on-line.
-
In the 90s clickers were cheap and I bought three. A Schwabe model D, a Fipi 20 and a USMC model C. Two where 220 3 phase. The conversion to single phase I did myself the Schwabe was easy go to the library, talk to friends. straightforward Now comes the Fipi 20, this machine made in Europe had a different wiring specs. and color. With sweat and chest pains I got it done. All three still in service today. Service availability is miserable you have to learn to do everything, thanks for the internet. Good luck.
-
You could try cording/welt. Sailrite or Rockford Supply.
-
One of my favorite machines. Problems! bottom feed only, you need a Teflon foot, or a wheel and matching feed dog. The machine has conical bushings (bearings) witch can be adjusted for clearance. No reverse which can be fixed by backtacking. An alternate choice would be a servo motor with needle position, or simply lock with moving stitch length to near zero. If you need a hook buy from a reputable dealer like Toledo. Good Luck
-
The ga5-5 which is a clone of the 45k25 shows 3 1/2 stitches per inch and the feed dog and throat plate are interchangeable so it might work on your machine, A search on Isaacs may help.
-
All of the early black oscillating crank drive Singer work basically the same. From the 31-15, 44 series to the 45k. They have conical bushings (bearings) these can be adjusted for wear. That is the first you do take up the slack. Next check how much clearance you have fore and aft of the feed dog. If you have have clearance you can do the following. Grind the slot further down on the stitch length selector about a 1/4", go slow since you don't want the feed dog to interfere with throat plate at maximum length. Also of note you can lock stitches on these machines by simply going to zero and make a few stitches. (embroidery machines work that way) Also note if you put a servo with needle position you can back tack with ease by setting servo at the point of thread release. Also if you glue a pc. of 2mm Teflon to your foot it will reduce surface tension. Have done this and it works !
-
I would recommend a compound feed (triple feed) with a clutch. Doing auto upholstery you will run into work that will need piping (welting). The center moving foot on the compound feed machine will cinch (press down) on the piping. This is specially important when sewing the piping (welt) to the upper and lower material. Most of these machines have a adjustment for the the lifting height of the feet, reducing lifting make sewing thin materials easier. If you buy a machine without a clutch make sure you make you mark hook and shaft so you can reset if you have a thread jam. A slightly used machine might be a better choice (non factory) because the hook and the race have smoothed with each other. A servo with needle position is a good choice. You can adjust needle position to reduce. thread jams (adjust in slightly descending position). The thread release should be adjusted at the top of the lift this reduces tension problems when lifting foot going around corners or heavy seams. Avoid factory machines they sell for a reason/ Good Luck
-
I do have a post wwll Singer 144w305 in Colo 81252. The price is $1800. Never a factory machine, sold originally to the VA in Colo. I bought from a awning business. If interested I will post videos of machine operating. I have converted machine to a hand operated reverse. I will convert to servo before selling. Reason for selling ? I have converted a 45k to sole stitcher and it will provide for other needs such as knife sheaths. Still a few days from providing images. tx Lynn
-
My research on early 20th century has mentioned belly leather for insoles. In my opinion the ultimate shoe construction is the sole construction using blake-mckay insole to midsole. Then using a outsole stitcher sewing midsole to outsole. The prominent construction today is using Goodyear welt attaching to composite insole and cork filling than outsole stitch welt to outsole. The timeless question was belly used for insoles because it was sort of leftover ? I use it for insoles because it conforms to the foot. I have never seen cork that wasn't deteriorated. I also us belly after being cased for heels.
-
My first industrial in 1972. My second for 25yrs selling in 2018. With a narrow Teflon foot you have great visibility for sewing detail. I think I see a low mileage machine, although the bed is very chipped the wear pattern in front of the needle shows limited wear. Uwe is a great source on ytube for belt replacement. You should be able to get table, motor,bobbin winder and thread stand for $100/$300. Good luck. It won't replace a 206rb a 280l or some Juki's but you can do a lot with it.
-
Maybe retime. Set needle at very bottom than raise .100 inches or 2..54mm The hook should intersect needle. Now raise or lower needle bar to right position. Check needle distance to the hook. Also make sure needle guard is not pushing needle away from hook. Check for burrs. These machine are finicky however even worn machines can sew well if properly timed There is also a slight chance the timing belt is off a tooth.. Uwe has great stuff on these style machines. Including clones. good luck
-
My first shoepatcher was a 29-4 for $25 still in service. By far the worst of the singer 29 series. Mainly because the base (foot) area cannot be replaced. That being said if it sews 6 stitches to the inch and needs no parts or service it is probably worth it because the stand is included. Oil generously particularly the head and cam bushings. If it won't sew forget it, to expensive to repair.
-
Pulling my hair out over tension issues with Consew 206rb
ljk replied to Lokahi's topic in Leather Sewing Machines
Being a owner of these machines since 1976 I have some experience. One The thread release works on both knee lift and hand release and is adjusted by a screw on the right side of the tension disk slightly to the back. The release should be adjusted at the very top so tension is not affected. Two The amount of lift is adjusted by a set screw behind the machine below the crank lever (my term) You will need to take the front cover off to to adjust the up and down movement on the rod. Simple but difficult to explain Three You can now adjust the feed lever on the back left to balance the the needle and foot feed. The right lever with the thumb screw adjusts the lifting height for various thickness. Four Bobbin case irregularity is caused by a bad case or a too tightly wound bobbin that expands and rubs against bobbin case If you don't understand any of this let's tackle each issue and I will probably get you through this. This is one of the best machines for performance and durability. -
It's complicated. Most bandsaw metal cutting blades are edge hardened thus retaining some flexibility to the rest of the blade. However they probably are the same overall chemistry. If your blade retains the edge than your good to go. You can harden by heating the edge cherry red (about 1500 F ) until a magnet won't stick, quickly quench in water. That edge is now very hard and can be sharpened to a wicked edge, however very brittle. I use sawzall metal cutting blades for my leather knife, being careful to sharpen the teeth slowly without heating the blade. Walter Sorrels has great youtube videos. .
-
Hi Tilda I may be able to make my model c work but your HEIC downloads gives me chest pains. Perhaps if you could send your image in a jpeg I can help. My clicker is now unloaded and working well perhaps I could make a video of the machine in operation. I'm sure the engagement issue can be resolved. tx Lynn
-
I tried a trial offer and got a little response. Here is my opinion, the shoe industry is dead in this country, the ones who are left are quality producers with specific dies and lasts. For example they want a specific die for a 11.5 ee not something close. The same for the last. The custom or bespoke shoe and boot industry on the other hand will buy close (like me) and modify. For example a sole die that's too large they will trim the leather. The dies are rusty and need to be sharpened. There is a market for one's and two's but for this to be successful the purchase of a large lot has to be very low since most will never sell. Cowboy last's have a better market because of more makers. But it doesn't appear you have any of those. If you take the time to catalog and cleanup, paint and sharpen you may have market. I suspect you my have also upper dies? Still interested! I have a box truck going to Fla. after covid, my last trip for stuff to move to Colo. Tx Lynn
-
I used phase convertors on my Schabe D and Fipi 20 20 years ago Still working The conversion on the Fipi was more difficult because of the euro wiring.
-
I have been down that road on a 155w. Follow the advice of the experts, make sure it is timed "right" Now drentch hook with oil and put in #69 thread. If it sews correctly than do the following. Remove hook "not carrier" those tiny jib screws have wings, check if there is any debris, inspect hook for any burrs make sure everything is smooth! Now remove tension spring and make sure thread path is clean and tension spring works properly. I use super glue on jib screws/screw driver to assemble. If that machine -doesn't work let me know I have another idea (crazy)
-
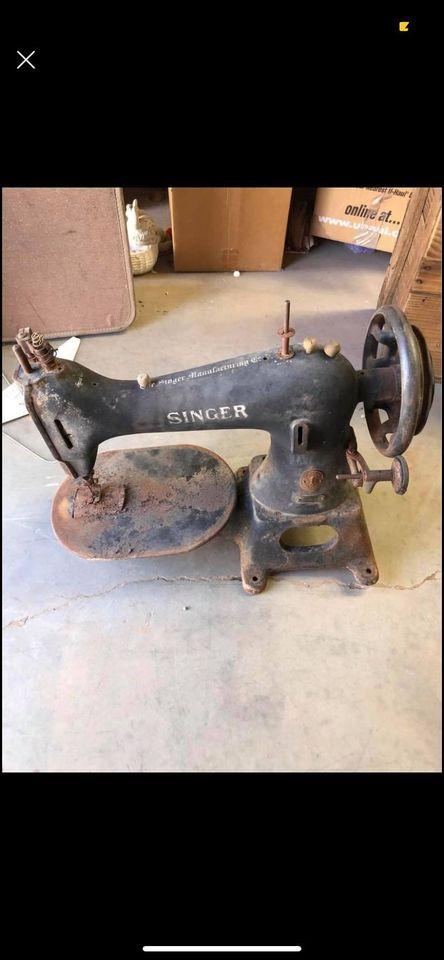
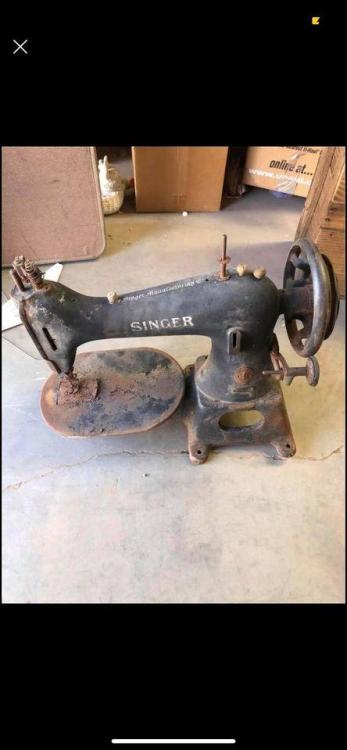
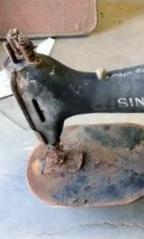
I would tackle this machine. The 45k pictured was in similiar condition. I will posted refurbished if post is still up. These machines helped me make a living for 25years, starting with a $25 garage find. Start with spraying with BD Blaster on all moving surfaces, every few days. This can take weeks. Then remove any parts like bobbin winder and screws. Done worry about hook and bobbins are cheap. Soak small parts in The Works its a drain cleaner and is disposable. I than tum parts in a cheap HF tumbler with a little dishwasher soap and water. (doesn't foam up). Now once it's all cleaned and turning try to stitch and see if it works. If stitches are short or it won't sew, now is the time to research. Restorers are shimming gears and other parts. Facebook has "Singer 29k and other cobblers" which has good info. Don't remove main shaft, and I hope flywheel isn't wobbly ( this too can be fixed). Personally I'm not a fender polisher I clean oil and use my machines. I like those old stenciles.
-
If I had to make a choice for just one machine it would be a singer 144w with reverse. (or adler equivelant) 25years ago my 206's would not sew certain parts on our mc chaps. We bought a 144w103 We called it T Rex pressure feet adjustment is easy, which makes different thickness material easy. Stitch length is more difficult (screw adustment} in top of the head. Parts are available. Another choice would be a singer 45k with the walking foot. These machines have a front stitch length lever making locking a stitch if you slide to zero or close. Thats how embroidery machines lock stitches between jumps. Both machines are available down to #20 needles. I'm currently modifing a $50 45k to sew shoes soles.
-
www.ameriken.com has been my choice for many years.
-
Hello I would go to the facebook china leather shoe patcher. This will usually work good out'of the box with #69 or #46 without mods. For a better machine which has been checked out and adjusted go to bantamsaddleandtack I think they are a moderator on site. There is enough info on that site that you don't have to fiddle and screw up.