-
Posts
2,380 -
Joined
-
Last visited
Content Type
Profiles
Forums
Events
Blogs
Gallery
Store
Everything posted by battlemunky
-

Free Sample of "Dyes-True" Leather
battlemunky replied to Johanna's topic in Leatherwork Conversation
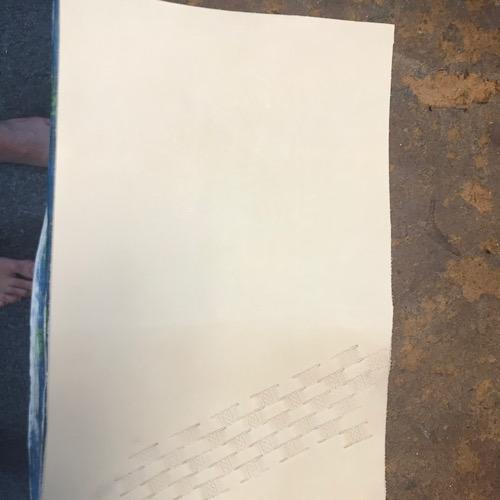
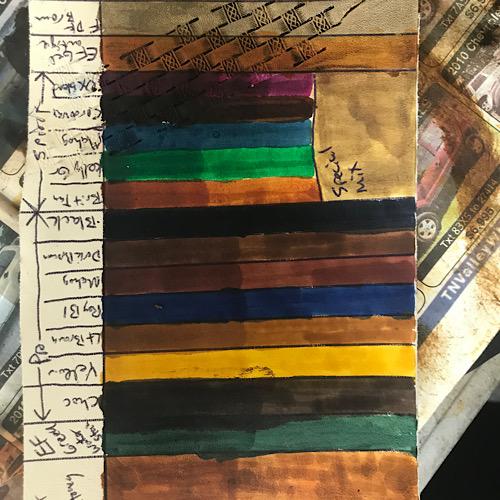
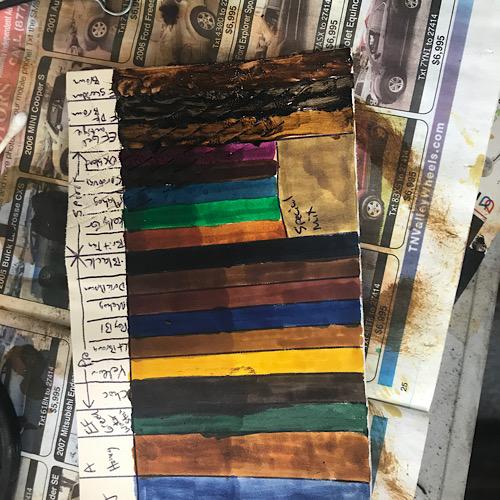
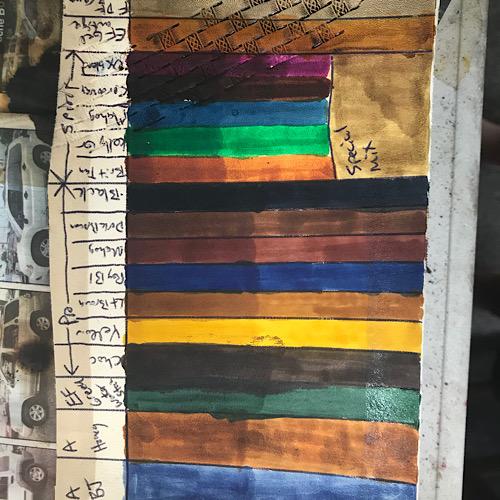
Ok, I tried to be as comprehensive as I could be with the area I was working with. The top and bottom was treated with NFO after the dye was applied. The top halves of each dye column got a second coat except for the antiques, those only got one. I tried to label everything but if you can't read them, let me know. My overall impression is that this leather takes dye very well. It has a great smell and has a relatively soft hand to it. These aren't really dry so once it does I'll try to get another picture up so we can all see it. Look at that yellow! I didn't have access to my bench so I was working off the table in my shed but it didn't seem to take stamping as good as I'd hoped but for an untooled piece this leather may be worth considering. I think once I get my workshop back I'm going to grab some for some totes and wallets, it is pretty nice. Any questions, holler. -
Literally, I'd start with a dinner fork (for spacing), an awl (for poking holes), some John James #2 needles (for sewing), and some "hand sewing thread" from Amazon, and use some sandpaper for edges. Get some cheap belly leather from Tandy (or some other vendor as long as it fits your budget) and make a few things to see if you even like working leather. If you do, then I'd not waste my time with even middle of the road tools. Buy once and cry once, just make sure you are getting the tools you actually need. I have a ton of crap I don't even touch because I bought it when I was stupid and knew no better. I have about 10 basic tools I use all the time, the other 200 or so are rarely touched; make the 10 superior and worry little about the other ones and go slow. My $.02.
-

Free Sample of "Dyes-True" Leather
battlemunky replied to Johanna's topic in Leatherwork Conversation
Ordered my sample, thanks for the heads up. I'll try a few different dyes/brands on it and report back. -

Latest Holster
battlemunky replied to JWheeler331's topic in Gun Holsters, Rifle Slings and Knife Sheathes
Looks good Sir! -
Thanks to both of you! Great tutorial!
-
I just lined the bottom of an old 6 lb sad iron with some leather. Painted the iron yellow so it is a tad happier. Nowhere near as refined as that weight though. That flag detail is really cool Mike. Is that a stitching wheel tracks outlining everything? Cool regardless of how you did it man, and clean as a whistle.
-

Another knife sheath
battlemunky replied to WyattEarp's topic in Gun Holsters, Rifle Slings and Knife Sheathes
Another fantastic piece @WyattEarp! Beautiful work! -
I believe I saw Block&Barrel had one in a video. I think he said he made his. If you have access to a table saw you should be able to make one easily enough.
-
Yeah man, that is really cool and super well done! I love it!
-

Cigar case, hand stitched.
battlemunky replied to Isaact's topic in Purses, Wallets, Belts and Miscellaneous Pocket Items
Those rivets don't look peened down enough to me. It'll probably never matter because that will NEVER see the stresses required to cause a failure but still. Looks great to me but @Hardrada does appear to have a point. For cellophane wrapped it looks like it fits the need. Beautiful leather, btw.- 4 replies
-
- handstitch
- cigar holder
-
(and 2 more)
Tagged with:
-

Tote for wife
battlemunky replied to wkleather's topic in Purses, Wallets, Belts and Miscellaneous Pocket Items
Really cool for a fan and well done it appears! -

My Dieselpunk camera bag
battlemunky replied to Arutemu's topic in Purses, Wallets, Belts and Miscellaneous Pocket Items
Tony makes a great pattern and great support videos too. You executed that very well! -
Also, if you are making thicker items, the lack of polish and those machine marks on those will make them a bit harder to pull out of the leather. That isn't necessarily a show stopper but it is something to consider. Once you get up around 9 oz and higher you'll be wishing for a mirror polish after a few inches or so worth of punching.
-

Does anyone know about these snaps
battlemunky replied to TheHollerLW's topic in Leatherwork Conversation
I have some similar to that I picked up in a lot I bought on eBay a wile ago and have no idea how to set them either. Hopefully someone will come along with an answer. Mine are just sitting in a box of random parts I haven't had the heart to toss. -

Order of finish
battlemunky replied to MarlinDave's topic in Gun Holsters, Rifle Slings and Knife Sheathes
The 'roon is miraculous stuff. If it works looking all gross like that and doesn't mess up the leather, who are we to judge? I strained mine but next batch I may not since I know you don't have to. It looks like hell though. -
Beautiful work!
-

How to add Gel Antique in specific areas instead of all over
battlemunky replied to swhoelefp69's topic in How Do I Do That?
You may even want to try to "paint" it on with a q-tip. Dip the q-tip in some gel antique and then wipe off most of it onto a paper towel and use the residue left on the q-tip to get in those areas around the base of the teeth and in the cracks. It'll get the goo where you want it and make getting it off the places you don't want it pretty easy. This is just a guess though, I'd test it for sure. -

Ancient Greek Motif
battlemunky replied to immiketoo's topic in Gun Holsters, Rifle Slings and Knife Sheathes
Your consistency astounds me, Mike. I don't think I've ever seen a flaw in any of your stuff over the years. This rig is no exception. -

New natural veg tan belt to perfect patina
battlemunky replied to Mandarage's topic in Leatherwork Conversation
I think if you seal it you aren't going to get the patina you want, especially quickly. Leather has been used for millennia, long before there were treatments and sealers. You could oil it and call it a day just letting the patina do what its going to do. If you want to fake a bit of patina, rub some wax, doesn't really matter the type, on some felt and rub the edges down, darkening the leather without using any dye or anything. You can also lay down a stencil and do that over the stencil to "patina" a shape or initials, etc. onto the leather. -

How to get correct spacing of stitches in round patterns
battlemunky replied to Zozo's topic in How Do I Do That?
Also brute forcing it is optional. Take your properly spaced circle part and then lay it in on the cylindrical part of the cup and mark it to line up with the circular part, then do your punching. -
I did @raymullens. I replied to it, let me know if you did/didn't get it.


