RockyAussie
-
Posts
3,265 -
Joined
-
Last visited
Content Type
Profiles
Forums
Events
Blogs
Gallery
Store
Everything posted by RockyAussie
-

Price check on Ax/hatchet cover
RockyAussie replied to Boriqua's topic in Gun Holsters, Rifle Slings and Knife Sheathes
There is NOOO way I would touch doing that for under $100 au (about $70.00 US) and like you I would still be losing on the patterning time heaps.If I am as equally stupid and slow I think it would take me 2 hours plus to get that pattern as is. Regards Brian -
Has anyone ever turned a charm into a concho?
RockyAussie replied to JerseyFirefighter's topic in How Do I Do That?
I have had badges made with screw backs and also the 2 piece speedy rivets but the base metal was brass. The speedy rivet ones first time made got soldered on and the solder filled up the stem. They would not compress down together and most got thrown out.Second time on they were careful not to let the solder go up the stem and they worked alright. -
Chrome-tanned vs veg-tanned for shoe lining
RockyAussie replied to Mike83's topic in Leatherwork Conversation
Its been awhile since I've made any boots but if your maker is in OZ he will know of a company called J.A.Brooks. http://www.jabrooks.com.au/ As they supply most anything for making and repairing shoes I would recommend the unsealed leather that is commonly used in surgical shoe making. If your feet do sweat a lot as mine have at times I have found putting 2 eyelet holes in the instep arch area works very well.(Not the sole but in the side of the shoe). As you walk air gets sucked in and out and keeps your feet dry unless you walk through water though. Regards Brian -
Strap work - your dream setup with machinery ?
RockyAussie replied to Christine's topic in How Do I Do That?
Hi Christine, How much is your buget? If you are doing that much by hand I need you over here. Being in Europe I would look at the OMAC line of products.http://www.omacsrl.com/ I have several of their machines and found them mostly good. Clicking press and strap cutting machine would be my first buys along with a double edge belt edger. If your budget is bigger they have some very automated machinery which is above my knowledge and I get a bit dubious of machines that supposedly get too automated. I bought a single edge machine that takes it from the operator and runs a edge around etc but I found it quicker and easier with the non automated edging machines.If you need any help on how to set up the dies for clicking out let me know. Here is a picture of one of my typical knives and jigs for holding strap in place for use with a clicker press. Regards Brian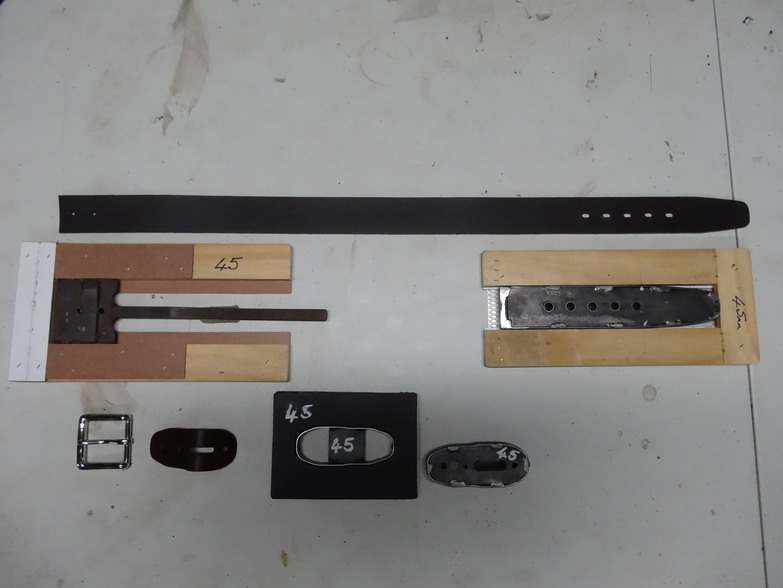
-
Looks pretty good so If the feed wheel rotates on its spindle without slop all should be ok. If there is no great play in the little shaft that holds the feed wheel then there should be no wobbles unless the feed wheel itself is not made right.(Can Happen) Best to test this without the drive shaft in place to be sure.The drive shaft looks like it wobbles even from new a bit but generally has no effect on the smoothness of the feed wheel rotation.Hope that makes some sense. Regards Brian
-
Thanks Jeanne. I hope you caught my post and video on the skiving machine roller.Check my You Tube if you haven't. You might want to follow as I have a heap more coming soon. The next one coming is on colour edging belts quickly by hand. I mostly use edging machines now but the rough edges on croc backstraps make finishing off by hand a better end result. Regards Brian
-
Looks like a great idea. A short pin attached to the shaft collar would help to hold the leather down and in place and allow multiple thicknesses of leather by simply rotating the collar around the shaft until the pin lightly touches the leather. Regards Brian
-
Hi Michelle, I would replace that drive shaft but as gigi said it may not be the cause of the wobble. I would put the thing back together without the shaft and try spinning the feed roller by hand to see if there are still wobbles. The shaft that the feed roller spins on is likely worn as well and need replacing. Also if it is a stone or rubber the feed wheel itself may need replacing as some operators can be known to adjust the feed wheel up and into the knife and do damage.Mostly though make sure there is no play in the knife up and down as if that is coming from the shaft that the knife attaches too, it may not be worth doing at all. Hope that helps Regards Brian
-
Just a tip to try. I have had the same thing happen more times than I care to admit but I have had success in removing the broken taps when they ended up level by using a Dremel cutting disc and cutting an Allen key to suit. Normally the 3 prongs end up at 1/8 to 1/4 inch deep. Works most times.
-
Exotic Leather Watch Rolls
RockyAussie replied to CazaLopez's topic in Purses, Wallets, Belts and Miscellaneous Pocket Items
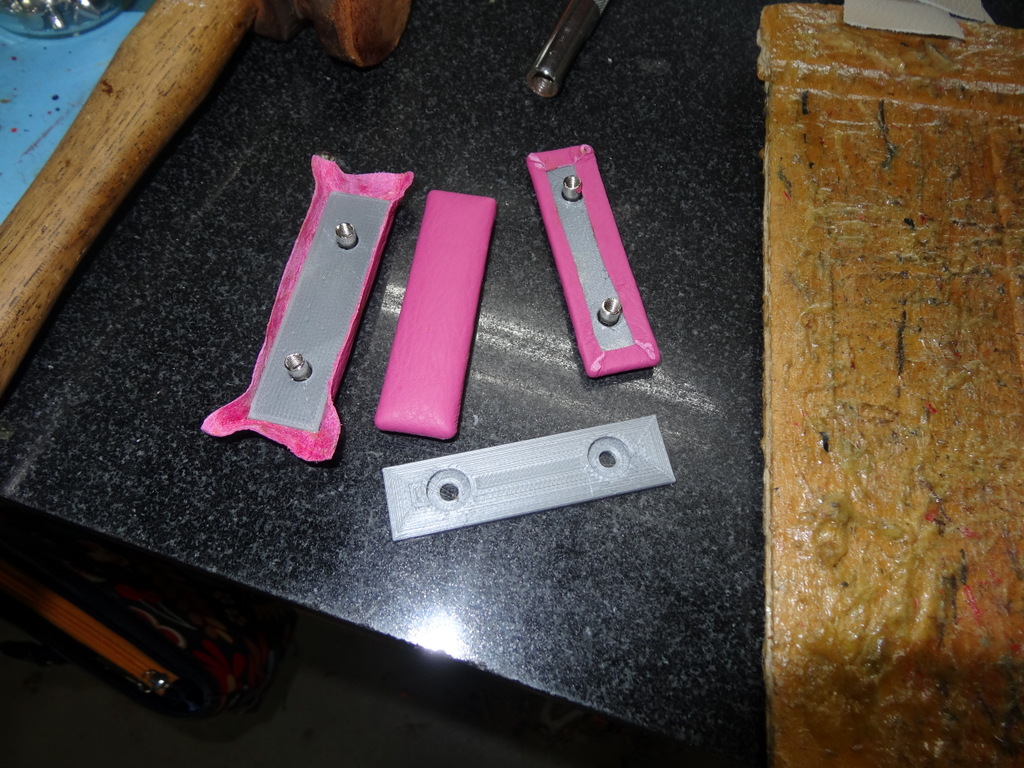
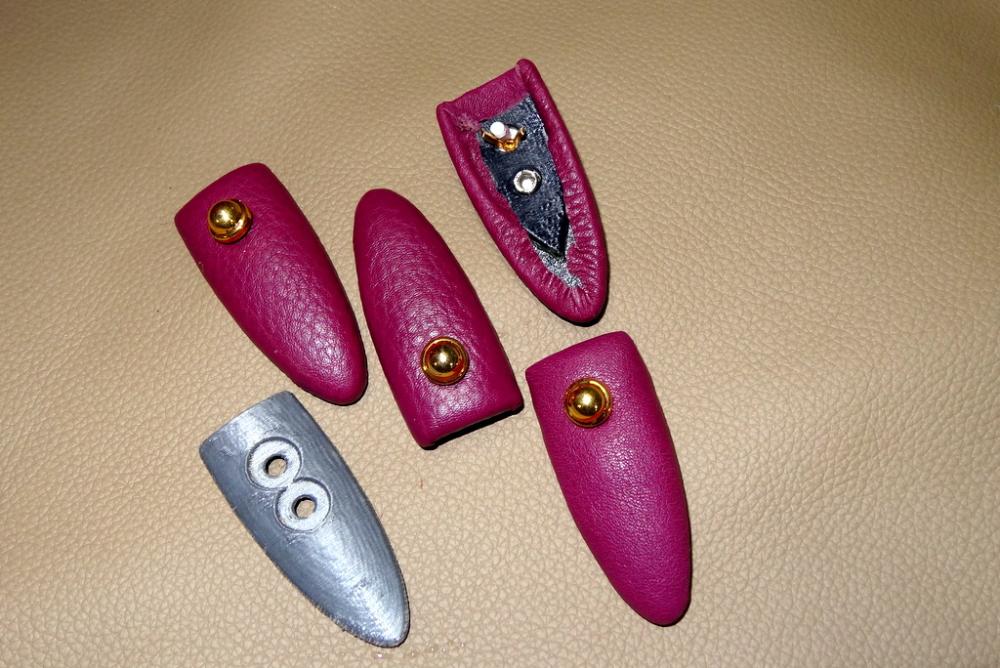
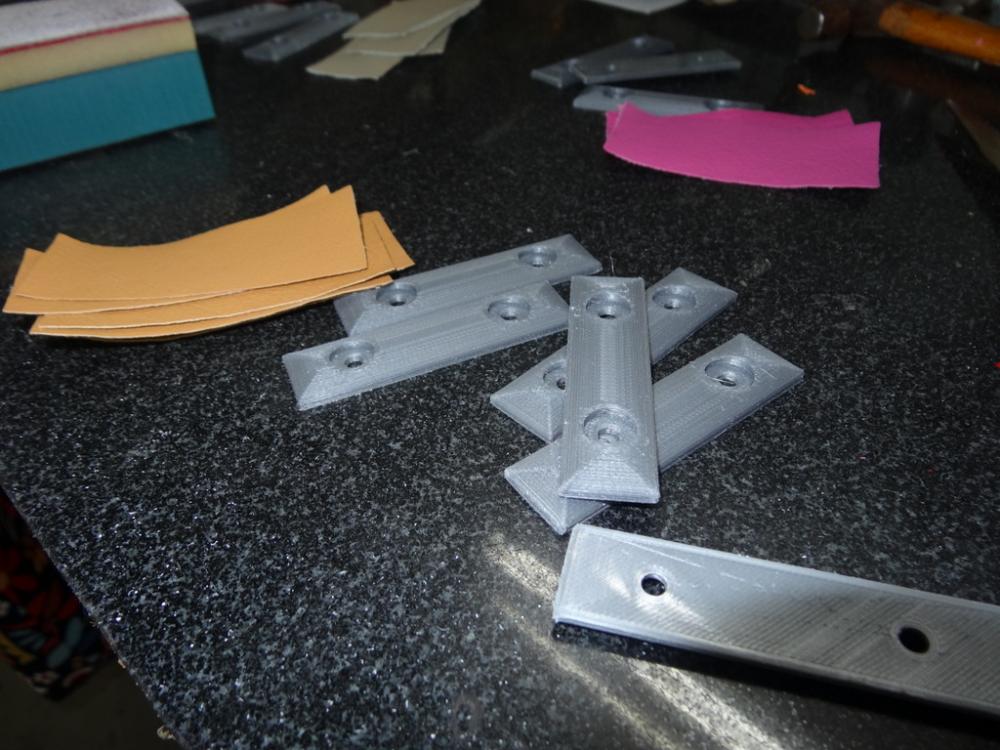
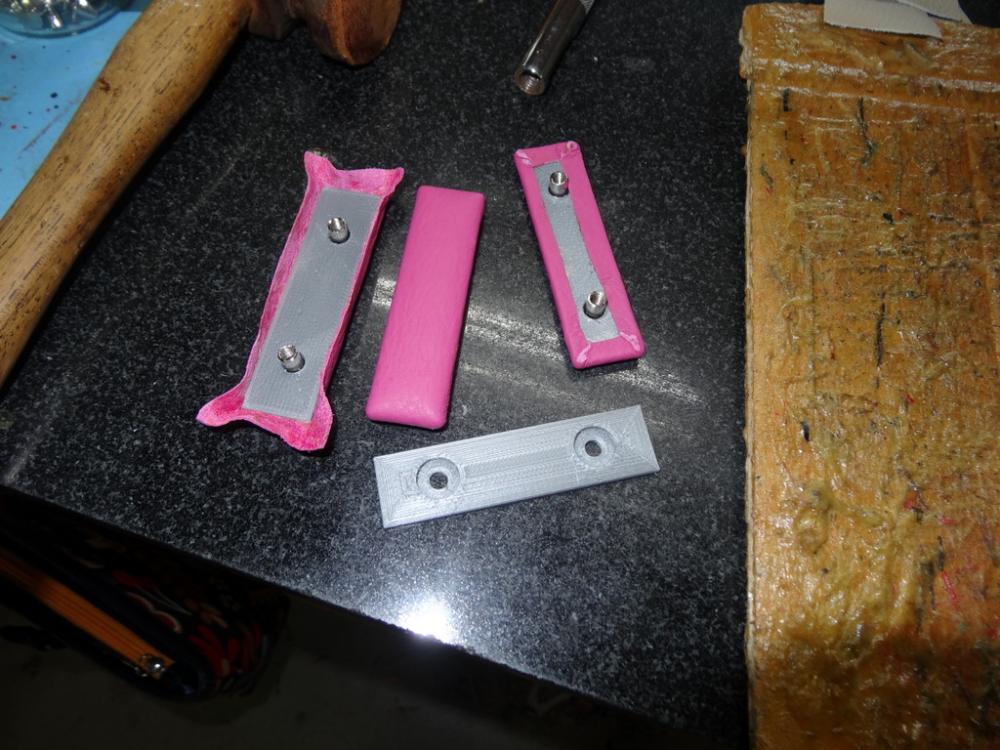
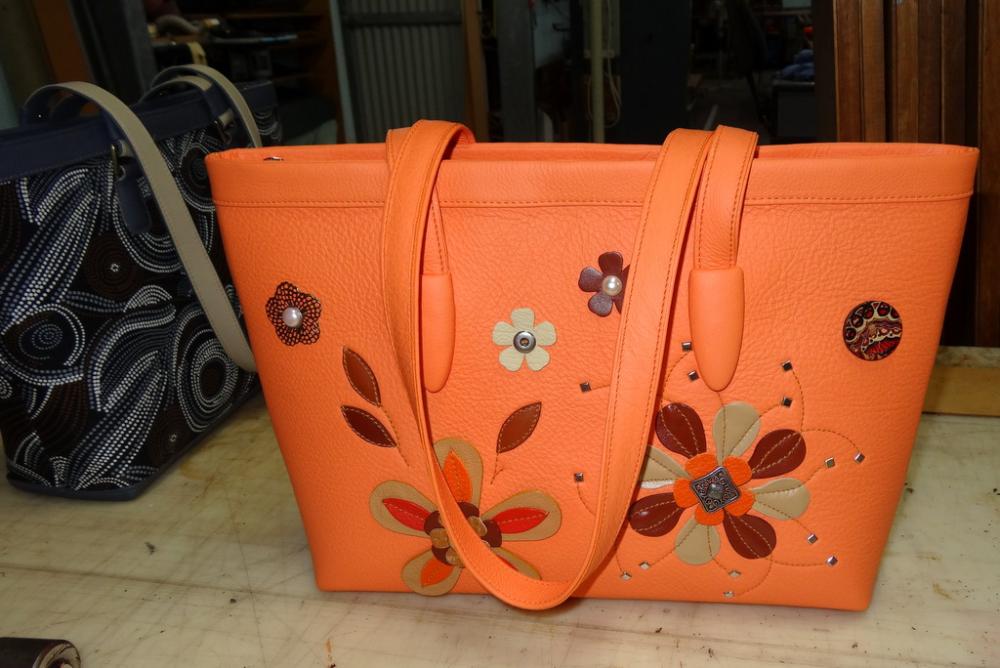
Nothing any where near that interesting. Doing a video on belt edging and testing out patterns and techniques on our new tote we are calling Emily.(After my granddaughter). Came up with a couple fitting designs that start with our 3d printer we then cover over. One for bag feet and one for holding straps on. Here's a couple of pics of them at this stage will post more when they are more finished. Hope to load video sometime next week to the tube. Regards Brian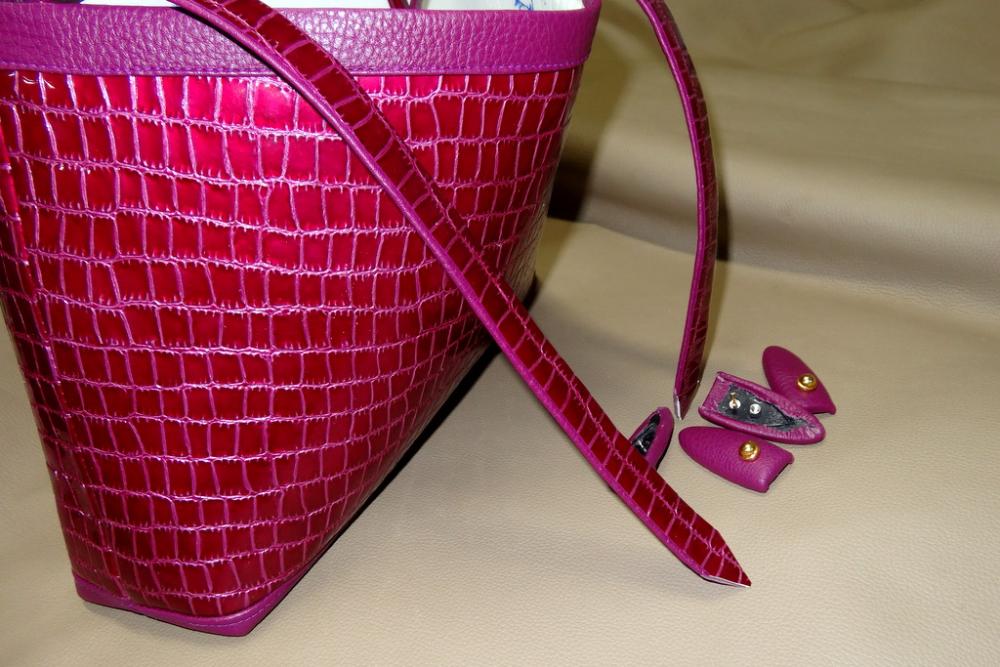
-
Thanks Floyd, That post mostly covers what I was trying to work out.Unfortunately here in Australia the colour range in thread sizes drops right down when you get thicker than the 138/20m range and the 794 LR range of needles only goes down to the 160/23 needle range which is a bit big for that size thread. Also at that 794 length it is very flexy and more likely to miss stitches. I was hoping there might be a solution by going this way. Regards Brian
-
Thanks Constabulary. Would you know how to find the length measurements on that system? I believe that this one fits the 45k Singer but I don't have one to check.
-
Just wondering what needle system would be the next size shorter than the standard 794 for the 441? I can't find a chart of needle lengths with diameters etc.
-
Exotic Leather Watch Rolls
RockyAussie replied to CazaLopez's topic in Purses, Wallets, Belts and Miscellaneous Pocket Items
Nice and interesting work there CazaLopez. Thanks for sharing. -
Second Holster
RockyAussie replied to Rotorwash's topic in Gun Holsters, Rifle Slings and Knife Sheathes
Looks to me like you are going to miss all the fun of learning. Gone straight to Master from the start. WOW -
Need strap ideas for purse
RockyAussie replied to shedhunter's topic in Purses, Wallets, Belts and Miscellaneous Pocket Items
That's are hard one at this stage. Nice looking work. How bout horse shoes front and back? Weld a 3/4" to 1" prong on the outer ends and make some leather straps to attach to the top line. Here's a picture might inspire...... or not.
-
Looks good. What is used to stop the lid contracting with weight in the bag?Stiffening in the lid or the bag?
-
Thanks for the answer. I hope to give it a try but for now that's a bit too over my head yet.
-
Nice clean instructions compared to some others. Thanks for posting Constabulary.
-
Very well done. What did you use for the steel type and procedure.
-
It looks to me that the needle is a bit big but at any rate loosen your top tension 1/2 turn at a time and check should help.
-
Thanks for that MADMAX. I like to see better where I'm stitching as well but I would not want to be stitching soft stuff and have it play up. Don't laugh as I'm sure others will, but I thinking about making it a non walking foot when I want that way.No front foot and closed up back feet the only foot. For intricate position stitching purposes.Just don't like the way the dog foot disappears so deep down in when at the back of the stitch.I'm not sure if there is any way to adjust for that as yet.Regards Brian.
-
Nice tidy looking mod MADMAX. I have been wondering whether to make a longer needle holder to cut down deflection but not sure yet if it is worth the bother. I notice the middle foot is cut near level with the hole. Does that give any problems such as missing stitches or anything?
-
Hi again Dunluce, just been checking a couple of videos on the subject and think I might have to do one.They were a bit rough and lacking in the finer details.A sheet of glass with some of that non slip rubber you get from the super market works well enough. As Gigi shows in picture above is one of my sometime favourites but it works best on soft leathers.To trim corners stuck together in that method I first push down firmly with a small pair of sharp scissors or sometimes a sharpened nail puller then press down into shape. What I call a slicker you might call a bone folder. They are good for slicking in lines as well. I make mine out of cow horn or bone normally to suit my hands and whatever the job application is. Normally I would not bother to warm the corners in production but after the glue has set it makes it easier to get it to mould around.Heated carefully with a heat gun or hair dryer will surprise you how much better the leather is to shape up.Sometimes I just use a lighter but on light coloured leather you have to be extra careful.Practice on some leather first to see how far away to hold it and how long. Like I said I think I need to make a video of it.
-
Looks pretty good Dunluce. Just warm up your corners a bit then with the side of a slicker press inwards and around. I do that style often. For skiving the corner hold the knife on an angle to skive with the side of blade touching the top of leather lining then put the edge of the blade about the same thickness of the product edge out before skiving.(2mm thick then start 2mm out) The skive should then be about as wide as the outer skin layer is thick.Carfully make sure all bits get glued including the skive. Let me know if you need a video done to show.Regards Brian