Rockoboy
-
Posts
1,422 -
Joined
-
Last visited
Content Type
Profiles
Forums
Events
Blogs
Gallery
Store
Everything posted by Rockoboy
-
I believe it was started in the US universities by students. They kick a small soft ball/bag of beans or similar back and forwards between each other. They count how many times they can keep it off the floor. One person can also kick it about by themselves, also counting the number of kicks they can accumulate without it touching the floor. Also what HW said ...
-

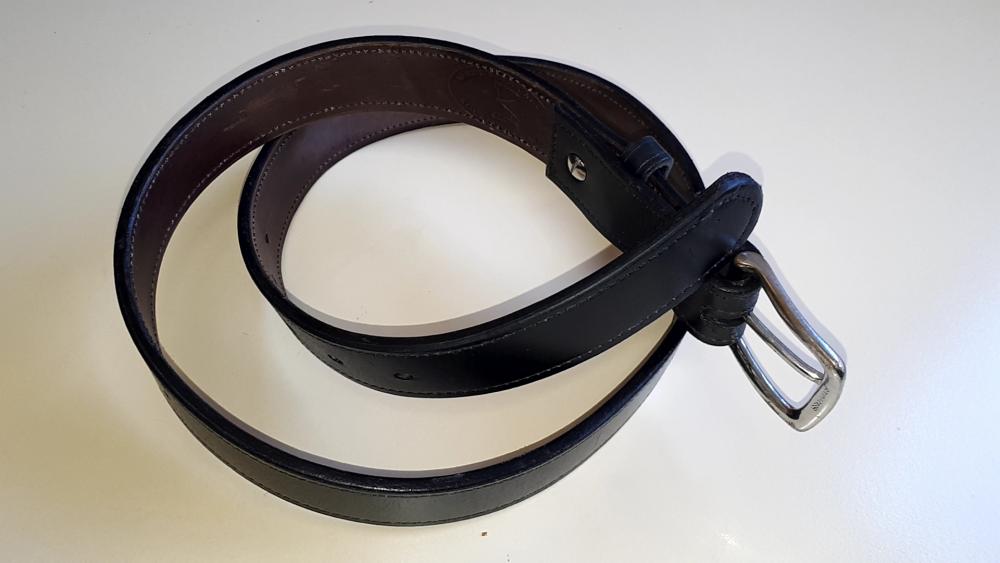
Another belt
Rockoboy replied to Rockoboy's topic in Purses, Wallets, Belts and Miscellaneous Pocket Items
What I do for resizing pics, is I email the pic to myself, and its all sorted. This what I have been advised to do as well. The lack of action is all my own work. This was recommended to me for sewing right up against a seam or the side of something where an ordinary foot is too wide. Its really the edge guide that I need to get sorted. I am willing to bet good money (your money, not mine) that my stitch-line will wander back and forwards, sometimes maybe going right off the item being sewn, if I try to sew within 3mm of the edge. -
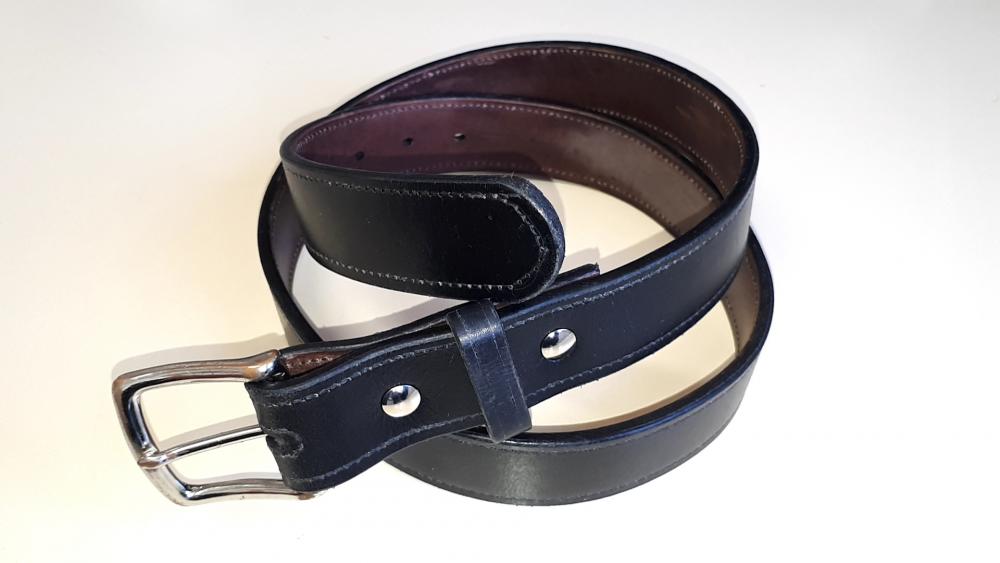
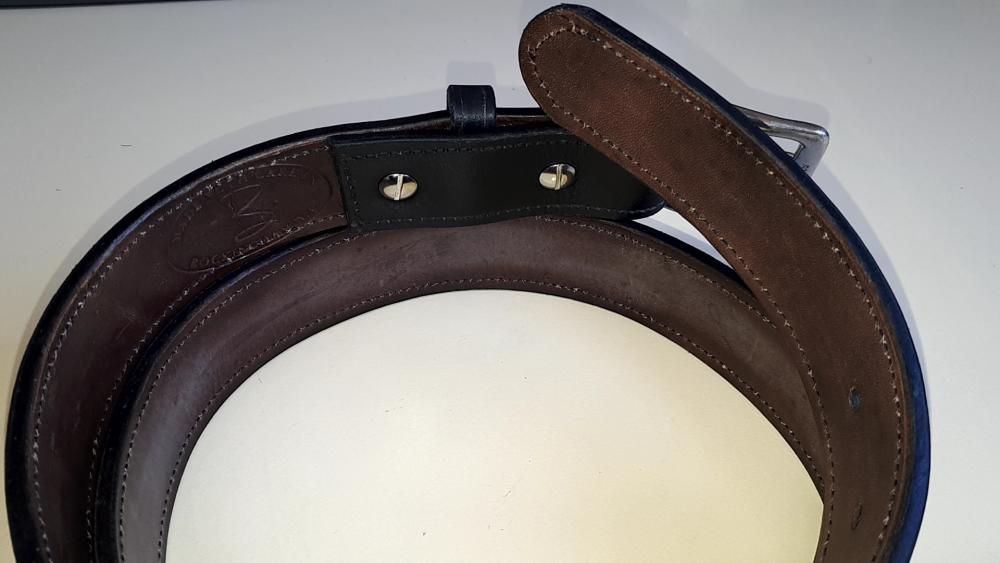
Another belt
Rockoboy replied to Rockoboy's topic in Purses, Wallets, Belts and Miscellaneous Pocket Items
Thank you Tom. I did glue the liner to the face before I burnished the edges, but no edge paint. Both the the liner and the face were black leather when they came to me, so that hid a whole raft of sins! I am trying to perfect the edge guide I made for my sewing machine, because I think the stitching is a bit to far from the edge, but that's a work in progress. -
My take on a boot purse
Rockoboy replied to Madmax500000's topic in Purses, Wallets, Belts and Miscellaneous Pocket Items
If its what you wanted, then you nailed it. If that's the way the buckle goes, that's the way it is, don't even bother with what I said. -
I don't know about advantage of using them, but the disadvantage is if the back is seen and it needs to be equal to the front. Where possible, I use double cap rivets, but I have no idea of the comparative strengths or weaknesses.
-
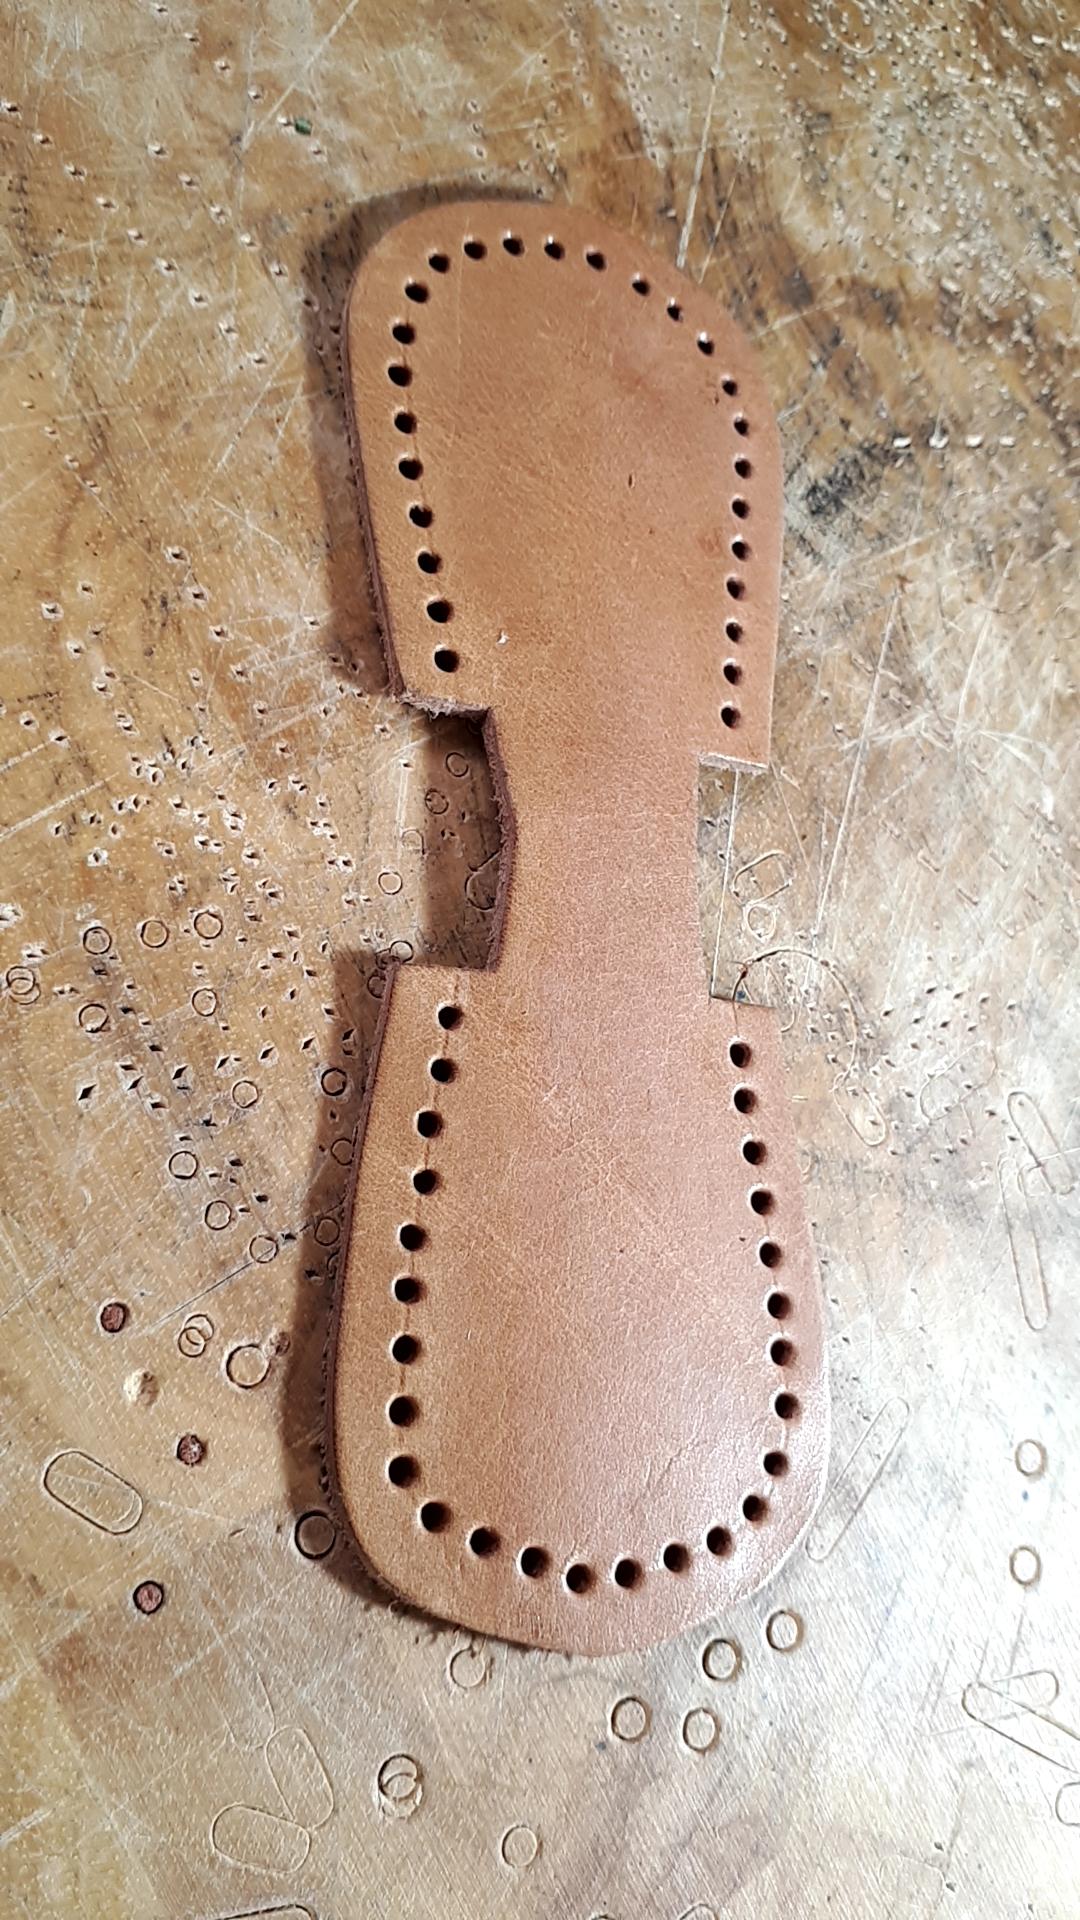
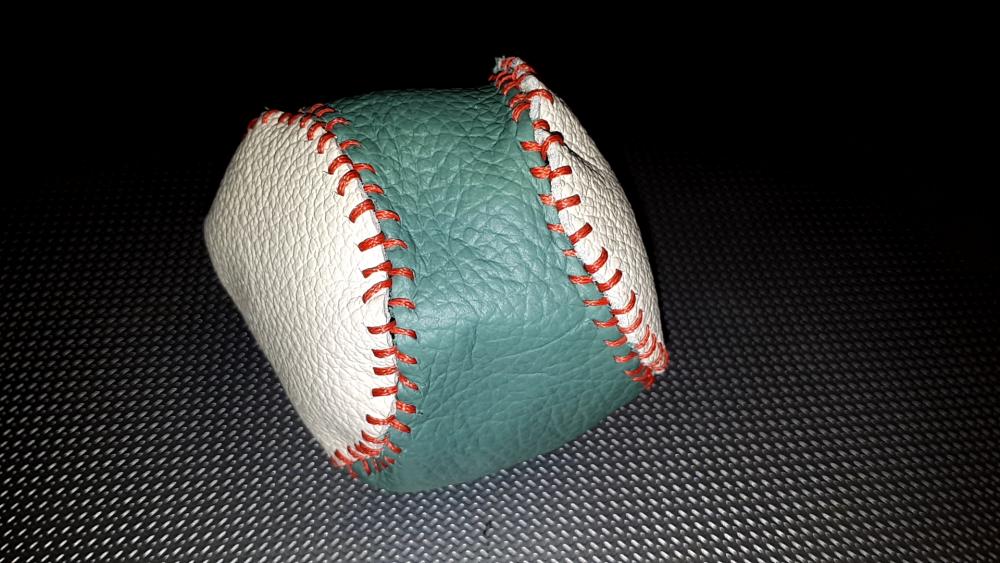
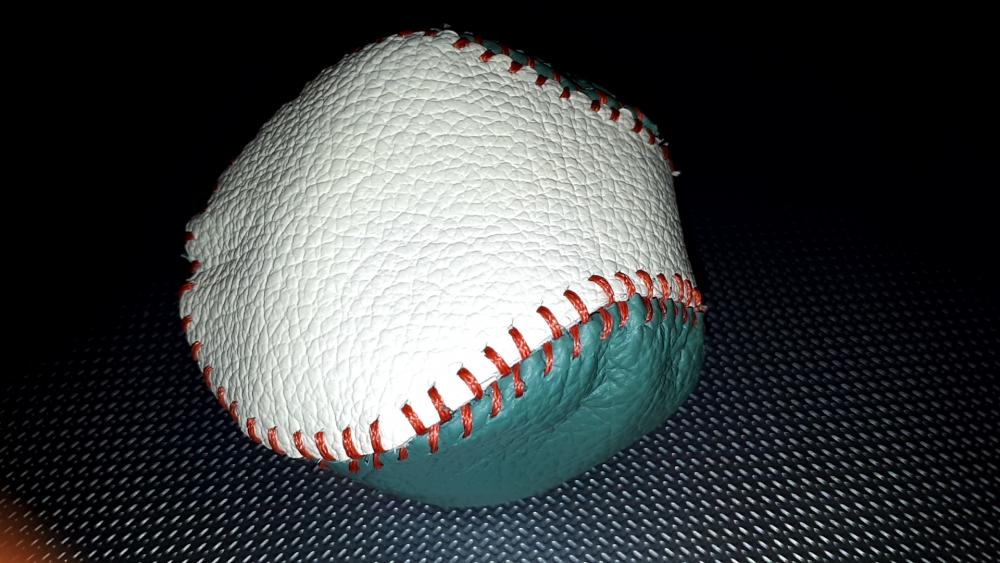
I got a pattern for this hackysack on here some place, so I gave it a go, just for the fun of it. The leather is some chrome tan for a scrap grab-bag from Spotlight (similar to Joanne's Fabrics I guess), stitched with 0.6 Tiger thread at 3.0mm spacing.
-
A work colleague asked me to renovate a man's leather belt. Unfortunately, the leather was past its use-by date, so new 4.0mm black leather, parentage unknown, lined with 1.0mm deer hide. Sewn on my 227R clone.
-
My take on a boot purse
Rockoboy replied to Madmax500000's topic in Purses, Wallets, Belts and Miscellaneous Pocket Items
That thing looks like a BEAST! but a good job all round Is it really heavy? There is something I can't quite put my finger on ... Got it! Is the buckle on upside down, or is it just me? -
First knife sheath
Rockoboy replied to TDragon's topic in Gun Holsters, Rifle Slings and Knife Sheathes
That is a nice looking blade. Do you know the history behind it? Age? Where it was made? Maker? Ohh yeah ... nice sheath. That will protect your knife for many years, and keep it from drawing blood unnecessarily. -
Not fair you blokes! If there was a quality minimum, I would never post anything! Even if you cannot be a shiny example of how to do something, you can be a warning of how things might come out!
-
I believe what you need is Gum Tragacanth. Apply a thin coat then burnish with a smooth burnishing stick.
-
This IS my new method, I love it! It will be dead easy to make a new template each time rather trying to have every size template ready made, which is what I had previously considered. I think the problem would be the size of the punch. Because the punch is only about 6 or 7 mm long, it's still very easy to have it misaligned by a tiny fraction, which might still show up.
-
For setting up multiple lines of stamps, such as along the edge of an article where there might be a groove then a line of stamps then another groove then a serpentine, you can use a set of dividers to mark a slight scratch on the face of the leather to align each groove or stamped line. After marking a line, take your time and carefully line up each stamp. If you are not sure of the positioning of your stamp, give it a very light tap, then check to see if it was perfectly placed. As you become more accomplished, you will find you do not need to check stamp positioning so much - just place it and hit it, rinse and repeat!
-
vegan leather The new trend in leather that they want to create
Rockoboy replied to migdelysleather25's topic in All About Leather
Two points come to mind ... 1. If there are any doubts as to a person's country of residence (possible subterfuge etc), that can be ascertained by the Mods. 2. I believe the OP has misspelt 'PLASTIC' in his 1st post. He spelt it 'vegan leather' ... Are we to assume the vegans who refuse to use leather, are happy to use petrochemicals (and deal with the toxins from the manufacturing process) to produce similar items? -
Sheath for head knife
Rockoboy replied to Rustwa's topic in Gun Holsters, Rifle Slings and Knife Sheathes
Looks like a nice tidy little project. The only thing I see that I might do differently, is the retaining strap. It looks pretty plain, Maybe a line of stitch right around, or some camouflage stamps along each edge, just to finish it off. I do like the way you have balanced the stitching along both bottom edges, even though (I would expect), the stitching under the retaining strap is not functional, but only for show. This what I did with the cases for my head knives, skivers, stitching chisels, boot knife, swivel knives, bevellers and edges, scissors, magnifying glass, sewing kit, pouches for rivets and rivet setters etc etc etc. -
When I was asked to assist with a small leather project for my son's class at school, I came up with a key tag. As the students are 10 or 11 years old, I figured they would be better served by not being given needles. I designed this key tag with lace instead of thread, so they could thread it without a needle..

-
Xmas gift for a friend
Rockoboy replied to Rbarleatherworks's topic in Purses, Wallets, Belts and Miscellaneous Pocket Items
You have riches worth more than any sum of money. Well done. -
I totally agree with you @zuludog. I have seen quite a few of his videos, and every one has given me something to improve what I do. Thanx @kyrrk, unfortunately some people are organised, neat and tidy and some (type 'B') people are not. I am one of the type 'B' people. Not a big deal, it gives me more to aspire to.
-
I think the main consideration is, round holes will become oval holes as the belt is used, but only the hole(s) being used. Having one different shaped hole detracts from the appearance IMHO. Absolutely, way harder to get right. Just one hole, a whisker out of line or tilted askew, and it can really draw the eye.
-
First thing, I can only see 2 pics. Second, I have never used any Kydex, but from what I have read, I wonder if that might sort out both of your problems, the handle and the body of the case maintaining shape as it gets older?
-
First attempt at a belt
Rockoboy replied to Rockoboy's topic in Purses, Wallets, Belts and Miscellaneous Pocket Items
Thanx guys. Not as clean and tidy as some I see here, but it is what it is, and it should last him until he out grows it. -
First attempt at a belt
Rockoboy replied to Rockoboy's topic in Purses, Wallets, Belts and Miscellaneous Pocket Items
He's a good kid, so I reckon he will say its OK, even if he doesn't like it. -
First attempt at a belt
Rockoboy replied to Rockoboy's topic in Purses, Wallets, Belts and Miscellaneous Pocket Items
Thanx for that tip jimi. Something I never considered. -
Can you make the sheath a little flexible and allow it to stretch by rubbing in some Dubbin or beeswax or neatsfoot oil or something similar? Somebody who actually knows what they are talking about will possibly be along soon.
-
All I can suggest for your snaps would be, take the jacket to your nearest supplier of snaps, or a friend with lost of different snaps, and try them all until you find one that fits. As for the pics, I take pics with my phone, email them to myself, then post them no problem at all. I think emailing the pic resizes it. I am not a tech-expert, but it works for me. Depending on just where you are, there may be somebody near you who can assist. I recommend including your location, either city or state or maybe country, in your profile to allow people to help you.