.jpg.d60258221c476480a6e073a8805645bb.jpg)

Rockoboy
-
Posts
1,422 -
Joined
-
Last visited
Content Type
Profiles
Forums
Events
Blogs
Gallery
Store
Everything posted by Rockoboy
-
 It looks great, but I prefer Chicago Screws instead of rivets. I do think those oval holes improve the look of the finished belt.
 -
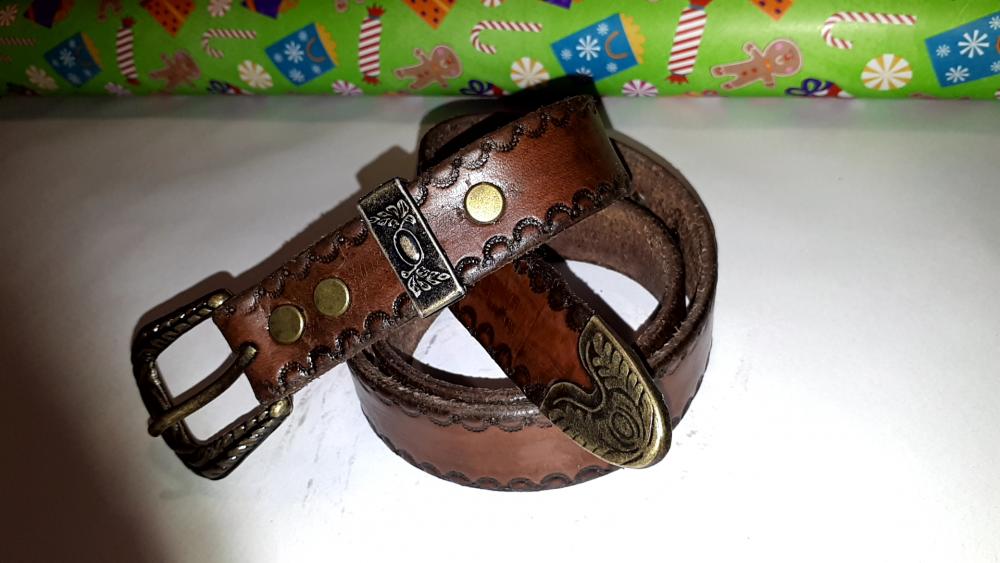
I made a belt for my son for Christmas. Vegtan about 3.0mm thick X 25mm wide, neatsfoot oil then several coats of mahogany antique to get the colour I wanted then finished with Tan Kote, buckle is a Western set from Birdsall Leather. Note to self: Do not apply ANYTHING with lambswool, unless the shag-pile look is the aim!
-
Xmas gift for a friend
Rockoboy replied to Rbarleatherworks's topic in Purses, Wallets, Belts and Miscellaneous Pocket Items
Whatever you did, keep doing that. It looks amazing. I can only hope to achieve something that looks so perfectly nice and clean. -
I have never made one, used one or seen a sap in the flesh, but I am wondering if a wrist strap might be a good idea on something like this. That would hopefully help you hold onto it in a confrontation and/or when using it.
-
Have you got some offcuts or excess hide you can do some tests with some different finishes? If you do, I would maybe start with what you already have, in the way of finishes, and see what works, partially works or fails completely.
-
Item is sold.
-
Hmmm ... I guess you're right. Screen printing would not work, because the paint, if it was thin enough, would run along the grooves. Unless you screen print the colours 1st, let them dry then emboss. That would work if you had a system of where to place the object so that the embossing is exactly aligned to the coloured sample. A simple pin register on the screen-printing station with an identical pin register on the embossing station. Again, I am not an expert in this field, just spitballing here.
-
Not my field of expertise, what about embossing then screen-printing? Obviously that would need to be screen-printed one colour at a time.
-
I think the best idea would be to remove the snaps, install a thin piece of stainless steel (to ensure rigidity and no stain of the leather) an inch past the snap holes, then reinstall the snaps. I have done this twice previously. One time I riveted the thin stainless straight to the leather, and on another occasion I wrapped the stainless in some goatskin to match the inside of the case.
-
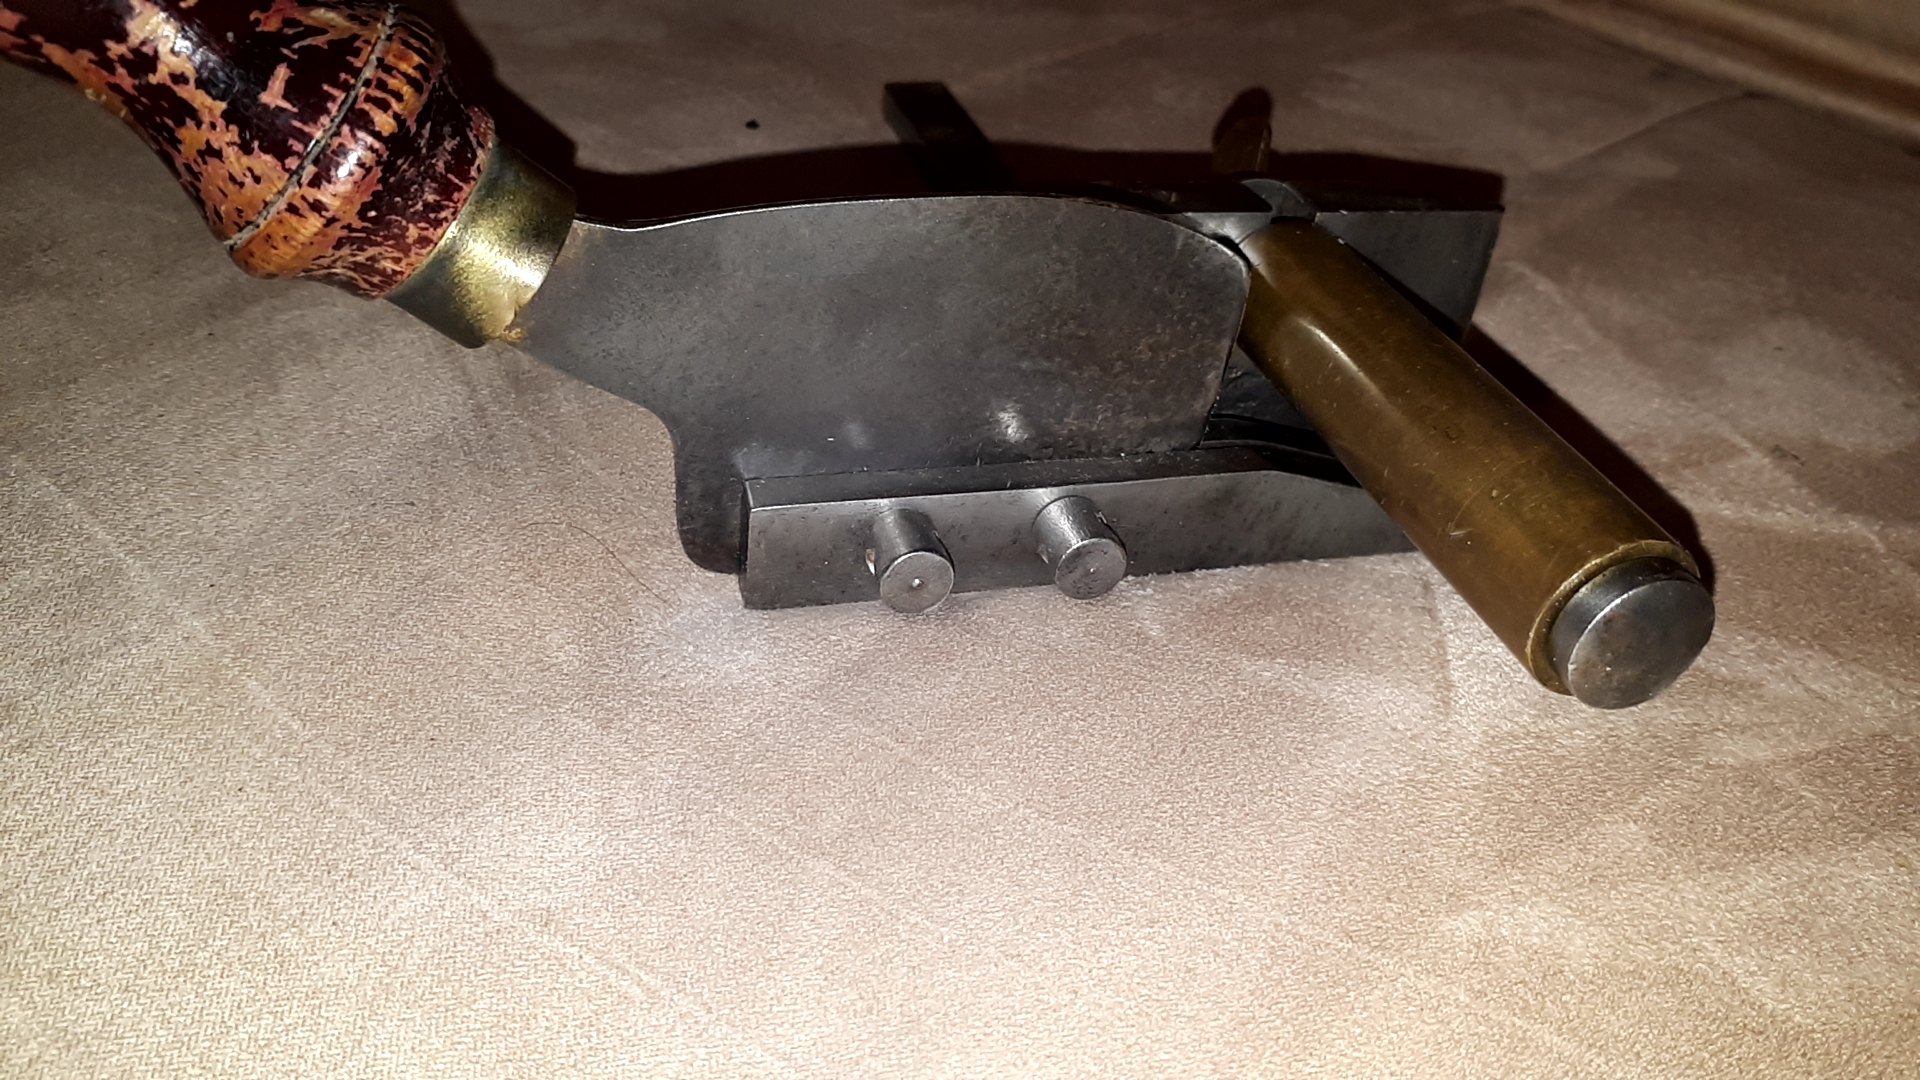
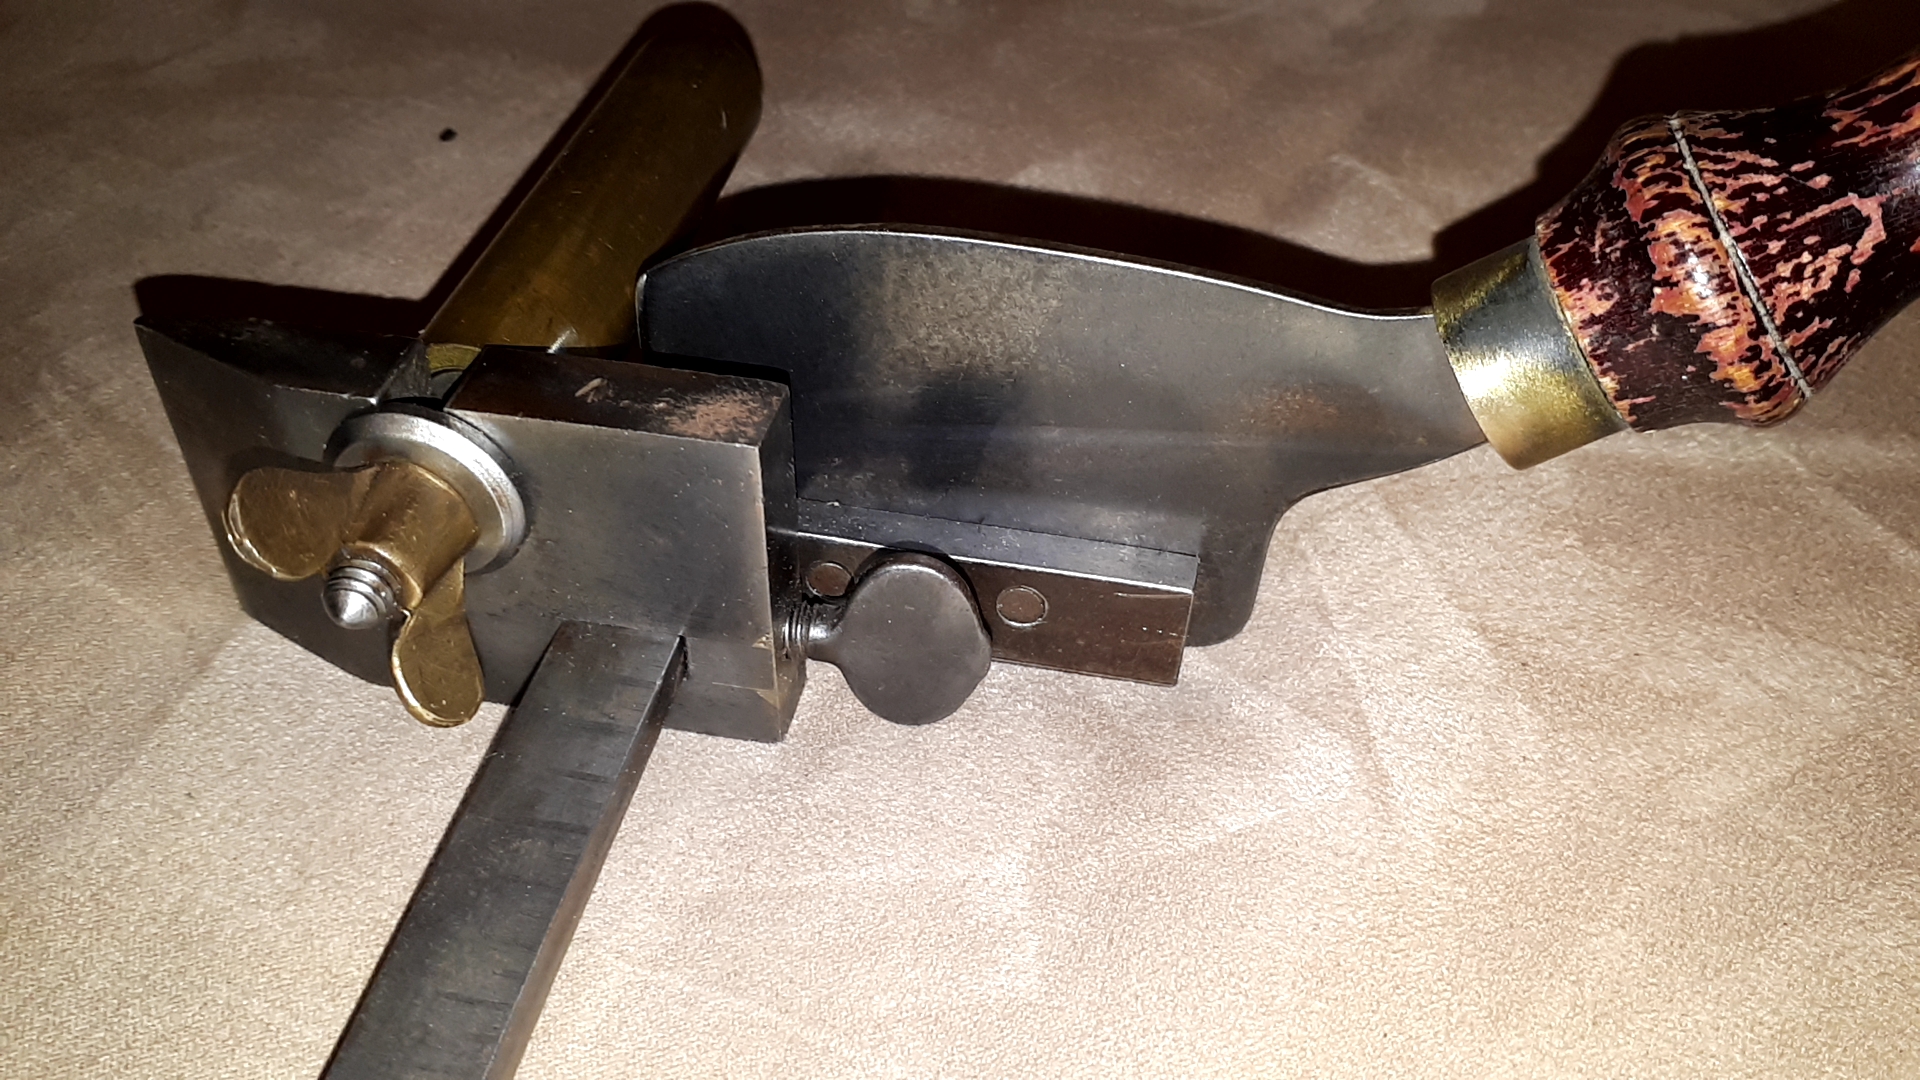
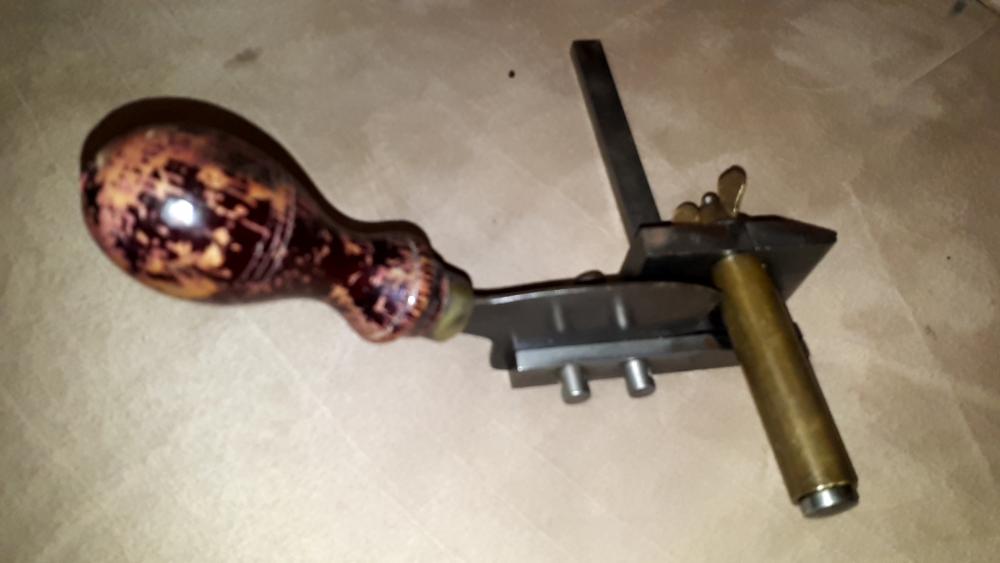
Very similar to my Geo. Barnsley plough gauge, this one is fairly sharp, cuts thru 5mm vegtan easily. Surplus to requirements. Local pickup from Rockingham, Western Australia or posted. Packaged up it weighs less than 1.0 kilogram, so it will be posted locally at buyers expense for $12.00AUD or internationally, cost to be determined. $70.00AUD


-
OK, I think I salted my hides, then rolled them up until I had time to deal with them. I don't think they dried out, maybe I wrapped them In cling wrap ... I cannot remember. I do remember one fish skin I did was about a month after catching and skinning the fish.
-
That looks really good. I wish I could do as good as that!
-
A pic would help me (and possibly other people) to exactly understand your dilemma. To help with the problem I have had with leather bellying out at the front of a leather case, I am considering inserting, and riveting in place, a piece of 3mm acrylic to act as a stiffener. I will post pics when I can get a chance to take some.
-
From my very basic experience tanning a few kangaroo hides and some fish skin, I thought the idea was to remove any flesh and fatty deposits from the skin before tanning. Are snake skins tanned differently for some reason?
-
Sticking with chisels instead of pricking irons...
Rockoboy replied to scrapyarddog's topic in Leatherwork Conversation
I totally agree with all that you wrote. I only have stitching chisels and stitching wheels, which I have had no problem using as described, sometimes with an awl, but usually without. -
posting photos on leatherworker.net
Rockoboy replied to Treesner's topic in All About Us and Off Topic
I think some people email the pics to themselves, which resizes them, save the attachment(s), then post those pics. -
I have no problem with this idea for anything with scales still attached, but none of my fish skins have scales still attached. They come to me from the factory, with no scales.
-
Tartare? Seafood sauce? I have not applied anything to any of my fish skin items, and my key wallet is in use every day. Its holding pretty well.
-
Rare Leathercraft Tool co Kelly Midas/Noel Kelly
Rockoboy replied to Thompsonleather's topic in Leather History
I have lots of their tools, maybe 40 or 50. Is there something specific you are looking for, or are you trying to judge quality? Of the tools I have used, I have found them to be pretty good. Disclaimer: I am not massively experienced, therefore what I believe to be good, might not be so good in the eyes of the true experts. -
There's a mob on Instagram called Mascon Leather who have a table that is 8ft X 4ft with a full size cutting mat, same as the self-healing mats already discussed. No problems with the mat not being big enough! I made a table, I wish I had the space.
-
WOW! That thing is a beast! I wish I had one.
-
I agree with this approach, but is it going to basic for what the OP was suggesting? The photo attached to the original post by @HondoMan is about where I believe a good starting point is. After this information is digested, there becomes a many-headed-monster that bends, twists and changes direction depending on the leatherworker. In fact, as each question is answered, there are sometimes many more opinions, ideas and strategies opened up for discussion. In short, the whole idea becomes so difficult to define, so making what began as a reasonable task, an insurmountable chore IMHO. The best analogy I can give is "Listen a lot, ask some question, practice what you wish to become good at. It won't happen overnight, but it will happen, if you stick at it". There is no way to put all the knowledge of experience into a inexperienced head.
-
I don't believe it makes any difference which way you sew, but you must duplicate the exact method completely with each stitch, so you get the same slant, tension and appearance on each stitch. Personally, I have just been shown a great method. I now sew away from myself with a slight upward slant, with the left needle entering the awl hole first, then the right hand needle is inserted at 9 - 10 O'clock on the hole, and the first thread is placed outside of the second needle which helps to lock the thread.
-
A pic of the stamp (from a catalogue) or some vague idea of what the stamp looks like, might be of some assistance in procuring this item.
-
Can you take a patch to your local thread supplier, and colour match it by eye?