-
Posts
698 -
Joined
-
Last visited
Content Type
Profiles
Forums
Events
Blogs
Gallery
Store
Everything posted by Hardrada
-

Kids first holster and knife
Hardrada replied to Akers's topic in Gun Holsters, Rifle Slings and Knife Sheathes
Capital! Now, for the cutlass baldric! -
Licked it? No. Spit into my anatomical snuff box and then dip my finger in the saliva therein and apply it onto an edge? Yes. Not my standard practice, though. For the important things in life, there's saliva; for anything else there's Tokonole.
-

Zipper Experts? How to Sew This Zipper Connection
Hardrada replied to dzsteez's topic in How Do I Do That?
Not a zipper expert myself, but I reckon you need the stops: https://www.buckleguy.com/riri-zipper-stops/ Of course, you need to buy the stops that fit your zipper (YYK, or whichever brand it is). -
Another item would be cut-resistant gloves.
-
Thanks for the educational explanation/link, @jcuk & @zuludog. I'll see if I can make my knife click-click when I use it to cut from now on. I prefer oil stones simply because that's what Al Stohlman's Leathercraft Tools book said to use. I read that book when I was starting out in leathercraft so I stuck with its suggestion; sometimes you just go with what you learn first and if it works fine you see no reason to try something else.
-
BTW, I don't think the French knife would profit you much, certainly not as much as the half-moon one. I've never handled a French knife but by the looks of it I can infer it uses different techniques. Cutting curves with the half-moon is quite easy, but I don't see how I could use the same technique with the French one. See here:
-
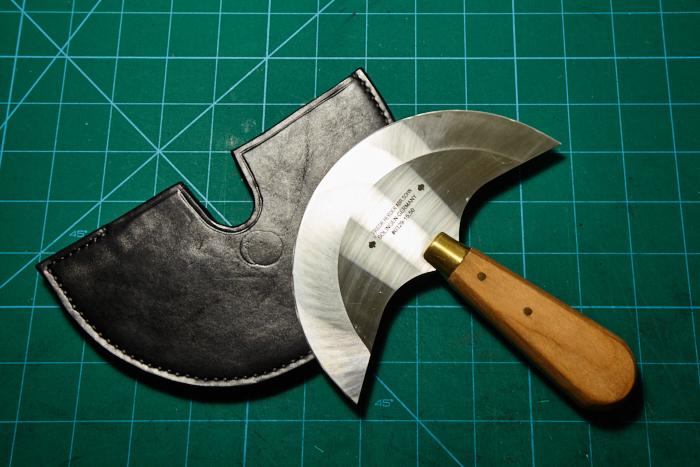
It's indeed not on the pocket size province: But my hands are towards the large size (not too large, though, and I have lean fingers). I find it OK now that I'm used to it, but at times it doesn seem a bit large. RML has a Vergez Blanchard, smaller and within your range: https://www.rmleathersupply.com/collections/skiving-cutting-knives/products/vergez-blanchard-head-round-knife-120mm?variant=706864527 Yeah, call me a shameless enabler, but I do think you should definitely have a half-moon knife in your toolbox. It's not a waste even if you end up using it only for certain tasks. Well used, though, and you can cut straight lines and curves, even tight ones, with ease, as well as skive, glass edges, &c. If you buy a quality knife, it'll last you a lifetime, so again, I see no waste of money there but a savvy investment. The key with these knives is that they must be kept sharp, always. So, make sure you have your sharpening stones, strop, and green compound.
-

Getting slanted stitches only on back side
Hardrada replied to allenayres83's topic in Sewing Leather
You need to pull your arms at an angle, not straight like an eagle. Pull the left arm away from you and ~45° upwards, and the right arm downwards at the same angle and towards you. Basically, you're pulling the threads following the direction of the hole's slant. -
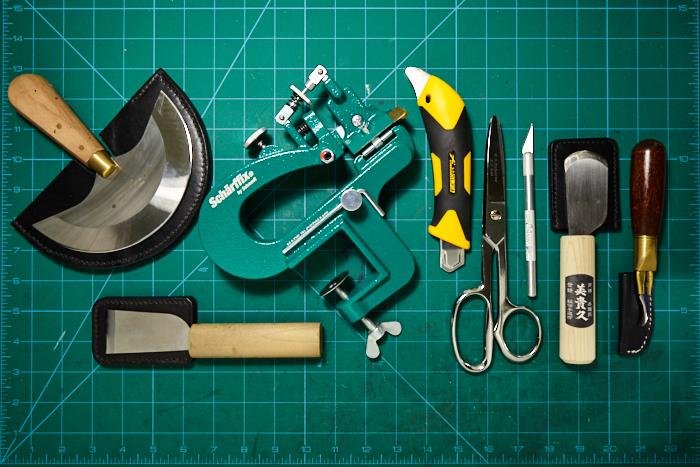
Ahh, curves. Now I see why you're using an Xacto. For curves, the best knife is the half-moon knife, really. You're gonna need to practice with that knife a bit, though, before you can master it; but it's not as scary as it sounds (or as it looks), if you watch the proper technique and then replicate it, you can be up and running pretty quickly. I was cutting smooth curves with mine in no time (same day, basically). Here's another one with techniques. I disagree on the sharpening approach with this fellow, but his cutting techniques are spot on (jump to the ~3:00 mark to see the S-curve cutting): What they mention there is paramount, though: the knife has to be very sharp. Always. This is true of any knife, anyway, not just the half-moon. A dull knife will force you to make several passes and it's also more dangerous than a scary sharp knife, as you'll try to use more force/pressure and if it slides or bounces on you or if your finger or limb is in the way, God help you. Lacking a half-moon knife, you can cut curves with a straight knife such as the Japanese skiving knife by successive straight cuts. Start at 45°, cut, then cut the newly made 'pointy' ends at 45°, and so forth till you've a curve. RE: sanding, I never sand my edges, if they need evening out I glass them with the knife instead. Here're two more references. In the first one several cutting choices are discussed and shewn, and sure enough, he does say that a craft knife (Xacto) is not the best to cut leather with and why; the second one concerns clean edges, so that might be useful to you.
-

Leather for holsters, knife and tool rolls
Hardrada replied to Northmount's topic in All About Leather
I guess that latigo should be OK for sheaths and holsters then. Or at the very least for sheaths.- 4 replies
-
- chrome tanned
- corrosion
-
(and 1 more)
Tagged with:
-

Notebook cover
Hardrada replied to Doug61's topic in Purses, Wallets, Belts and Miscellaneous Pocket Items
Pretty snazzy. -
Just make a small modification and you're good to go. In some cases you have to modify somebody else's pattern, anyway.
-
Xactos are just one cutting tool to have and they're not suitable for everything. What weight is the leather you're cutting? If you have to make several passes with the knife, you're increasing the chances of going off with each pass. Methinks you need to get additional cutting tools, such as a half-moon knife, a Japanese skiving knife, and an Olfa snap-off utility blade. The latter is probably the cheapest and more accessible and easier to use option for you right now (not that that means you shouldn't procure the others): if you're cutting thick leather you can pull more blade out (I normally pull out the blade(s) up to two notches when cutting >8 oz leather). https://www.olfaproducts.com/olfa-l-5-fiberglass-rubber-grip-utility-knife-18mm.html
-
Welcome! Love the ruler with the slits in that third video of yours. Any ideas where one like it can be purchased? (Hopefully not amazon.)
-

Ostrich Foot Wallet
Hardrada replied to Loudcherokee's topic in Purses, Wallets, Belts and Miscellaneous Pocket Items
Stropping them will only get you so far. I know from being there myself. Eventually you'll need to sharpen them or remove chipped edges. This is what I use to sharpen my knives: https://www.danswhetstone.com/product/bench-stones/ A Soft Arkansas (Medium) and a Hard Arkansas (Fine) in 8x2x1/2 should suffice. Since the Japanese skiving knives are straight edge and single-bevel, sharpening them with stones is real easy. -

Latest card holder
Hardrada replied to Danne's topic in Purses, Wallets, Belts and Miscellaneous Pocket Items
One observation on the shell cordovan thing: I think the favoured practice is not to line these in order for the 'Genuine Shell Cordovan' stamp from the tannery can be displayed on the insides of the items crafted with such leather. See an example: https://www.youtube.com/watch?v=2mHnZE-8d9o -

Ostrich Foot Wallet
Hardrada replied to Loudcherokee's topic in Purses, Wallets, Belts and Miscellaneous Pocket Items
Or mark the leather and use a half-moon knife. No ruler required to cut straight lines with those. Or, mark the leather and use a Japanese skiving knife to cut it 'in stages'. No ruler required either (actually, rulers are advised against when using these knives, as their super thin edge can be easily dented). Glue your pieces and, again, use a divider to mark the stitching line and then punch your holes with a chisel. Also, you can use black thread so that any slips in the stitching are much less obvious. Also too, get yourself a #0 beveler and refine those edges. -
Be also careful not to run your fingertips into the blade when pushing the needle in.
-

The Owl Bag
Hardrada replied to toxo's topic in Purses, Wallets, Belts and Miscellaneous Pocket Items
Haha! Love the feather-shaped shields. -
You learn something new every day. Thanks for posting that.
-

Latest card holder
Hardrada replied to Danne's topic in Purses, Wallets, Belts and Miscellaneous Pocket Items
I'm sure @Danne will elaborate, but you can see in the third picture that it is indeed lined with leather—with the chevre. One reason for splitting so thin is so that you can glue two pieces of the same leather back to back and have grain on both sides—instead of grain on front, flesh on back, kinda like what they do with lined belts. Having grain on both sides makes the item more durable and way more aesthetically appealing.


