


PastorBob
-
Posts
1,447 -
Joined
-
Last visited
Content Type
Profiles
Forums
Events
Blogs
Gallery
Store
Everything posted by PastorBob
-

New Holster For Speed Competition
PastorBob replied to AzShooter's topic in Gun Holsters, Rifle Slings and Knife Sheathes
That thick leather sure doesn't move much in the vacuum. I like the idea of the stiffener addition. -
Simply elegant. That could don any of many show horses and the owner would be proud to show it off! Wow!!!!
-
Rifle Buttstock Cover
PastorBob replied to Tequila's topic in Gun Holsters, Rifle Slings and Knife Sheathes
Beautiful pattern on the background. You did a great job carving the letters too. What is the second, parallel stitch line on the back end of the cover? Is it for the liner attachment? -
Congrats to Greg! Surely he will love the memorial koozie for his mom! Well done!
-
22 Plinking Pouch
PastorBob replied to Brokenolmarine's topic in Gun Holsters, Rifle Slings and Knife Sheathes
i love your detailed instructions and your willingness to start over if necessary, to make sure that such a gift is worthy of the recipient. Can't wait to see the finished project. I have not tried the box stitch yet. I will have to get my scraps out and practice. -
Nothing like nature to inspire us. Great work!! Captured nature's beauty perfectly!!
-
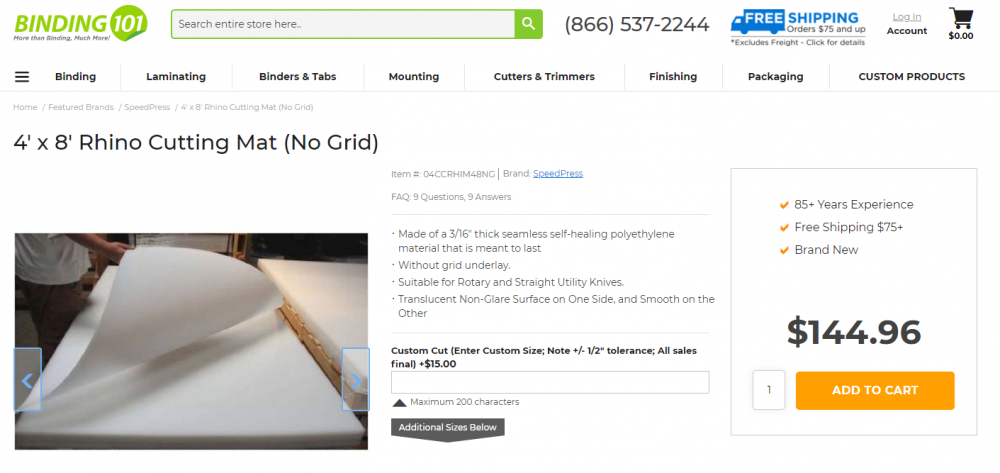
at over 10 years of use, comes out to about $14 a year. Not a bad spend IMO. There are many solutions for cutting surfaces. Lots of good input here to choose from.
-
I use this...I have had it for 10+ years. My table is actually 2'x8', so I cut it in half. Every 6 months or so, I flip it over and use the other side. Little pricey, but I have never cut through it. All of my large cutting is done on it. You can also buy it with a grid as well. I just leave it on the top of my workbench. It also doubles as a way to keep dye of my table top (a few spills here and there). https://www.binding101.com/heavy-duty-translucent-rhino-cutting-mats-no-grid?sku=04CCRHIM48NG&utm_source=google_shopping&prod_id=11767&aid=11767&gclid=Cj0KCQjwlemWBhDUARIsAFp1rLX3vEK9XFgAq-uxCJKZnaejEz9RyeMWAFZe3fimY9n9I1Qgf257nowaAuHhEALw_wcB
-
Jesse James's rig
PastorBob replied to Brushpopper's topic in Gun Holsters, Rifle Slings and Knife Sheathes
Wonderfully done. Have been to the location where he was shot a number of times. Right around the corner in St. Joe, MO. -
That is stunning! I love the design of the lines as well as the superb stitching lines. How much does it hold and how does it taste?
-
From the fabulous Las Vegas, Nevada
PastorBob replied to JonesCoLeatherworks's topic in Member Gallery
Welcome from SW Missouri. What equipment have you added to your arsenal? Pics are appreciated here. -
Gussetless Purse
PastorBob replied to caressofsteel's topic in Purses, Wallets, Belts and Miscellaneous Pocket Items
I think you did a great job for no gussets. I have only done one bag with gussets and it was a pain in the butt. I need more practice. -
Welcome to the forum! Nice start to your projects. That handle is fantastic. I also love the stamping pattern around the snap on your compass holster.
-
Perfect solutions @Gezzer and @K5HEP. I almost have more revolvers than semi's and love to shoot them. Tend to carry a semi for EDC.
-
Starting an informative series of Leatherwork Videos
PastorBob replied to YinTx's topic in Show Off!!
Kudos to you for taking the time to put this together. It is not an easy task. I am guessing for that sub 7 minute video, there are over several hours of work that went into it. Great job. Suggestion - I love the music you chose, may just want to turn it down and leave it at the same volume throughout rather than having it louder when you aren't talking. -
Very creative. I have done the craft shows (motorcycle accessories, not leather) and having everything quickly mobile is key.
-
Hunting knife sheath
PastorBob replied to riy's topic in Gun Holsters, Rifle Slings and Knife Sheathes
+1 for hard to punch straight holes through a welt. I still do it by hand, but try to leave a little extra material around the edge so if it goes awry, I still have some room between the edge and the stitches. Nicely done on the basket weave. Tape sure does help. I normally keep a 2" and 1" roll of blue painters tape on my workbench for such occasions. I have found that if you leave the tape on for too long, it will really pull up fibers on the back side when removed. I try to remove the tape almost immediately after stamping. -
That's a great idea. I had my wife type in all the stamp numbers into a note pad on my phone so I have it with me when I am visiting a store or ordering online. Seems to help as well.
-
Some of my bags
PastorBob replied to angelhc's topic in Purses, Wallets, Belts and Miscellaneous Pocket Items
Very impressive. As you continue, you will see that each bag gets better and better. When you post pics, it gives others a chance to give input such as @toxo where, as the craftsman might not see it. On edge paint, I rarely use it. It can be a painful process. I just normally slick them down and they come out a shade darker than the original color, still giving some contrast. -
That sounds like it would work. Also, maybe sponged on?
-
well done. great job on the stitching as well. should last a few more generations, thanks to you.
-
My latest cross body bag/purse.
PastorBob replied to toxo's topic in Purses, Wallets, Belts and Miscellaneous Pocket Items
Very classy! Thanks for letting me know the size. what does "both ways" mean? The only difference I see is the mongram on one. -
Nicely done. Can't wait to see the strap.
-
My latest cross body bag/purse.
PastorBob replied to toxo's topic in Purses, Wallets, Belts and Miscellaneous Pocket Items
That is a great looking bag. well done. what is the overall dimension of the bag? -
Hello from Southwestern, PA. IronDrake Studios
PastorBob replied to IronDrakeMacGowan's topic in Member Gallery
Welcome to the forum from SW Missouri. I will be relocating to a new shop before the end of the year and have a blank slate. Please share how you set up your workspace...pics always welcome.
