


.jpg.e13e7809a690335a89b8a4ed2e876db1.jpg)
Northmount
-
Posts
6,553 -
Joined
-
Last visited
Content Type
Profiles
Forums
Events
Blogs
Gallery
Store
Everything posted by Northmount
-
@laether Lots of post about servos. Try a google search "site:leatherworker.net servo" without the quotes. Add additional words to refine your search. Tom
-
@tieflyer Please read and conform to the Market Place rules http://leatherworker.net/forum/forum/70-announcements/ Add photos and full description. Thanks. Tom
-
@teatree I assume you are requesting help with a sewing machine. Perhaps you could provide a bit more information such as the type of machine and what you need. I'll leave the post here for the time being until we hear back from you, but think it would get more attention if it was placed in the sewing machine forum. Tom
-
You are probably trying to push the presser foot through the plate or feed dogs. I would suggest that instead of randomly trying these adjustments, you obtain the service/instruction manual and go through the complete setup, starting witht he outlined sequence. It must be making more noise as it runs as well instead of a nice smooth operation. Tom
-
@levinus Moved to Home > Marketplace > Items For Sale > Hand Tools-Leatherworking Tools Tom
-
@SStrey Moved to Fabrication > Leather Machinery Tom
-
Industrial strength is a mis-nomer. It's just a old steel domestic. Have you read this post? Tom
-
@GaryTullos Up to about 3/8" roughly. Tom
-
.thumb.jpg.6e903dd66163ad5672f00f144058c571.jpg)
Sold handbag business, left-over leather needs a home!
Northmount replied to Patti's topic in Old/Sold
@Patti Moved to marketplace ... Tom -
We Need an Adventurous Skilled Leather Worker to Join our Team
Northmount replied to mattattenborough's topic in Old/Sold
@LeHoang @mattattenborough Matt hasn't been active since Nov 22, 2017. Only a single post. Tom -
Consew 226-R reverse stitching issues?
Northmount replied to Dominover's topic in Leather Sewing Machines
Switch directions after the needle has risen maybe a 1/2", but before it rises above the surface of the leather. Reversing directions before the hook has caught the loop may result in a skipped stitch and a bird's nest on the bottom. Tom Edit: That should be 1/4" -
Sheridan Styled Photo Album
Northmount replied to IngleGunLeather's topic in Books, Journals and Photo Albums
I have found places that sell quantity lots, so instead, went and bought a binder with the size of rings I wanted and took them out and trashed the cheap cover. Tom -
Depends a lot on what you are looking for. What type of patterns? Bags, holsters, carving/tooling, Etc. http://www.bighousedaddy.com/ is one that came up recently on another thread. Tom
-
Have a great retirement. Pop in once in a while for an update. Show off the kids and any new leather items. We appreciate your work and advice. Tom
-
Marketplace > items for sale > machinery - sewing and stitching Tom
-
@ljk moved to > market place > items for sale .... Deleted double post Tom
-
As Dwight says above, " The key is the insulation. The building has a minimum of 4 inches of styrofoam insulation in the walls and 6 inches in the ceiling and the floors. " Foamed-in-place insulation is the best bet, reduces air infiltration and exfiltration. My son's workshop uses foam insulation, drywall on the walls, open ceiling, 14" high ceiling, open trusses. Uses nat gas radiant heating, leaves the temperature set at 40 F when not working. Sets up to 65 or so when he is working in it. Shop is comfortable, and stays dry except when bringing his tractor inside after moving snow. Then it takes time to remove the moisture to due to how well sealed the shop is. Remember with radiant heating, only what is exposed to the radiant tube receives direct heat. Convection from those surfaces does the rest. He really doesn't notice the cost of heating the shop due to how well it is insulated. Winter in his location is down to -40. Adequate insulation really makes the biggest difference to comfort and utility costs. Foamed-in-place insulation done right can eliminate the cold steel or wood bridging from outside to inside. I don't believe you will have problems with leather drying out anymore than with other heating systems, as long as it is not too close to the radiant tube. Tom
-
Please include photos. Your IP address indicates you are near South Fork ... for anyone looking for a more precise location. Tom
-
@Mizzy I moved your post to Leather Sewing Machines. Will get more exposure to members in the know. What a find, and from what I understand, unusual to find many used machines in Australia. I see from your IP address that you are in New South Wales. Tom
-
Bag stiffener - Anyone know this product?
Northmount replied to KingsCountyLeather's topic in Leatherwork Conversation
The thing you apparently don't use to iron (press) your shirt or pants. Tom -
If you use a leather point needle, you will get less blow out on the back side. You can also try hammering the back side to flatten it out somewhat. A touch of moisture may help. Keep experimenting to find what works best for you. Note that leather point needles are not good for textiles as they cut the threads instead of passing through or between the textile threads. Tom
-
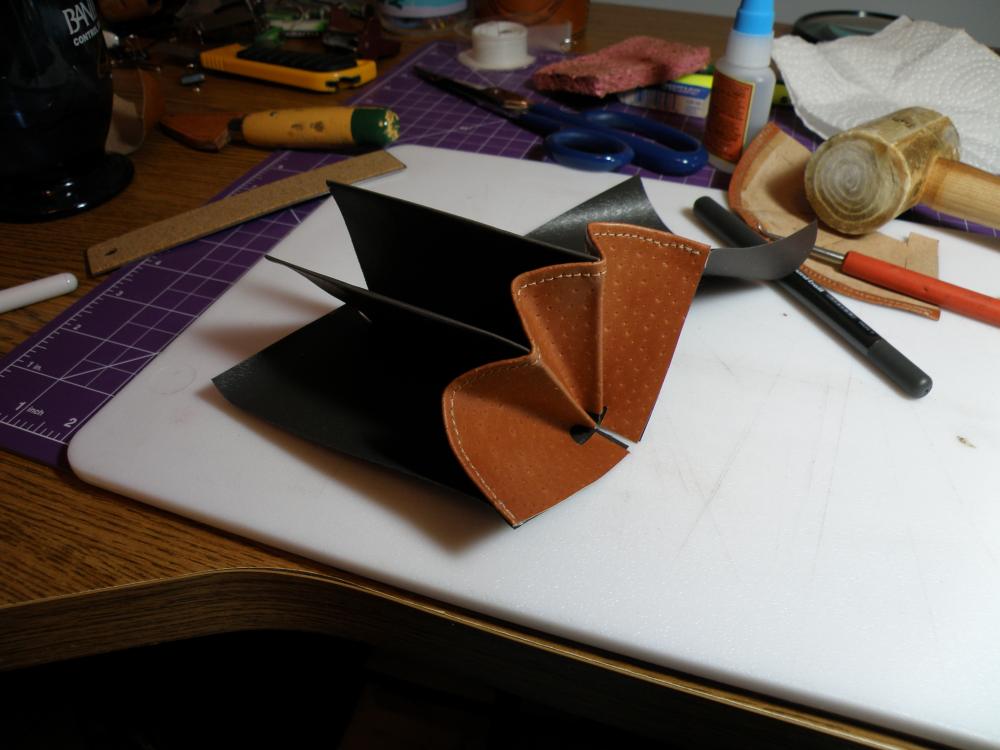
Thanks. Has gone through several iterations to make it neater and to arrive at the proper sequence to allow machine stitching. Glued or taped, hammered flat, stitched to keep it flat and to prevent pieces being pulled out or loosened by wear and tear. Tom
-
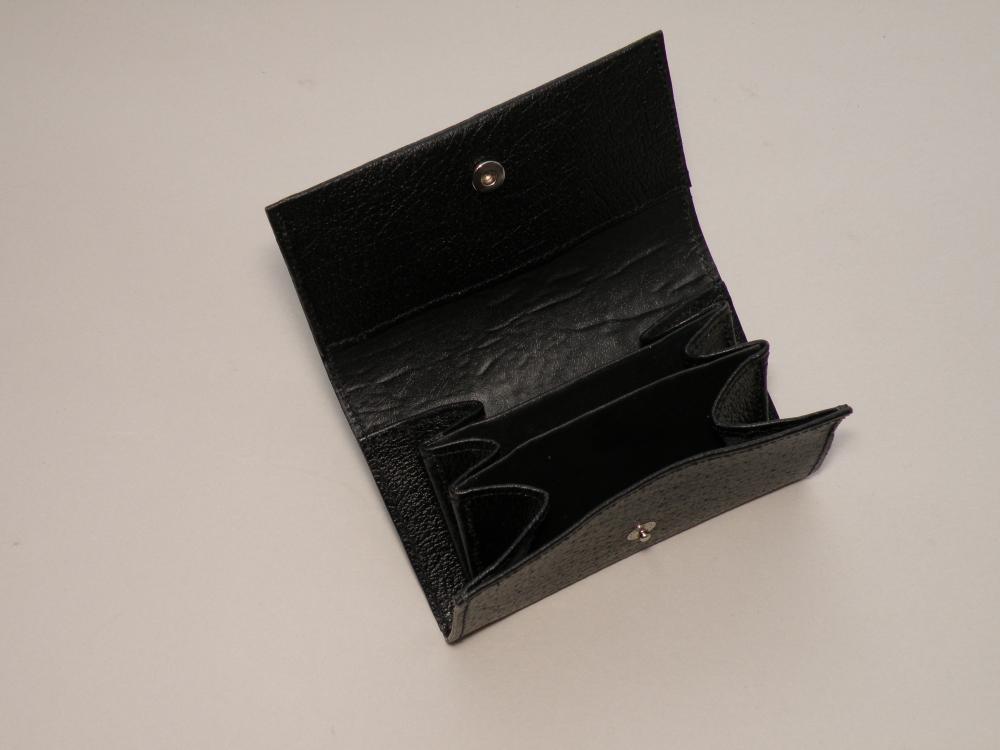
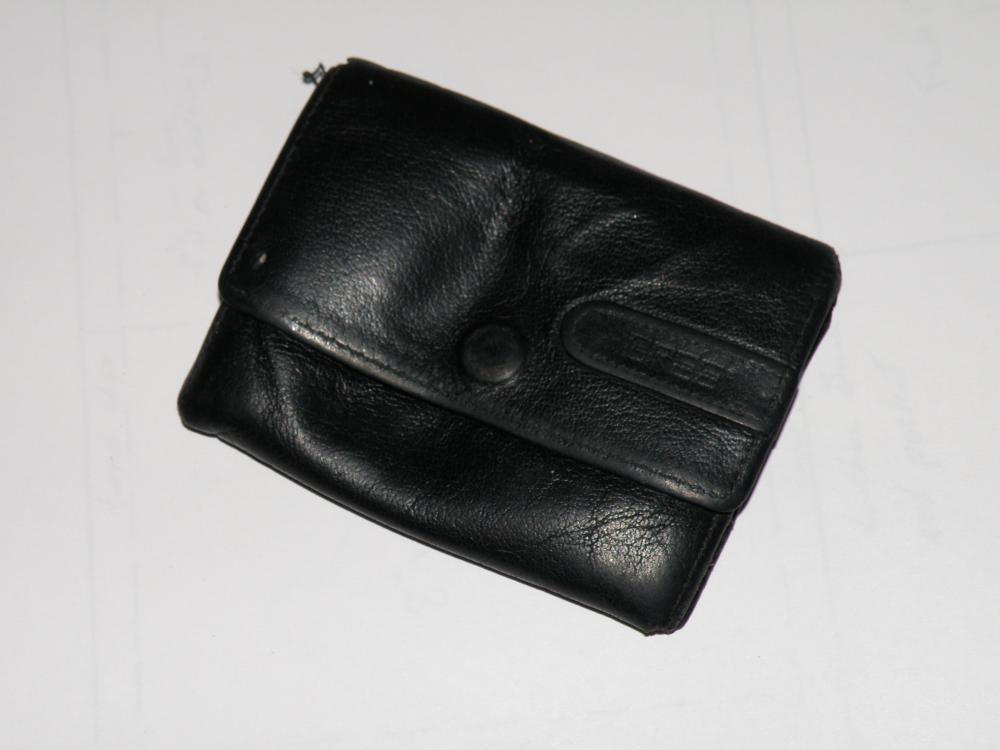
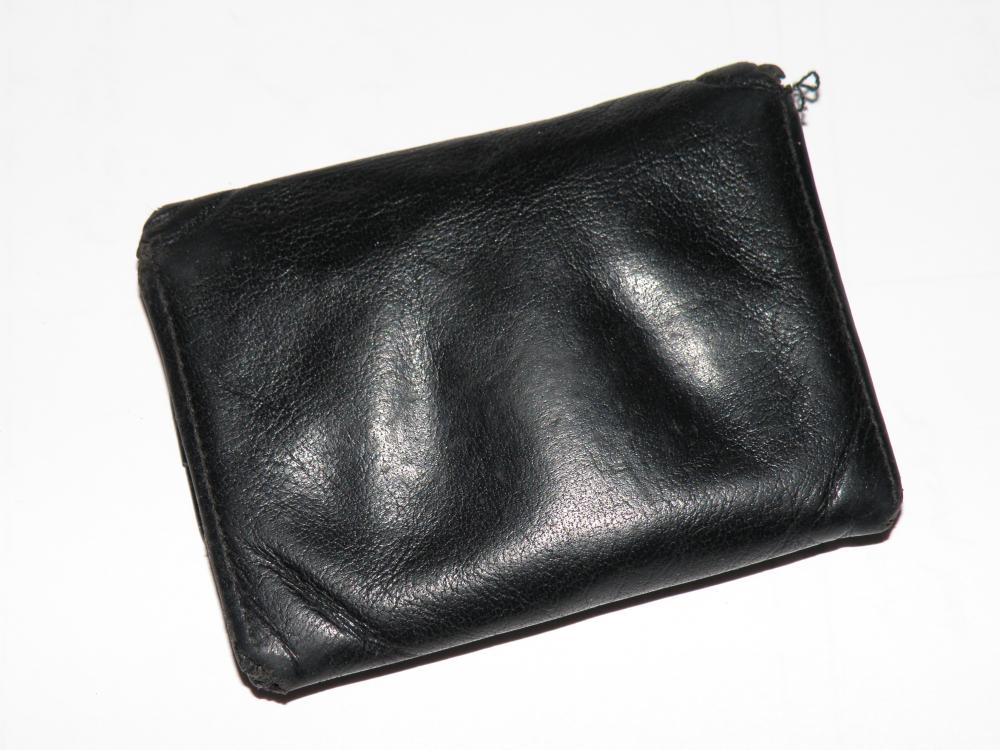
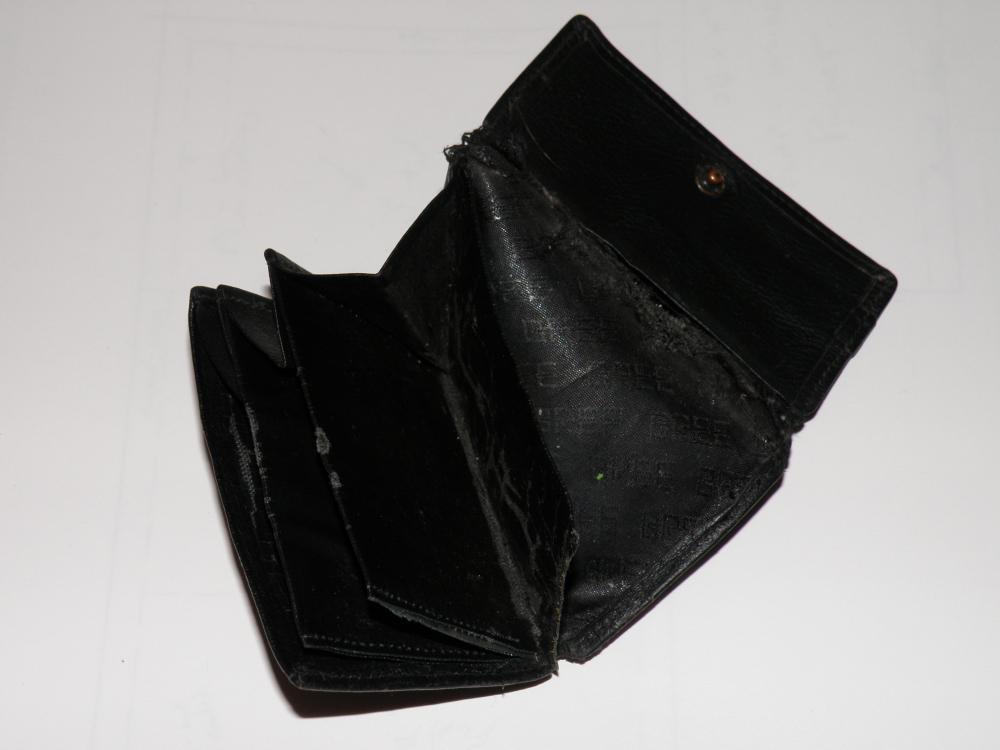
Here are some photos during assembly of a small accordion change purse. Copied from a pre-WWII German made purse that was falling apart. Also PDF with pieces and dimensions. Interior was Coated Polyester to reduce bulk and thickness. Original was a very soft leather. These ones were made using some thin pigskin, so don't have quite the same appearance or feel. And yes they are difficult to work with. I machine sewed these. Some of my stitch lines were bad because of trying to get the needle and presser foot into tight spots. Original one I did, I used a lot of crazy glue. Later ones I used leather tape to hold everything together for sewing. Dividers needed stiffening too. Hope this helps with your project. Original purse: Copies: Pocket Change Purse Rev 1.pdf Tom
-
Messenger bag
Northmount replied to mike6642's topic in Purses, Wallets, Belts and Miscellaneous Pocket Items
100% agree! -
Messenger bag
Northmount replied to mike6642's topic in Purses, Wallets, Belts and Miscellaneous Pocket Items
It is no sin telling where you got a pattern from (unless you stole it and that is the sin). Selling copies of it or otherwise distributing it if copyrighted is. Tom


