


.jpg.e13e7809a690335a89b8a4ed2e876db1.jpg)
Northmount
-
Posts
6,539 -
Joined
-
Last visited
Content Type
Profiles
Forums
Events
Blogs
Gallery
Store
Everything posted by Northmount
-
Use right twist for the outside thread. I recall reading a couple threads on this subject if you want to search for more information. Tom
-
.thumb.jpg.6e903dd66163ad5672f00f144058c571.jpg)
Foam press for leather holsters?
Northmount replied to SouthernCross's topic in Gun Holsters, Rifle Slings and Knife Sheathes
Here are links to a few threads here on LW. http://leatherworker.net/forum/topic/74742-ever-seen-this-vacuum-setup/?tab=comments#comment-491611 http://leatherworker.net/forum/topic/27904-leather-holster-forming-vacuum-versus-press/?tab=comments#comment-175367 http://leatherworker.net/forum/topic/72326-wet-molding-pressing-in-hydraulic-press-etc-holsters/?tab=comments#comment-473131 http://leatherworker.net/forum/topic/22164-cheap-holster-press/ If you want to do a search here, you will find more threads with good information and photos. Tom -
Saddle Lac Sadness
Northmount replied to YinTx's topic in Dyes, Antiques, Stains, Glues, Waxes, Finishes and Conditioners.
As soon as you get a the gel antique on, you have to start scrubbing it off with a wet sponge. If you don't it stays on thick, darker, over the whole item. As an example, saddle tan turns the whole item a dark red. George Hurst has a short video showing how to use it. It would be really nice if Tandy would actually put some instructions on the bottle! Then I might have half a chance of not ruining my project. Don't use gel antique and antique paste on the same project. Tom -
Calgary, AB
-
Moore Leather --- Can you update this thread with photos that have gone missing due to being linked to a sharing site? Seems they have been deleted, moved or otherwise changed permissions. Please add them to a new post here, or to a gallery here. If you need help to do so, PM me so I can help. I can even stuff them into the original posts if you make them available to me. Tom
-
Watch Strap
Northmount replied to SunLynx's topic in Purses, Wallets, Belts and Miscellaneous Pocket Items
Good stuff! Sandpaper works for roughing up the grain side before gluing. Also, use a contact cement. Water based or solvent based. Tom -
For many machines, reverse after the needle has started to rise. So the hook has caught the loop. Tom
-
To create a new Album, go to the Top menu bar, Browse, and click on Gallery. This will show a a number of gallery areas. Click the "Add Images" button. Then select a category. A couple of them are "More Leatherwork" and "Tutorials and Lessons" that might be what you are looking for. Select the category. On the left portion of the screen, there is an area to Create a new Album. (On the right side is an area to pick an existing album. You can access existing albums from there later, or from your profile.) Name the album ---- Add a description ----- Set the ownership (place your screen name here "RockyAussie"), privacy and album features you wish. Click the "Create New Album" button. Now you can drag and drop photos (files) from Windows Explorer (if you are using MS Windows, can't tell you for a Mac) or click the "Chose Files" button, which will open a dialog box where you navigate to the folder location and files you wish to load. There is a limit of 100 files. For each photo that is loaded, select the photo and add a name, tags if any, and comments.. Then click the "Save" button. I have just created a new album for test purposed so I could step through this procedure. I'm away from home so do not have access to my photos, so have loaded a few samples off the web. You can navigate to your photos through either the main Gallery, or through your Profile. Since you have created an album, you will now see the album in your profile where you can manage your photos and add more photos. Click on your photo so it displays larger. Right click on the photo and pick "Copy image location" and paste it into the post. It gives you two options. Display as a URL or embed. Pick embed to have the photo displayed rather than just the URL. (It worked!) Tom
-
For test and demo purposes, used to show how to create an album and copy photos into a post.
-
-
From the album: Toms Test
family brands from about 1920 until 1970 approximately. -
You can email Matt and arrange purchase and delivery through Houston TX if you wish. Both books are well worth while. If you have Australian connections, you will find them especially interesting. Tom
-
Create an album, name it, load your photos into it. Then copy the URL of the photo you have in your album, and paste into your post. You may have to reduce photo size, but I have noticed that the system allows larger photos in your album than when you post in a thread. Tom
-
Please read and abide by the market place rules http://leatherworker.net/forum/forum/70-announcements/ Tom
-
" I usually round over the point at the top. I never cut with it and that is what has bit me when I have reached across. " See this thread http://leatherworker.net/forum/topic/38698-tips-on-how-to-use-a-draw-gauge/?do=findComment&comment=240356 I've never clipped myself, but figure Bruce's comment is quite wise. Voice of experience. I like to reduce risk where I can. I'm a little adverse to slashing my wrist. And you really don't use that top 1/4" as it's not accessible to cut with, other than your wrist! Tom
-
Round off the top end of the blade, helps to avoid accidental injuries. The top end of the blade is of no use when cutting, so no harm to the functionality of your drawgauge. Tom
-
have you done a search here? Take a look at this post http://leatherworker.net/forum/topic/36137-leather-lifts-up-with-needle-need-help-at-wits-end/#comment-223429 You can find more like this. Posts by Wizcrafts and Gottaknow have a lot of good information on thread lubrication as well as many other sewing machine helps and problems. Tom
-
Recommended figure carving tools? (and color question)
Northmount replied to caitobrien519's topic in How Do I Do That?
Looks like your casing is improving. Too wet and the leather is mushy. The swivel knife drags. Stamping gets sort of blob like instead of burnishing and turning a deeper brown. You need a hard surface behind your leather while you are stamping. When I started 55 years ago, I had no option of getting a piece of granite or marble. I used 1/4" Masonite hardboard on a solid table with pipe frame and legs. For up to 8/9 oz leather it worked okay. Wood itself, depending on species is not likely hard enough. Some proponents of sharpening your swivel knife will tell you that you should strop on a hard surface rather than the backside of leather, since the leather deforms and tends to round over the sharp edge you are trying for. I use a piece of 3/4" MDF. Have one for red rouge and one for white stropping compound. I use a diamond sharpening plate labeled as extra fine if I need to remove any scratches from rougher stones or whatever, then of course follow that with red, then white stropping. Whether you use paints or dyes, make sure you allow adequate time for drying between coats. Also before applying any finish or layers of finish. No less than 4 hours, some behave better at 8 hours. When using dye, I sometimes dampen the leather slightly first as it helps stop the dye from suddenly seeping beyond the brush. Tom -
Consew 226R thread breaking and tension controller sticking
Northmount replied to Carrie88's topic in Leather Sewing Machines
Needle system size 135/16 is a leather point, 135/17 is a conical point. Both are the same size/length. Leather point doesn't blow out the back of the leather as badly as a conical point. This version of leather point is like a chisel. Anyone that is somewhat mechanically inclined should be able to help you switch motors. Get a servo with the smallest pulley you can so the machine can run slower. Tom -
If you drop out the music, you could add some instructions to turn it into a small tutorial. Tom
-
Recommended figure carving tools? (and color question)
Northmount replied to caitobrien519's topic in How Do I Do That?
Figure carving tools/stamps are a sub-set of all the stamps. What you are looking for is the main stamps used for most floral carving to do the moon and star. A medium to small beveller, might want to get both a smooth and checkered style. Looks like you need a swivel knife, or need to get yours sharpened and make sure you are casing the leather correctly. For floral carvings, add pear shader, (checkered, smooth, and vertical lines are all nice to have). A camouflage stamp, veiner, and a couple versions of background stamps. And the list just continues to go on and on. But you can do a lot with about 5 stamps. Tom -
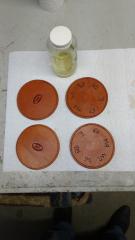
Impressions on Buffalo Leather
Northmount replied to bristolbrandedleatherco's topic in How Do I Do That?
Take a look at https://brandingirons.com/collections/custom-branding-heads Scroll down the page a bit. Bought a hand held brass stamp with a 100 watt heater a few years ago. Use it for both wood and leather. There are other similar suppliers around too. Tom -
Try Rona, Home Depot, Canadian Tire. They all have various metal stock in bars, rounds, angles, aluminum, brass, steel, etc. Tom
-
A photo or two and the purse name and style might help us provide some more assistance. Do you have access to a photos of the finished purse from the vendor? Tom
-
64 year old wallet interior
Northmount replied to Halitech's topic in Purses, Wallets, Belts and Miscellaneous Pocket Items
Available 1963 and earlier for both the log letter craftaid and the wallet interior. May have been available for a few years after as well. The log letters were one of my favourites. Tom -
Here is their FB page https://www.facebook.com/Oaksonauthentic/ Tom