


fredk
-
Posts
5,976 -
Joined
Content Type
Profiles
Forums
Events
Blogs
Gallery
Store
Everything posted by fredk
-
Not usual. I would send it back for exchange
-

This Art Form Is Going Straight To Hell
fredk replied to Reegesc's topic in Leatherwork Conversation
Right, I'm off . . . 1. Johanna's way in her Tandy shop is the way Warhammer shops work now. From 0 table top wargaming players in N.I. in the late 1990s to about 20 groups (estimated at 1200 - 1500 players) now, not all using Warhammer products. 2. Tandy never had a presence in N.I. / Ireland. Nearest was in England and until just a few years before they closed down they refused to do postal delivery to N.I. One branch changed staff a lot and whilst I found one set decent the others were only interested in chalking up sales, they had no knowledge of the products they sold. 3. the OP opening is a rant against Tandy not specifically about the 'art' of leatherwork. Tandy is not the only leather goods supplier out there, as we all know already. Other companies are doing what they do, afair Le Prevo (England) attends 'medieval' fairs to sell leather goods. They go to sell but by having a presence they promote interest in leather working 4. Its naive to believe only one country can produce quality tools. eg Snap-on mechanics tools are all made in USA but they have a poor reputation in N.I.. I spoke to a professional mechanic about Snap-on tools and their life-time guarantee and instant replacement. He told me and showed me tools which were twisted and broken, he said the tools were 'soft' and not fit to use, they broke so often that Snap-on has to replace them. This mechanic now uses a top name of tool, also with the life-time guarantee and replacement, they are made in Taiwan. He's not had a breakage due to poor materials 5. This 'art form going to hell' is because despite our efforts the general public people out there no longer recognise it as such. They are happy to buy a cheap handbag of plasticky 'leather' from Tesco/ASDA/Walmart at £10/$10 than pay £30 for a true leather one. So what are we going to do about it? As we are from all over the world so our markets are so very different I read and look at the most excellent holsters on here, but thats not my market. Only two groups here use firearms; the police and terrorists. The police have to use the government issue holster and the terrorists don't bother using one. I haven't sold a belt in years. People would rather pay £3 for a PVC one from the local Tesco/ASDA/Walmart I'm in a special group which promotes Crafters of N.I. within and without N.I. Despite my approaches they won't recognise leather work as a 'craft'. Its far too long to explain here. Its the same with both certain bodies which promote and set up craft/farmers markets and the insurance companies 6. This 'art form. . . .' ~~ whilst in certain countries the Sheridan or Western style of carving is still wanted, outside of 'medieval' groups no-one wants viking or Celtic lace stamping. My society is very divided.; whilst some will buy Celtic lace others won't touch it with the proverbial barge pole. The 'art work' of stamping and tooling needs brought into the 21st century 7. Its up to leather workers everywhere to advance the qualities of leather and leather work. Its up to us. No one is going to do it for us. Just because a Tandy branch closes we cannot cry,. 'oh they're not promoting leatherwork in my area' What are you and I going to do about it.? With Covid 19 restricting and altering my plans for 2020 I have the rest of this year to formulate my plans of attack for the 2021 season, and those plans are being worked out Are there groups out there you can do some demo or teaching classes to? I tried it a few years ago, it didn't work out, but maybe a different type of demo might. I used to get lots of people standing watching when I made a small purse at 'medieval' events. At fairs I had two Oppos who minded the stall whilst I sat and sewed or made something, that drew a small crowd. Maybe the same in your area, get an Oppo to help out on the stall, do a 'demo' make at that farmers market next Saturday. Whilst show casing your work it also leads to interest of doing from others, especially if you put together some easy to make kits *waffle mode off* -
Actually, my unit has a wood roof suspended over the top. Even in our mild summer that tin box gets pretty hot inside. So if not for dampness, ventilation space at least for air to help the cooling
-
I rent storage space which is made up of shipping containers. They stand on a concrete yard. My unit has a plywood floor but nothing lining the wall or roof. At another storage rental place their containers were stood on natural ground, they had plywood floors as well. My unit is as dry as you'd want it. I have no problems storing leather in it, but I'd not do so in the other place, dampness was coming up though the floor and there was a lot of condensation on the walls and roof. Mould was growing on a couple of cardboard boxes in the one I inspected. If it was me I'd pour a concrete base for the whole area and stand the containers on bricks or blocks to let ventilation underneath them
-
Shipping issues...USPS coming and going
fredk replied to BruceGibson's topic in Leatherwork Conversation
What I found out recently is that a lot of airplanes are still grounded, airlines have gone out of business and a lot of airports are still closed and others are working at reduced capacity. What this means is that space for international airmail is very limited. Some countries are down to 0 capacity whilst most are running at about 25%. Priority is being given to items declared essential, non essential items are being sent onwards by sea freight. -
That passes scrutiny. Its just grand so it is remember; we are own worst critics. When I have to do a fold in leather I first gouge a line then I use a ball-head modelling tool back and forth over the groove in the dampened leather. This usually helps, but not always,
-
?? Subscriber Trunk Dialling ?? I thought that was done away with years ago
-
neetsfoot oil, aka nfo, = oil made from the feet and lower legs of cattle. Neet is an old English word for cattle. Use pure nfo, not compound. NFO keeps the leather fed with necessary oils beeswax = bee processed honey. A bee is fed honey which it turns into wax. Its water soluble at high temperatures but at normal temperatures its a solid. Beeswax helps waterproof (slightly) and keeps the nfo in the leather carnauba wax = from the palm tree, helps add hardness to the soft beeswax Mix the three together. Beeswax & nfo in almost equal amounts and about a teaspoon full (about 5 ml) of carnauba wax to 4 oz of beeswax yup, there is a lot of that. Tales told but these are all tales told over and over again with no proof of their truth or not . . . . 'oh, I was told by my wife that her cousin was told that the friend of one of her workfriend's brother's bowling team said that putting olive oil on his leather gloves rotted them away in a week' Vegetable oils may be detrimental to linen thread but today almost everything is sewn using nylon or polyester which are not affected by these oils. I have experienced leather that someone was treating with olive oil and after a period the oil was going rancid.
-
Back to your gaiters. I presume all the straps pull it closed up right around so there is not much gap? My father was wearing gaiters whilst in a great-uncle's Florida orange grove when he got struck by a (rattler?) snake. They had to lop the snake head off as the fangs were so locked into the leather. This is what he told me. Possible, or was he spinning the tale?
-
I'm feeling in the dark here. Would a B997 beveler do the job? https://tandyleather.world/collections/tools/products/b997-craftool-beveler-stamp
-
I congratulate you. You are one of the very few people who know of these things Its bad luck to be superstitious, but why take a chance?
-
Actually thats easy to do. We were given a large canvas bag and that was it. The bag had been designed in the 1890s, and was still made by guests of Her Majesty in the 1970s. We filled it and then emptied it. Never any interest in its design
-
yeah, right, and spiders, roos, frogs, crocs. . . . The most dangerous thing here (other than terrorists) is the wasp Mind you, I could have done with anti-wasp anklet gaiters when I was a postie. The wasps like to sting ankles
-
afair a kilt doesn't need a hem cos its the width of the loom so both edges have a selvage - a self-edge
-
Excellent. Thank you. I've just started to wet mould a mask. I'm using a polystyrene head to shape it on. I'll be using elastic to hold in on me
-
That looks grand I'd like to see more photos. Maybe some of it on a face? a polystyrene head maybe?
-
Aye, and a little known fact is that tens of thousands, from the Highland Clearance mainly, went as slaves. My town was a major port then and the slave ships called in for provisions before heading to the Atlantic. But this be a deviation. I'm just keeping up with following this thread and the construction of this sporran edit to add, btw do you know there are various superstitions related to bags, purses and sporrans? mmmm, thought not. With sporrans you are supposed to give it to the new owner and indeed keep it yourself with a small leather drawstring bag containing a handful of dried oats. This is to ensure you or the other person will never go hungry. Superstition is that if you don't have or give that wee bag you'll starve to death within 6 months
-
Search out 'Irish Arms' ~~ I don't have any contact details for them. Its been many years since I dealt with them. Last I knew they were based on Co. Louth, but may have moved from there They've made leather items as well as swords, soft clothing and more for many of the top films. Owner is (was? RIP?) Boyd Rankin, a top guy in the way of making things, especially pedantic about it being historically accurate
-
Most definitely YES, it can be to some people
-
Try searching for 'airbrush spray booth' for plastic modellers. They are small, sometimes portable. One of these would do your job example; https://www.ebay.co.uk/itm/Hobby-Airbrush-Spray-Booth-Kit-Craft-Spray-Booth-Extractor-Filter-100-240V/193475341465?hash=item2d0c076c99:g:DN0AAOSwARpdOBpc
-
Use MDF. Laminate it to the thickness you want if its not available. Sand the cut edges smooth. Coat all with two thinned coats of waterproof PVA glue, then three coats of a gloss varnish, sanding smooth between coats.
-
yes, but for small items an arbor press will do the job. I use my Tandy press and metal dies to punch out the bases for game playing pieces from thin suede pig skin neither would I
-
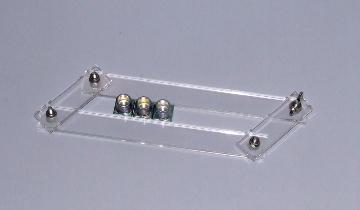
About 6 years ago we had a very heavy snowfall. About 5ft in rural areas, 3 ft in cities. Local airport spent £150,000 on a snow plough/blower for the runways. By the time they got it the snow was gone. The airport has not needed it since. This past winter we had 1 inch of snow for all of 36 hours. That picture of a 'traffic jam'; if that was here, the double line would be white and all those drivers would get a fine for crossing them Here is my letter aligning frame; I posted up about this some time ago, here https://leatherworker.net/forum/topic/88027-some-ideas-for-your-letter-stamping/?tab=comments#comment-601367 Here, there was a man who did that. No longer. Don't know what happened to him. But through him a lot of less-well off people could buy bikes for themselves and children. Now you can't touch a basic bike for less than £300
-
a. Those come in a variety, with different messages b. I saw a live one in Belfast, about New Year time afair. By the feel of the lettering and the smell it certainly felt and smelt like it was burnt in using a laser
-
Try Le Prevo in Newcastle. England. Their tool prices are very easy on the wallet and I think the tools are made by Ivan. Scroll down to 'Embossing Stamps' http://www.leprevo.co.uk/carving-tools.htm I got about 90% of my stamping tools from Le Prevo.