-
Posts
1,653 -
Joined
-
Last visited
Content Type
Profiles
Forums
Events
Blogs
Gallery
Store
Everything posted by alpha2
-
Your curves are getting a lot better, very quickly! Much smoother now. Jeff
- 27 replies
-
- don gonzalez
- sheridan belt pattern
-
(and 1 more)
Tagged with:
-
A splash suppressor, is that a silencer for a water-gun? Seriously, though, could you just hot-melt glue a piece of felt to the inside where the thread exits, to wipe the excess off the thread before it exits the pot? Any excess would drop back into the pot. Jeff
-

My second laptop bag.
alpha2 replied to jasonphx's topic in Purses, Wallets, Belts and Miscellaneous Pocket Items
Nice bag! I would bevel the edges and do some kind of edge finish, doesn't take that much time, and really kicks up the over impression of the work. If I thought I'd put my iPad in a sleeve, I'd make one! But I know me... Jeff -
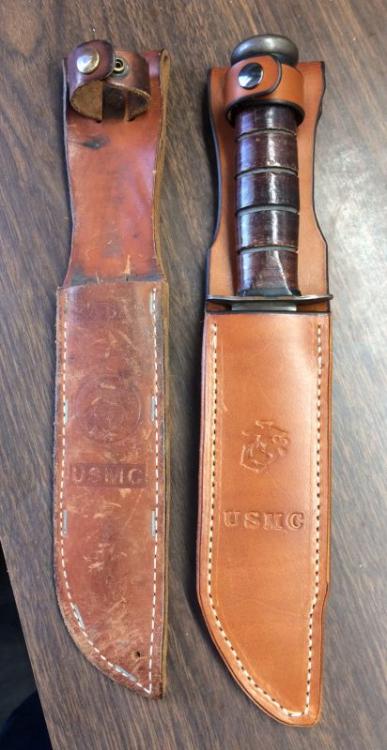
Well, the wider the fold is at the top of the belt loop, the less the sheath will wobble front to back. As you can see with the KaBar sheath, (USMC knife), the fold is fairly narrow, and there is a hole at the tip for a cord to tie around the leg. All the years my brother carried this knife in the Marines, he never used a cord, and doesn't remember anyone else doing it either. He didn't do much slogging in the jungle, though, he was an aviation type. There's a LOT of sheath makers on this forum, so feel free to ask more questions as you move forward with your sheath! Jeff
-
This is the best video on beveling I've seen. www.youtube.com/watch?v=9oC5VytYiSg It really opened my eyes on the subject. Jeff
- 27 replies
-
- don gonzalez
- sheridan belt pattern
-
(and 1 more)
Tagged with:
-
personally, I've had better results with Resolene over Tan Kote. That's just me.
-
That's a tough one. I've done that too. Also the other version, last hole too far from the tip. I tend to leave extra for a "carry" belt, so if they add a holster, the strap is still long enough to leave enough billet with the added thickness of the holster or any mag holders. Not an issue everywhere, I realize. You don't have control over everything the end user will use the belt for, so you can only go with the averages. Jeff
-
"The only problem I see is I should move the design up a little toward the buckle to catch the end of the strap better. I don’t know why I didn’t see that before? Thanks again." I wouldn't worry about that. I've thought that too, and when moving it toward the buckle, I thought it was too tight on the heel of the buckle. I'd leave it. Jeff
-

Newest project wrapped Harley in leather
alpha2 replied to TJPARSLEY's topic in Motorcycles and Biker Gear
Well, that's nice! It's definitely yours now! -

MY Belt
alpha2 replied to Rolandranch's topic in Purses, Wallets, Belts and Miscellaneous Pocket Items
You're young, you'll soon learn to NEVER ask that question. For instance, the wind could catch that buckle, and who knows where you'd end up! Seriously, though, nice work, as always. Can't wait to see what you come up with next. BTW, we were up in Steamboat Springs over the weekend for a conference, and at dinner, Jenny pulled out her new pen...well, everyone had to try it! Jenny says she's never had a pen that wrote so easily and smoothly. Excellent choice on the cartridge/refill! I keep threatening to make her a custom wet-molded case for it, but she won't have it. She loves the pull-up leather one. Jeff- 14 replies
-
Outstanding! Now I'm thinking about making a model of my airplane out of leather... I spent quite a bit of time in the Ventura area in the '60's. I couldn't go back, though. Jeff
-

MY Belt
alpha2 replied to Rolandranch's topic in Purses, Wallets, Belts and Miscellaneous Pocket Items
I didn't mean free-handed without a line to follow! Heaven's, no. And, when I saw that pic, my first thought was, "well, yeah, the APC or whatever is heavy, but they'll still have take into account the weight of the buckle!"- 14 replies
-
I was also going to say that there are precious few spaces that aren't textured. Sometimes, less is more. A little more space between the mulesfoot impressions will tone it down a bit also. I too have a problem with trying to do too much. Then, when I see some work with little tooling/texturing, I'm amazed. Jeff
-

MY Belt
alpha2 replied to Rolandranch's topic in Purses, Wallets, Belts and Miscellaneous Pocket Items
Actually, how do you bend over with that buckle? I've been planning on doing a decorative stitch like that serpentine one you have going there, I assume you layed it out then free-handed it with your 4500? BTW, here's a pic of when I last saw a belt that strong used...- 14 replies
-

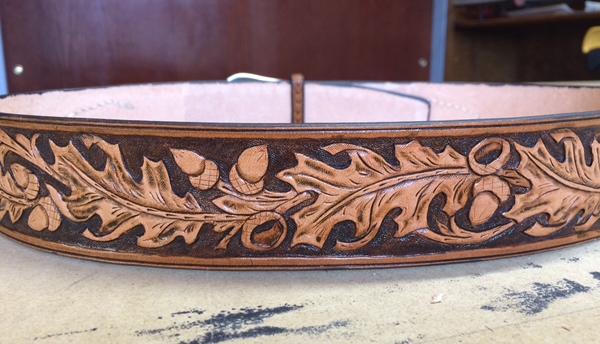
Basketweave Belt, Oak Leaf Arm Guard
alpha2 replied to LederRudi's topic in Collars, Cuffs, Leashes and Leads
Interesting, I never thought of using a template. I'll have to give it a try next time. Jeff -
That's a great first bag! I'm thinking with what you've learned on this one, the next one will be fantastic. Jeff
-

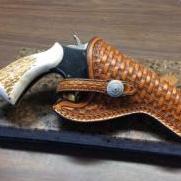
Ruger Blackhawk Holster
alpha2 replied to MoRoadglide11's topic in Gun Holsters, Rifle Slings and Knife Sheathes
How's the firmness of the leather? Did you line it with something else? I can see where the skirt would help stiffen the back side, but with only the double layer at the muzzle end of the holster, what keeps the top of the rig formed? I've got an old pair of boots looking for a new life, that's why I'm asking! Jeff


