Jump to content

alpha2

Contributing Member
  • Content Count

    1,653
  • Joined

  • Last visited

Everything posted by alpha2

  1. Just so you know...yours is the typical first project. You just finished, and already know what you'd do different next time! Be aware, that never stops. I've done a dozen holsters, and more belts than that, and knife sheaths, and collars, and wallets, etc. etc. etc. and I know what I'd do different next time! I guess what I'm saying, is that the perfect project is a moving target. It's the hunt that makes it all worthwhile. Nice first effort, though, shows that you gave it a lot of thought beforehand. (Always a good idea.) Welcome to the adventure! Jeff
  2. Sheilajeanne, I've seen pics of your place. Your problem isn't not enough room...just sayin'. MAYBE too much stuff...Nah!!!
  3. No help here...I stand for two reasons. I was afraid to lower the table without some help holding the whole thing up while I loosened the bolts on the stand, and then, I don't have enough room to put a chair between the CowBoy and my bench. Barely enough room to stand. If anyone want's to donate a few extra square feet of shop space, put it in a box and send it in! Jeff
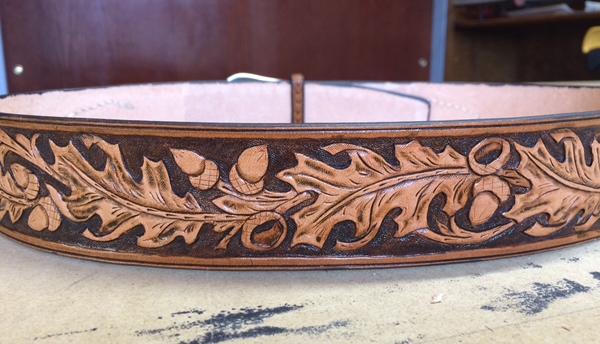
  4. Nice work! I'm loving that border. I've not yet done a border on both sides of a folded holster. I'll have to give it a go. Can't wait to see it finished. Jeff
  5. Nice! What color thread is that? And, I assume a backgrounder stamp on the belt too? Jeff
  6. That's on the back side of the watch while wearing...enjoy your amazing watch band! We've all done something similar. I just did it on my most recent holster. Come to think of it, I have a holster that almost matches your watch band! (Not the one with the thread issue, though.)
  7. I just had a request for a pink dog collar. I couldn't find any pink, except for a "dark pink" paint. I found on this forum that oxblood will do pink. So, I picked some up while in Arizona last week. Today, I tried some out, 50/50 and 2 to 1. It was pink, but actually the 2 to 1 was exactly like the Eco Flex Waterstain in fuscia! Go figure. Jeff
  8. Wow. That's amazing! Thanks for sharing.
  9. Nice rig. Is that Russet dye? I've just tried Russet and even with 50/50 alc. it came out darker than I'd planned. Jeff
  10. Hi, Bob!

    The 4500 I recently purchased came with the blanket set, but it didn't include the serrated feed dog. Is this needed to sew poly webbing? Also, I assume the standard needle plate that came with the kit is the one referred to as the item "D, Blanket" on the parts page included with the machine. Next the "item E, feed dog".

    Also, what thread and needle size would be used for poly webbing for dog leashes and collars? I know it's a 7x3, but not sure of the size.

    Thanks,

    Jeff

    1. CowboyBob

      CowboyBob

      Hello Jeff,

       No,since it has the walking foot & needle feed you don't need that feed dog.You probably could use #  138 & a #23 or 24 needle,what's nice about webbing  most people use a size or 2 larger than what you'd use for leather because the hole closes up & you'll break less needles that way.

    2. alpha2

      alpha2

      Thanks, Bob.

      I'm leaving town Friday for a week, I'll get an order in to you when I return.

      Jeff

    3. CowboyBob

      CowboyBob

      Ok,LMK when you get back

  11. "I just joined yesterday and "...already she has a question?" Actually, that's why most people come here! Welcome! Jeff
  12. If a customer measures an existing belt from the end of the buckle, to the most used hole, and gives you that dimension, it doesn't take into account the additional circumference due to the additional layers of leather in a Range belt. The part that goes into the inside loop behind the buckle, and the fact that the buckle tab and billet part are outside of the main belt leather. The question is, how much to add to the single layer belt dimension? The best method would be to have the customer measure an existing RANGER belt. I made myself a Ranger belt with the Stohlman belt book, and measured an existing plain belt for the dimension. I had to remove the billet part and make another one that was longer to make it fit. Jeff
  13. That mystery one, with the knurled locking ring, looks like my adjustable V-groover. Jeff
  14. All done except for the Resolene. I promise I'll get a pic up when it's finished. Frankly, it's not as good as the last one I did for the Ruger, but this one I'll keep, really miss the one I shipped out! Jeff
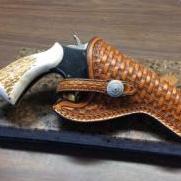
  15. Once again, amazed by your talent. I was going to post a pic of my latest Single Six holster...maybe not! Jeff
  16. So, valafar, does the 45 degree angle take the place of the groove in others? And, do the straight sides of the "v" cut shave flat angles on the edge? Never used one like that. Maybe I need to broaden my horizons. Jeff
  17. I'm not a fan of bevelers that don't have a groove to lay on the squared edge. Less idiot resistant in my opinion. Also, none of my bevelers have that sharp apex. Maybe that's just me.
  18. They do tend to make long, un-necessary excursions into places of deep, dark drama. So I've heard. Not Mrs. Alpha2, of course.
  19. Have you considered some grooves at the flex point?
  20. All of my Chicago screws have fairly coarse threads, so the Loctite thread lock is pretty much necessary. I likely use TOO much thread lock. I've always been one of the "if a little is good, a lot is better" people. THAT has bitten me in the arse on more than one occasion. Jeff
  21. So, we're all thinking the same thing on those sheaths. Best make your own pattern! I've made a bunch, all for the specific knife. It's much easier than with a holster and a firearm. (If guns were flat, holsters would be EASY!!!) Just remember to think about what the blade will do when you insert, and draw the blade. Jeff
  22. Loctite thread locker, I'm sure. I've done mine with the blue, because I know how hard the red is to remove. I tried to remove a couple on a neighbor's belt that I made. Couldn't do it without doing damage. I smell a fish here with the customer. I've been using Loctite thread locker in gunsmithing for quite a while, and a couple of decades with dental equipment before that, never had a failure, unless the threads were coated with grease or something before application. I've since decided to just figure the CS is a sacrificial element if I want to remove it, and use a Dremel to cut a slot in the smooth half, and replace the CS with a new one. I've got bags of them, don't know why I tried to save the one. Just got silly, I guess. Jeff
×
×
  • Create New...