chuck123wapati
-
Posts
7,441 -
Joined
-
Last visited
Content Type
Profiles
Forums
Events
Blogs
Gallery
Store
Everything posted by chuck123wapati
-
i am going to make one like yours for my wood lathe work it will be handy.
-
excellent job indeed!!
-
lol they used to teach this stuff in grade school. a compass, ruler, protractor and square were basic tools back in the day.
-
yw
-
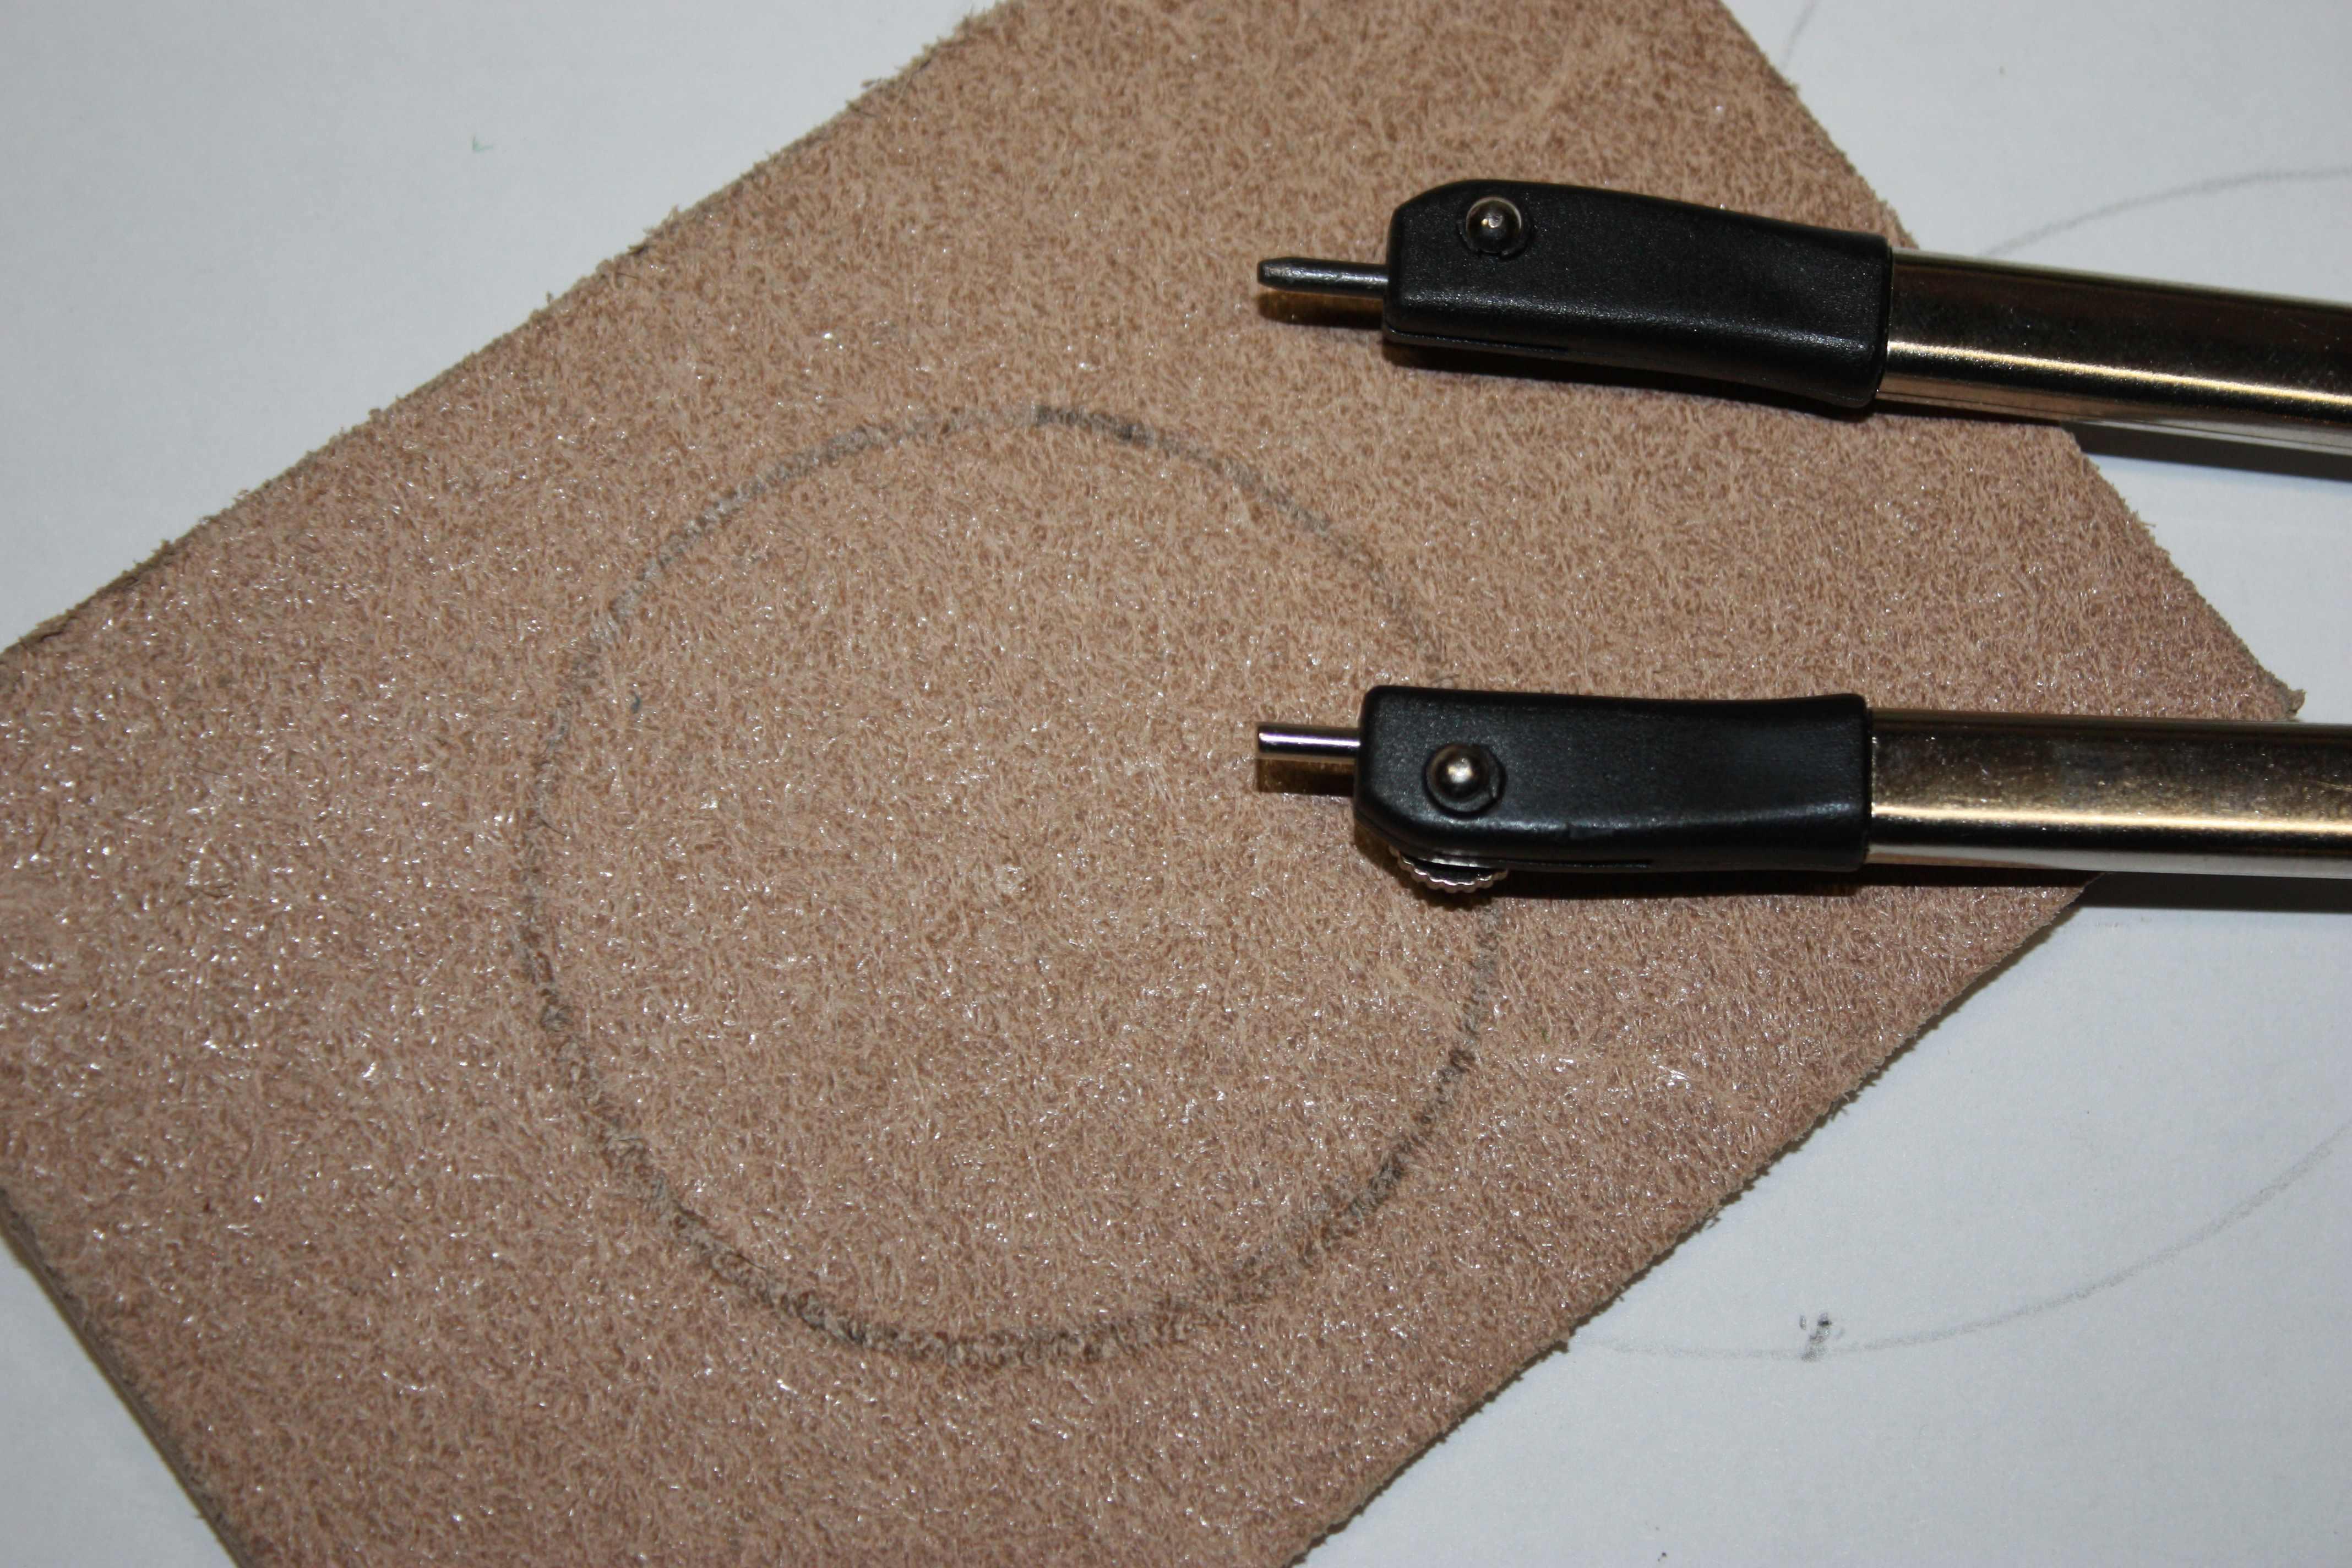
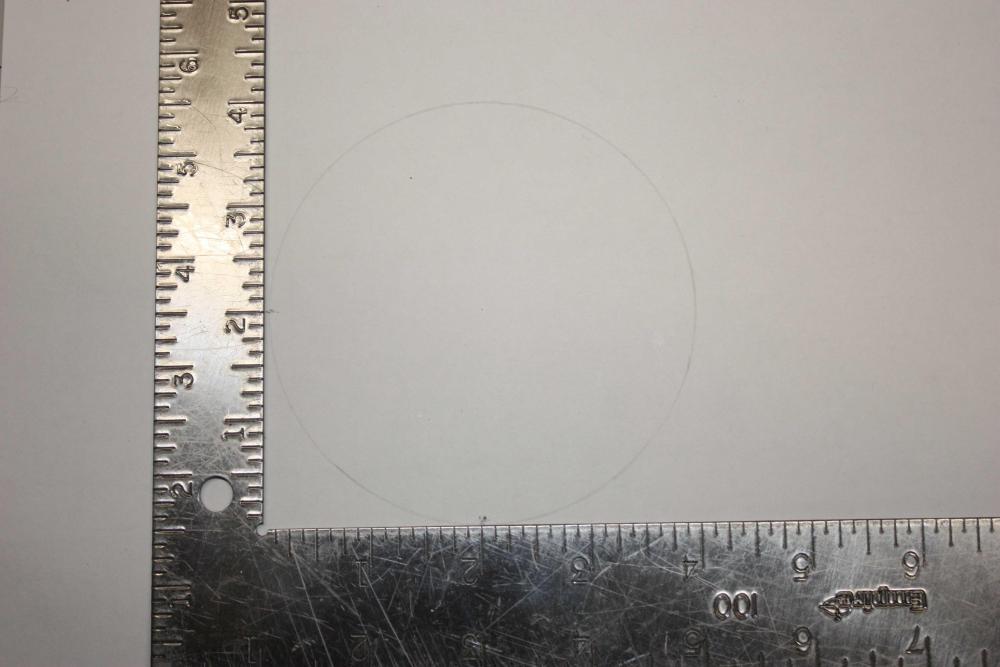
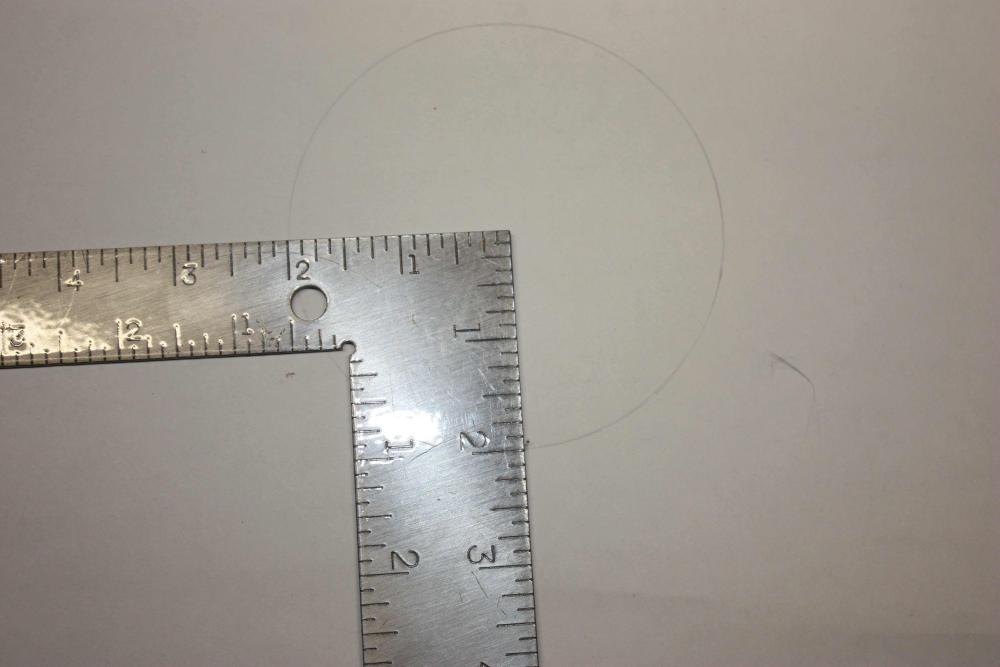
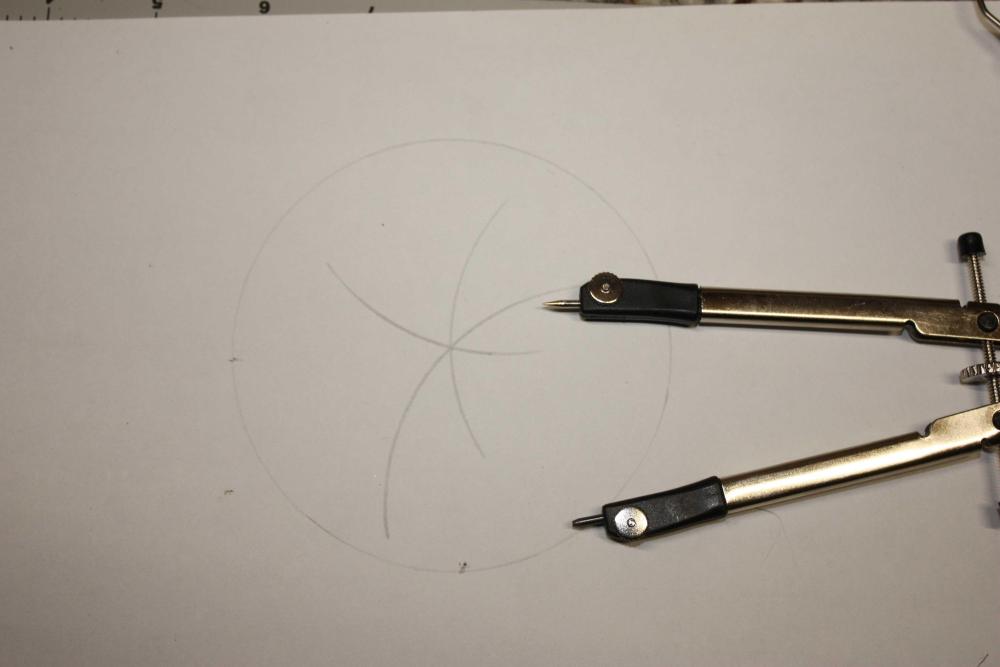
for those without welders here are a couple ways to find center without extra tools. Sorry for the light lines. 1. with just a square find the diameter then divide that number and mark both points on the edge of the circle turn the square over and align it with the marks and the measurments on the square. 2. use a compass , find the diameter divide in half then put thepointy end on the edge and draw an arc, move it anywhere basicly and draw another or a few. 3. The easiest way, buy a compass and blunt the point a bit so it doesnt poke a hole in the leather and draw on the back of you piece. In my case i simply installed the point backwards.

-
1 mm is pretty close especially for leather work. pretty cool!!
-

spring flowers and good food
chuck123wapati replied to chuck123wapati's topic in All About Us and Off Topic
Sorry for the late reply, all is well here for a change that is if your not traveling, the roads are closed this morning due to wrecks on the ice. i took a nice spike elk this year and with the garden we are set in for the winter. Now maybe i can pound some leather lol.Take care and feed your dad well lol. We had a huge elk roast last night with our garden carrots and fresh idaho potatoes. Take care over there also!!!! -
very nice !!! I like walnut.
-
interestingly stupid lol, so plate your atv, here you cant drive on the major forest roads without plates.
-
awesome
-
lol I wish my Rem 700 took one of those.
-
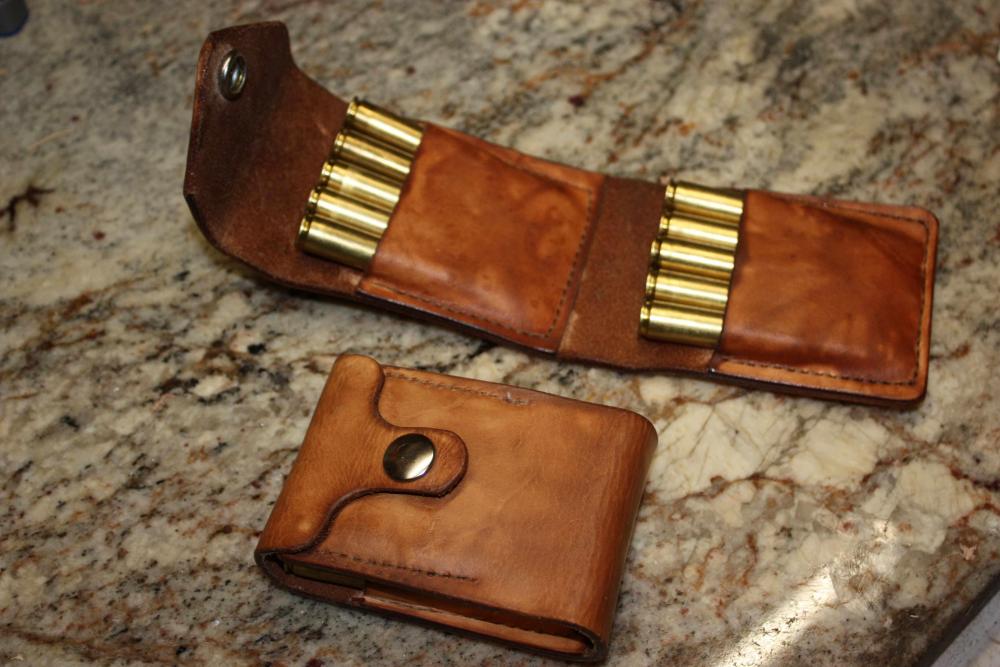
You can have ammo in the magazine can't you? I'm not too fond of that pocket problem as well, here is my fix for that.
-
actually, i misspoke i lengthened it so i didn't have to use a screw in my stock. Sorry I'm getting old lol.

-
Here is mine i used the technique on the original M1 scope risers, a slot is cut into the leather plus the string is wrapped, mine doesn't add rise because it is open-sighted but adds padding for a good weld. I had one stock-mounted bullet loop thing and lost to many shells with it so I tossed it out, they don't work well for rimless cartridges if your hunting requires more than sitting in a blind or tree stand.
-
Strange grey spots on new veg tan?
chuck123wapati replied to Yukonrookie's topic in Leatherwork Conversation
Could have, check the unused part closely for contamination of any particles that may be causing the problem. iron reacts to the tannins in the leather when wet and causes staining. -
Strange grey spots on new veg tan?
chuck123wapati replied to Yukonrookie's topic in Leatherwork Conversation
Iron filings will cause that problem did you sand or sharpen anything near it? -
How tight is too tight?
chuck123wapati replied to LRBespokeGoods's topic in Leatherwork Conversation
you wet mold this type around the cylinder and trigger guard only, the gun should slip in easily/ fall into place but still fit snugly so the blueing isn't worn off by jostling around. -
How tight is too tight?
chuck123wapati replied to LRBespokeGoods's topic in Leatherwork Conversation
put it on a belt and try it. It should come out smoothly with no hangup. -
No room for two needles in stitching holes (pics)
chuck123wapati replied to Dannyman's topic in Sewing Leather
wiggle your needles in the hole up and down side to side, this will stretch the holes or awl cuts enough to easily pull thru. then they will close back up tight like they are supposed to be. Two needles or one doesnt matter. -
is it hi how are ya or how high are ya?
-
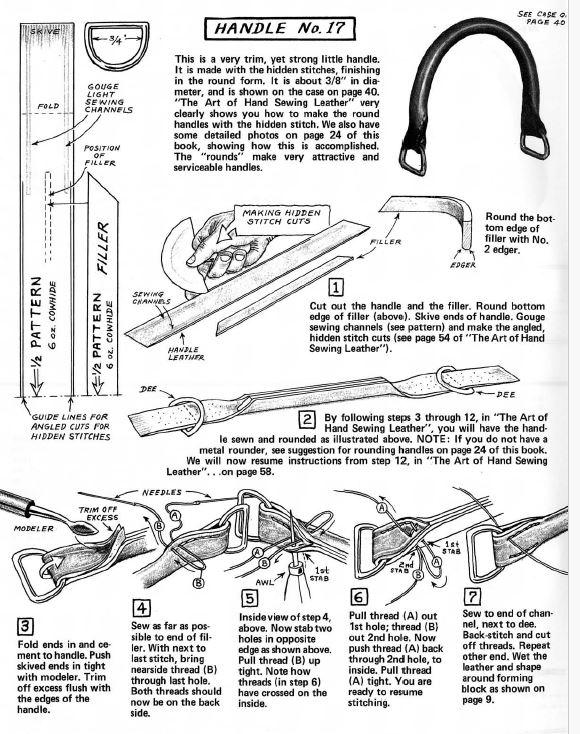
yes it did ,The Art of Making Leather cases vol 2.
-
hey my friend, you can stop by once in while and say hi!!
-
you may have to skive around the holes so the edges around the marble are thinner and can form around it.
-
make and put it in the center of a round handle, punch three holes slightly smaller than the marble ( top and sides) so the marble can be seen and you can stitch the bottom side closed
-
i would look closely at the air brush also, can you set the air pressure on that thing or can you even tell if it has pressure? Your paint should be the viscosity of milk like the others say.