


TomE
-
Posts
1,293 -
Joined
-
Last visited
Content Type
Profiles
Forums
Events
Blogs
Gallery
Store
Everything posted by TomE
-
Thanks, @Hags and @Mablung. My friend is excited to try it out and give me feedback. Going to make an adjustable guitar strap for another friend once I finish sharpening my large bag punch.
-
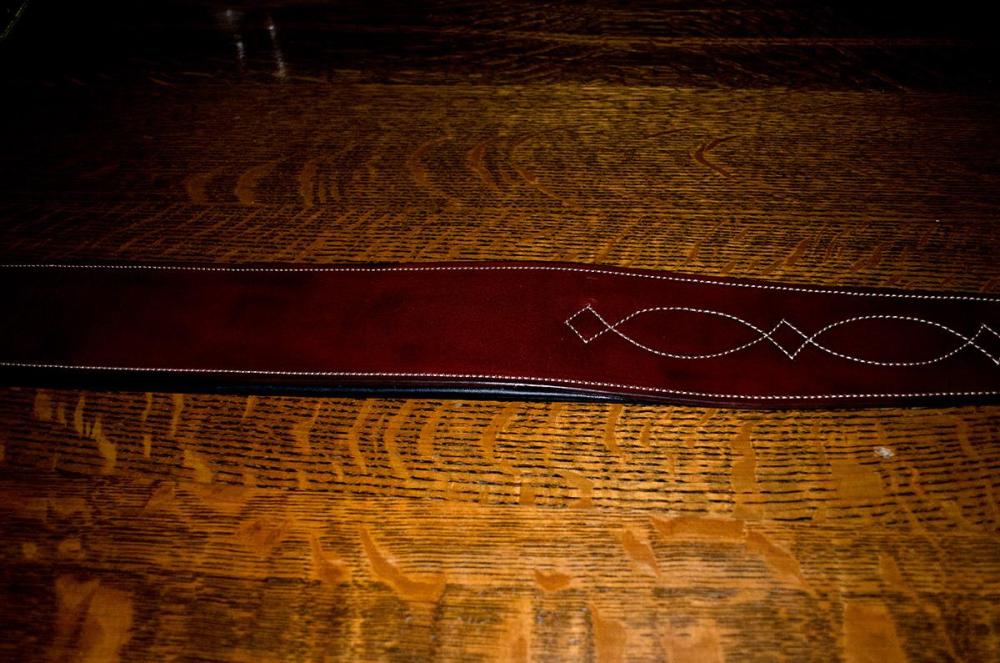
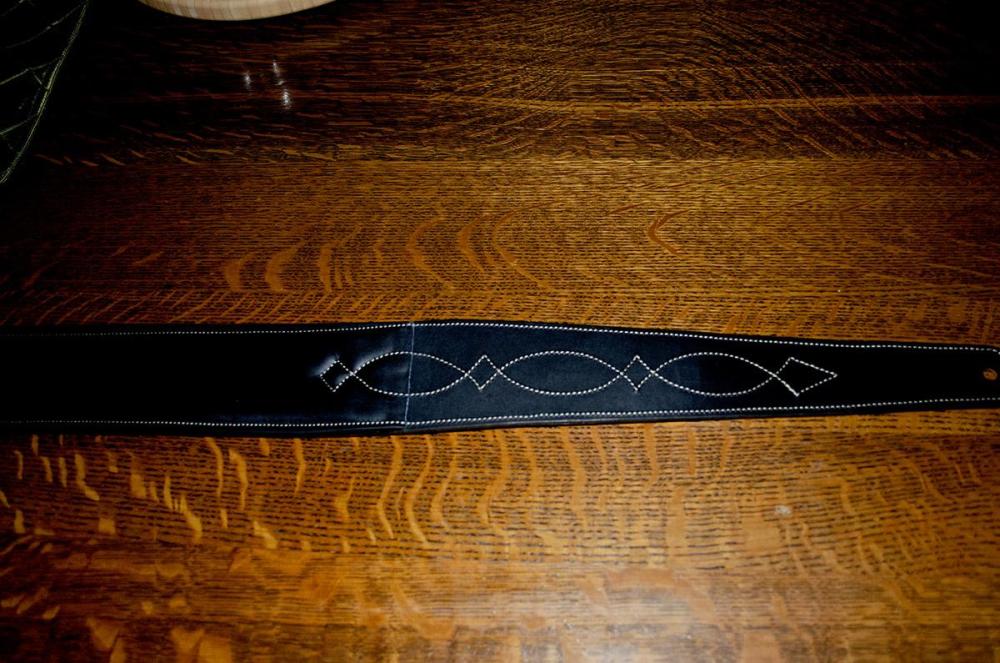
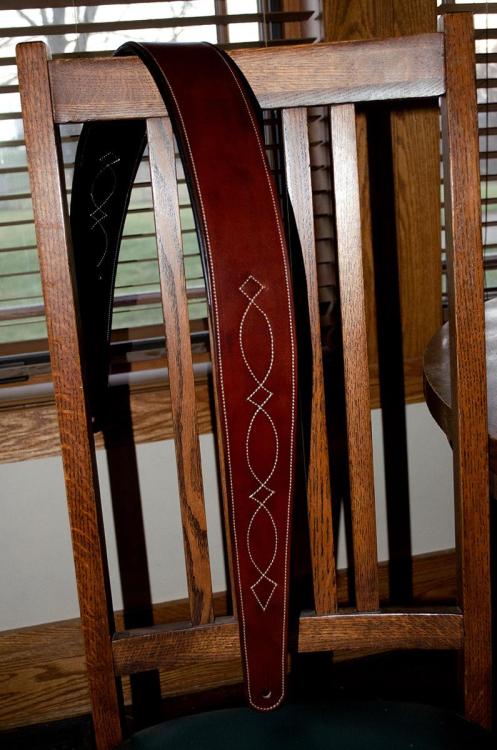
Made a fixed length guitar strap for my friend and farrier. A thank you for shoeing a couple of our horses even though he's trying to retire. The strap is British brown HO bridle leather lined with 5 oz. black napa leather. Padded the middle section. Wasn't sure how to finish the ends of the padding on a 3" wide strap, so I skived the cover and extended the decorative stitching to secure the ends of the pad. Thought about adding 2 additional lines of stitching along the pad but decided this looks cleaner. You might see grooves and wrinkles in parts of the strap. He wanted me to use leather near the belly of the hide because he likes the imperfections. I hope he likes the imperfections in my work as well.
-

Applying oils
TomE replied to bruce johnson's topic in Dyes, Antiques, Stains, Glues, Waxes, Finishes and Conditioners.
Thanks for this practical idea. I really enjoy learning here. -
Looking for flat bed, triple feed purchasing advice
TomE replied to stitchgearhead's topic in Leather Sewing Machines
These machines have been discussed here quite often. Try a key word search of this forum for each model using quotes, e.g. "Pfaff 1245". -
Yes, the Class 14 is pricey and built like a tank. I found a (barely) used one on this forum. Good luck!
-
Those are fantastic! Love the colors. They must have been thrilled with the gift.
-
A manual splitter like the Osborne #84 is very handy for splitting straps, and for lap skives on the ends of straps. However, I wouldn't count on splitting pieces wider than ~2". Depending on thickness, the leather will stretch when pulled through the splitter. It takes practice to get an even split over the length of a strap - harder with wider straps. Variations in the firmness of the leather will affect the split. The Cobra Class 14 splitter will more easily produce consistent splits on wide/long pieces of leather but it can't do lap skives. So if I had one splitter it would be the Osborne #84 or the similar Tandy Pro splitter I use. @bruce johnson sells new Osborne #84s with a sharp blade. Requires skill to sharpen a blade this long. The Class 14 blade is hollow ground and LMC has a sharpening service. The Class 14 is a luxury for me but probably a better choice if you need to split wide pieces of leather.
-
Thanks for this info, Bruce. As always, you are contributing to my leather education.
-
Curious why the customer is interested in horse hide for this purpose. So many more choices in cow hide.
-
Could make the crystal studded strip as an inlay in a thicker strap. See this arrangement with fancy browbands/fronts on English bridles for dressage. The raised edges offer some protection for the crystals. Here's a dog collar with the same idea. https://youtu.be/ThF98j8fqzc?si=3NukH7_Z3PU0SFOW
-
Mine is one wheel with the cotton layers sewn together to make a firm edge. My buffing wheel is 3/4" x 6". Fits the curved blade of a hoof knife. I don't have experience with black compound. Green is plenty fine for my blades. I buy supplies from Farrier Product Distribution or Sharpeningsupplies.com.
-
I agree with @bladegrinder's choices. I have a 3/4hp Baldor motor with 5/8" shafts and a sewn cotton buffing wheel. I use green compound for everything. The other side is a deburring wheel. Has lasted 12 yrs in a machine shed although I'm hearing a bit of bearing noise. I use it for hoof knives and leather tools.
-
Not sure what "curing" leather is but if you're interested in hardening leather you can search the forums for "hardening leather." One method is to use low heat to work stearic acid (a long chain fatty acid) into the leather.
-
Messy stitches on cobbler only when stitching to the right
TomE replied to arich's topic in Leather Sewing Machines
Thanks for the info. I appreciate learning from this forum. -
Messy stitches on cobbler only when stitching to the right
TomE replied to arich's topic in Leather Sewing Machines
I am not familiar with your machine but it looks like the knots are showing on top when the stitches become irregular. Would help to describe the weight of leather and needle and thread you're using. Changing the needle can affect the top tension. I don't understand the problem with your presser feet. If they have teeth then grinding and polishing the feet is an option. -
Although @bruce johnson didn't say it, he sells high quality leather tools that are sharp and ready for use. Check out Bruce Johnson Leather on the web and on Facebook.
-
Thank you @bruce johnson, @chuck123wapati, and @AlZilla for your thoughtful replies. You all raise interesting points that will influence my experiments with leather this winter. Hope to spend more time in the leather shop once I finish the fall/warm weather chores - spreading manure, replacing broken fence posts, and weaning the foals. Thought I might turn this hobby into a business someday but my wife's business uses up most of my time. Maybe there will be a brief span when I'm too old to mess with horses but young enough to mess with leather.
-
Cobra Class 14 Leather Splitter - Complete Unit vs. Head Only
TomE replied to PaulaK's topic in Leather Machinery
I don't know of a good way to skive with a Class 14. It is best used for thinning larger pieces of leather than can be done with a manual pull-type splitter. It is also easier to do long splits on the Class 14. I still use my Tandy Pro splitter for lap skives on the ends of straps. -
Hand tool for setting rivets w/burrs in awkward locations??
TomE replied to ValkyrieEquine's topic in How Do I Do That?
Would a bumping dolly be heavy enough to replace the anvil? One person holds the dolly and saddle and another person sets the rivet. They come in a variety of shapes for auto body work. Eastwood Co. sells quality tools https://www.eastwood.com/fairmount-double-ended-round-dolly.html -
Nice design. I'm interested in seeing how you construct the slings. The only thing I know about duck hunting is that it's cold.
-
Looks like a comprehensive course and teaching is a great way to extend the teacher's skills and understanding of their art. For folks who don't have experience with the listed techniques/tools it might be helpful to provide a narrative overview of the skill areas covered by the course - construction methods, project design, tool maintenance, finishes, etc - or some learning objectives for each lesson. I taught medical and graduate students for 25 years and was asked late in my career to provide learning objectives for each lecture. That exercise made me think more critically about how the topics fit together, how to prioritize them, and what the takeaways were for each lecture. The learning objectives weren't " know this and that" but instead they were "be able to explain this and do that."
-
Bridle and harness leathers stuffed with waxes and oils will absorb neatsfoot oil without a problem. I’ll guess the leather was sealed with acrylic or similar finish. Cracking of the grain may well be due to low quality tannage. Might try burnishing the edges as another test of quality veg tanned leather. Maybe @RockyAussie or someone else can suggest a good leather supplier in your part of the world.
-
Beautiful folk art! Thinking about a summer day (although I'm happy that fall has arrived).
-
Y-knot Lace has a good selection of kangaroo lace that could be braided to make a drawstring. I've been pleased using it for laced reins. https://y-knotlace.com/
-
Looking forward to hearing about your experiences with the raised leather. Always looking for new ideas and improvements.


