GrampaJoel
-
Posts
972 -
Joined
-
Last visited
Content Type
Profiles
Forums
Events
Blogs
Gallery
Store
Everything posted by GrampaJoel
-
yes absolutely!!^^^^^^^^^^^ I’m going to be brutally honest here. Please except it,,, in the kind way I offer it. As the very realistic old leather worker that I am. Wanting you to look at reality. Maybe they aren’t,,,,,but your wallets look like ‘ kit ‘ wallets. Maybe purchased from a supplier, say like Tandy. Something a Boy Scout might make as a project. it’s nice that you have added tooling to the outsides. But your tooling is just in,,,the just above beginner class of tooling. Look at and compare your wallets to the ones JLSleather posted. Can you see the difference? As for the price? I would,,, ask the price of the cost of the kit. And be willing to take less, and chalk it up to the learning experience. So ,,, I don’t know what others would pay, but I’d say less than $15.00. If I was a teen,,,Or just a boy looking for a first wallet. As an old guy that has seen and made from scratch some ugly,,,,, AND,, some pretty nice wallets. I wouldn’t pay money for any of them at all. But you never know what a person will pay money for. So keep going, keep making. IF,, or,,, AS, you continue to improve. Perhaps one day people will be willing to pay whatever you ask. No matter what it is. maybe….. Joel
-
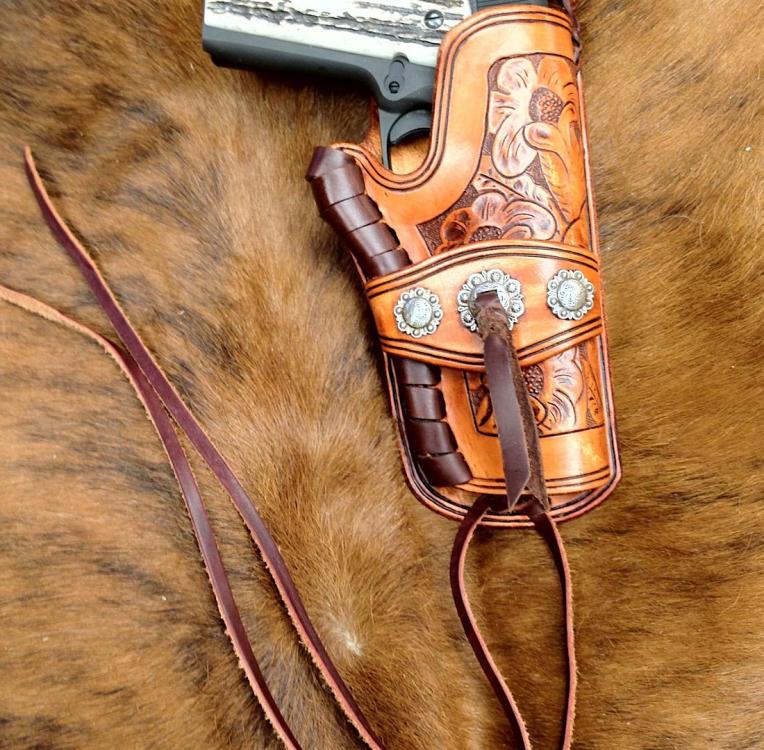
Sling, cuff, lever-wrap combo
GrampaJoel replied to BigBore's topic in Gun Holsters, Rifle Slings and Knife Sheathes
Very nice! did you color the leather, or did it come that way? Joel -
Sold
-
Ok my Venmo is back up and working again so it’s your choice for payment.
-
Yes they are still available. Send me your address and I’ll get them in the mail. I’m in Redlands and with you being in Los Angeles, the postage shouldn’t be very much. Can you do PayPal? My Venmo account is having some type of problem with the app. Joel
-
Holster #2 - for a CZ52.
GrampaJoel replied to Littlef's topic in Gun Holsters, Rifle Slings and Knife Sheathes
For only a second made holster I think it is nice. the blow-up/close-up photos show lots of things that need refining. It definitely doesn’t look shiny and new. It needs better edge work. That coin is gonna catch on everything. I can verify that from personal experience. A refinement of the toe plug stitching, and yada, yada, yada. BUT, it looks pretty cool in a rustic sort of way. Kind of like a well loved and used holster. And it looks good and sturdy. Pretty cool !! Joel -
The Power of ' word of mouth' advertising
GrampaJoel replied to Handstitched's topic in Marketing and Advertising
All my business is by word of mouth. Back when I was doing cowboy gear, I made a pair of hay chaps for my hay guy. he spread the word like wild fire. All the hay guys started coming to me for hay chaps or repairs. I repaired my friends saddle. He told everyone that ask , that I am here. I soon had so much repair work, that I never actually got to building saddles from scratch. although I did build a lot of other horse gear from scratch. Joel -
I include a business card and a thank you card. Often I’ll include an extra piece of leatherwork. A small wallet in a purse. I have even sent high quality wallets inclosed in a purse. The wallet being the purchased item. I like pleasingly surprising people. I ordered a tool a few months back. The tool came in a red gold padded foil envelope package. Just the ‘unusual sight’ of the red gold foiled padded envelope package brightened my day . so I have since purchased gold foiled bubble packing envelops to ship my items in. Wallets in boxes. And the boxes in the padded foil envelopes. I like shipping them too. It makes the item look special in my mind. Joel
-
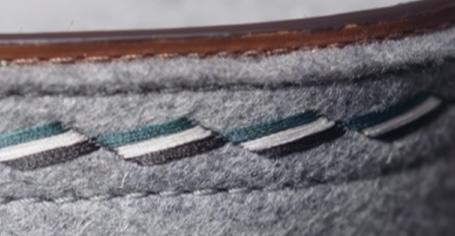
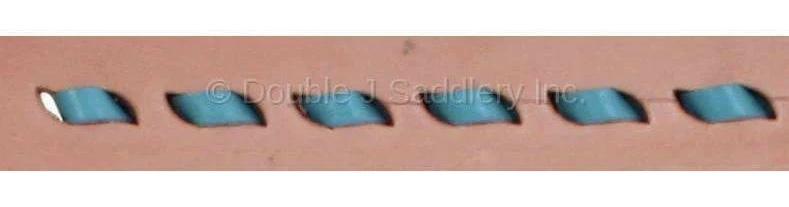
I still think it is a ribbon. The photo you posted show the individual threads with their own twists, and shadows and different lengths. . The OP photo shows a a flat even line. Almost like a buck stitch.
-
I’ll guess. I’m guessing it is a ribbon, not three threads. the stitching on either side appears to be machine stitching. Joel
-
I certainly hope they paid hundreds of dollars for that strap. it seems we are often not paid the artistic and skill value of our creations. So I certainly hope you were paid well. Joel
-
Quick sheath for a buddy
GrampaJoel replied to Garyak's topic in Gun Holsters, Rifle Slings and Knife Sheathes
Very nice job! As others have said, it would have taken me longer just to put the idea together. So is the the leather over a blue plastic sheaf? It looks like some type of gator and lizard leather. very nicely done. I agree with those above. A small demo or tutorial is warranted. Joel -
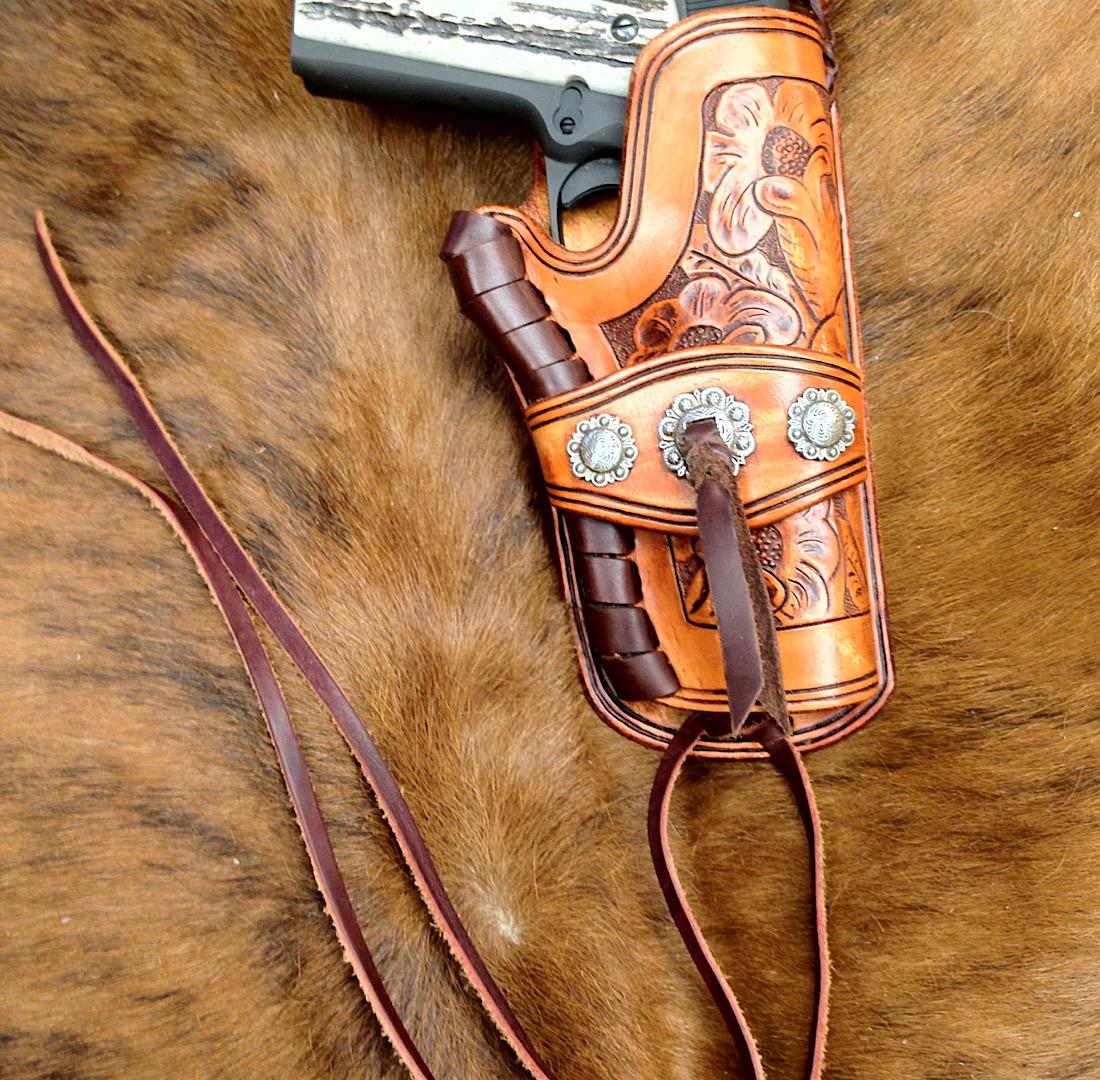
1911 holster
GrampaJoel replied to bladegrinder's topic in Gun Holsters, Rifle Slings and Knife Sheathes
I don’t know much about the correct way to make holsters. I’ve made a few, but not many. Probably less than ten. I will say that I think that your beautiful pistol and the color of your holster go together like peanut butter and jelly! I like it! Joel -
Made this belt bag
GrampaJoel replied to dhaverstick's topic in Purses, Wallets, Belts and Miscellaneous Pocket Items
Thank you Darren. My brain is still spinning from your quality of work. you make it sound sooooooo, simple. But then, I find that masters of all fields of creation, often do, when explaining their methods of creating their works of art. Thank you for explaining your methods. Joel -
Made this belt bag
GrampaJoel replied to dhaverstick's topic in Purses, Wallets, Belts and Miscellaneous Pocket Items
Your leather work always catches my mind and eye. Your choice of color and leather posted above is superb !! Is the back side braiding a pair of belt loops? I have blown the photos up larger, but I still can’t figure out how you did the braiding and edging. Is will you share? Joel -
Hey! How the heck did you get all those itty bitty stars painted?
-
I know I’m late to this thread. I agree with Dewight. Needle/thread don’t match. And your thread tension, appears way to loose. I will add. I loved my cobra 4 for many years. Sewed many , many items on it. Great and small. And I learned to do corners the hard way. I broke a lot of needles trying to turn 90* while under power. So I started always slowing to a stop and then hand turned the power wheel( where the pulley belt is). At the 90* corner, I let the needle drive itself into the leather, and then I would stop. So, before the needle would start to rise., turn the power wheel by hand until you just see the slightest up movement in the needle as it starts to rise. press the presser foot peddle down and when the presser foot rises, rotate your leather into the direction you wish to continue sewing. then foot off the presser foot pedal, and foot on the power pedal, and away you go. I hope this helps some. Joel
-
I would just line it with 1oz. leather of your choice. I think it looks much nicer than painting or even burnishing.
-
It can get pretty frustrating with the two different measurement methods. when I was doing horse gear, belts, holsters and big ( in size) leather items, I was satisfied when cutting it measuring the leather, if I was 1/4” close. I used a stitch wheel and marked stitching points that way. What ever worked was fine. I then poked the holes with a stitching awe. I adjusted spacings as needed as I went. A stitch 1/8” extra in distance , didn’t seen to be a real life changer. No big deal. These days I’m just doing real small items. Wallets and such. I use pricking irons that measure in the little tiny millimeters. The hardest thing I had to adjust to was changing my measuring system. So now days, I measure when making my wallets, in millimeters instead of inches. Oh, how I long for the stitching chisels to be made in standard measurements. I also use a pair of magnifying glasses just to see the measurements. Real fine detail stuff,,, those silly millimeters. of course my newest journey is getting all those little tiny stitches to come out straight. on the other hand. As said above. It sure is easier than trying to add fractions or measuring in fractions. but the truth is, on a belt I don’t think anyone would notice a belt hole off just one or two millimeters. But someone quite possibly might notice a belt hole off 1/8”. As far as the difference thicknesses. It could be just a new or perhaps just an old die that did the cutting.
-
I just took a cheap screwdriver in the right width to match my lace and ground it until it matched perfectly. Then used it for a punch. I prefer flat punch holes for lace. As apposed to round holes for flat lace. btw, the holster is what the customer wanted. He brought me a photo and I duplicated it. With minor changes so as not to be an actual copy. Joel
-
I always used dummy shells and stitched one at a time. With the shell hanging in a looped holster ‘by its base’ there isn't room to just make loops. I did measure, but I used a physical shell in each loop. Joel
-
Woven bags
GrampaJoel replied to Chux's topic in Purses, Wallets, Belts and Miscellaneous Pocket Items
Thanks for the pictures. I think you did a very nice job with all three of the bags. The grey one just catches my eye, for sure. It has that ‘expensive’ look to it. I think you are on the right track. Good luck with your venture into leather working. Joel -
Woven bags
GrampaJoel replied to Chux's topic in Purses, Wallets, Belts and Miscellaneous Pocket Items
I really love the grey one. Is that nubuck leather? I see they have a fabric lining. Does the woven outside leather have a backing to stiffen it and keep it from collapsing, after some use? I would love to see more of the grey one. -
Sticky backing on card stock patterns?
GrampaJoel replied to GrampaJoel's topic in Patterns and Templates
That strap has such a finely defined line. I am amazed that there is no bleed over in that textured surface from the coloring. you do very nice work. -
Sticky backing on card stock patterns?
GrampaJoel replied to GrampaJoel's topic in Patterns and Templates
Duhhhhh, Double sided tape! Of course. I often use it instead of glue where I plan to sew. thank you Danne !! Joel