


mdawson
-
Posts
51 -
Joined
-
Last visited
Content Type
Profiles
Forums
Events
Blogs
Gallery
Store
Everything posted by mdawson
-
Personally I like the look as it is, each to their own :-)
-
Hi all, Thanks for taking the time to respond, apologies for tardy acknowledgement, I assumed the forum software would notify me of responses to my query which it didn't, I probably need to look at my preferences :-) Dwight, interesting idea, hadn't thought of that, will give it some serious thought although I might have the suede extending between the layers (appropriately skived). Matt, I know the facts on the strength of epoxy but murphys law (& my paranoia) tells me epoxy on non porus surfaces would let go and I'd lose the badge. Bob, still thinking this is my preferred option, I like the mechanical 'lock'. Mark
-
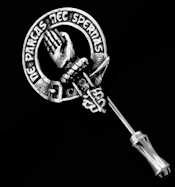
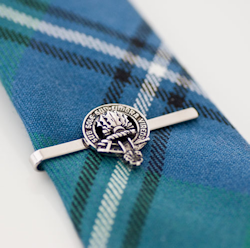
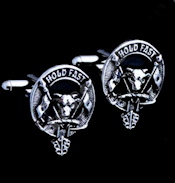
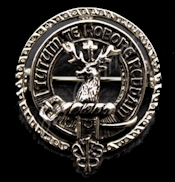
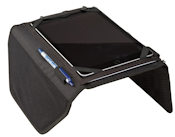
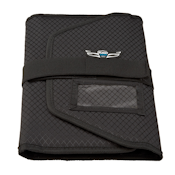
Hi All I'm planning on a tri fold compendium style case for my iPad something like below but for some time have been mulling over how to decorate it with most of my ideas beyond my newby abilities. I've recently come up with one concept reflecting my Scottish heritage with two layers of leather glued together with a cut out in the top layer the shape of a clan crest badge and the badge itself set into that recess. This being on the outer flap. My problem is how do I fix the crest badge, there are several styles of crest badge with different fastenings to use as source, cufflinks, tie pin, tie slide, badge, all of these are roughly 2cm across. Cufflinks Tie Pin Tie Slide Badge I have no problem removing/modifying the existing fastenings on the back of the various styles but being low melting point pewter I don't have the knowledge/ability/equipment to solder anything to them and as the badge has open areas I cannot tolerate any glue squeeze out which would be immediately obvious. The other issue I have is to keep the entire assembly minimal thickness as any excess will make that flap stick up. So far my ideas are :- 1. Cufflink, remove the swivel pin and put the 2 remaining legs through the bottom layer of leather and fold them out although bending them may be difficult if they're steel depending on how hard the steel is as they can't be heated without affecting the pewter. 2. Tie pin, simply put the pin through the backing leather, although I feel that the badge would wobble around with only the single point support. 3. Tie slide, cut the back of the slide off but keep the front 'arms' and trap the arms between the layers of leather, with a skive to minimise the 'lump'. Probably glued and stiched to the back layer to keep it stable. So far I'm liking option 3 but any ideas would be most welcome.
-
Hi, I noted this thread a while back, but not tried it so cannot comment on whether it would be appropriate for your situation, I'll be interested to hear how you make out.
-
Hi Your profile does not mention where you are, if you’re downunder you can get knurling tools from Machiney House (Hare & Forbes), Amazon has them or just about any machine tool supplies will have a range to suit anything from a small hobby lathe up. As you mention making tools from stainless steel I imagine you’ve already discovered how SS work hardens, I’ve only ever used a knurling tool on mild steel, I would be very interested to hear your experience knurling stainless when you get going. Mark
-
Hi Paul Ian Atkinson has a couple of videos on tools to start out which may help. Top 25 Recommended Leatherwork Tools More recent The Tools You Need for Leatherwork! Older Mark
-
Hi Josh As you working with MS Paint presumably you’re using bit mapped images such as jpeg, bmp etc. A simple way to get a precise size would be to place the picture into a word processor such as MS Word, Libre Office (free), Open Office (free) and use the picture tools to resize the image to the actual dimensions in mm or inches, then print without scaling. If you’re unsure how to do this I can put together a how to for you but unfortunately not until Tuesday, if that would help, let me know. Mark
-
Hi Weaver Leather did a video on this using a strap cutter and an English Point punch. The Leather Element: How to Taper Leather Straps Mark
-
Hi That is not a knot as such, you make 2 cuts along the belt towards the end dividing it into thirds, that’s toward the end not right to the end, then after feeding through the buckle, or snap in this case, you twist the three pieces into loops and feed the belt length through them. bit hard to describe without pictures but don’t have access to any right at the moment. i learnt this as an aussie bushman/drovers belt, if you google those terms it should come up
-
The shoulder straps are actually one long piece with a cow hitch through the top ring and snaps on the ends, unhook the snaps, pull through the cow hitch and you have a long strap which can be snapped onto the D rings on the gussets giving you a shoulder strap. Agree with fredk that the strain on the top O-ring could be excessive when used as a backpack but a clever way of building in 2 carry systems without having to carry extraneous straps. Perhaps moving the O-ring from the top of the bag to high up on the back with a doubling to spread the load would be a better option.
-
I’d be trying the local gunshop, they sell lead shot for home reloading shotgun shells. mark
-
This is an old trick for storing opened tins of paint, no need to transfer it to threaded cap bottles unless you specifically want it in those bottles, just turn your tin upside down..... after making sure you got the lid on proper :-)
-
OK, I'll be the dumb one to ask, what the heck do you use porcupine quills for ? Mark D
-
Perhaps modify the existing straps to make speed lacing rather than eyelets. mark
-
Also, a clever dog can undo a bowline if it's far enough from the collar to get their canines into it, when we tied our dog to her kennel we had to make sure the knot was close to the collar otherwise she'd undo the knot and jump the 6 foot fence :-(
-
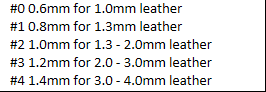
Hey Don, I've heard that different brands size their bevellers slightly differently. goodsjapan.com list several brands of beveller and they quote the beveller number, width and recommended leather thickness. This is the list for Kyoshin brand, Craft Sha and Seiwa brands have very similar leather thickness recommendations, I quote Kyoshin only because they have the widest size range listed on goodsjapan. Mark
-
I did find a conversion table from the number to mm online, possibly on a sellers website, so the info is out there ....... somewhere. If i can find it tonight i'll post it. Mark
-
Tried google ? I found this :- https://www.bankofengland.co.uk/banknotes Follow the links for each note and it lists the dimensions.
-
Hi FC, I've seen a sample of leather that thick in a tannery, it was quite an old piece, sorry I can't remember what it was from. Mark
-
Interesting, was that an acrylic or 'oil' dye ? Mark
-
I have a very nice leather 'rug' made out of leather squares about 100mm a side sewn onto a backing or howasbout some patchwork place mats, trivets & coasters. When you say journal size is that big enough to do a mouse mat ? Heavy weight leather, perhaps some small boxes.
-
Hi Just stumbled across some edgers on goodsjapan.com which describes a No1 as 0.8mm, No2 1.0mm, No3 1.2mm and No4 1.4mm.
-
If holding the dremel this way make sure you keep the cooling vents clear, if blocked the dremel will run at higher temperatures which could have an adverse effect on the bearings leading to premature failure.
-
Hi Windrider, I'd suggest you give Birdsall a ring, they're all hands on and know their products. Mark
-
Thanks Cheryl, I'd actually found that one, it came up in every search I tried. As a complete ignoramus in leather I was hoping to find a more concise pattern to guide me. I actually thought it would be quite easy to find as I found a lot of talk about the design & I know I've seen a proper pattern as opposed to this rough sketch. Oh well, to the paper & scissors to try & work it out :-) Mark