.jpg.d60258221c476480a6e073a8805645bb.jpg)


Halitech
-
Posts
1,229 -
Joined
-
Last visited
Content Type
Profiles
Forums
Events
Blogs
Gallery
Store
Everything posted by Halitech
-
I'll' start this by saying that yes, some people use Tankote as a resist for antique, but it is NOT designed to be used as a resist. You don't want something that will run and pool into the depressions and then dry. Satin shene is a better option as it will dry quicker and does not end up being a thick layer. Personally, my go to now is Fiebings Pro-resist. It's a little thicker then shene but thinner then tankote. I find 2 coats applied over a 4 hour period and then doing the antique the next day works best for me. Then, I apply my top coat with an airbrush so I don't stir up the antique.
-
Love it. Still gong strong and I've made over $500.00 from products made with it and I have repeat customers buying multiple lots of items
-
If you are doing Veg Tan leather, you can get away with a standard arbor press, a C clamp or even a pair of C jaw vise grips, and water. If you are doing chrome tan stuff, you really want the heat to give you a good crisp impression because you can't do much with water.
-
Don't paint or dye them at all, just give a good burnish and finish with pure beeswax.
-
Normally people don't have issues with the oil dyes because they take longer to dry and you can spread it around better then water based. May have just been the leather itself if the 4/5 was fine and you've not had issues before. Did you buff it good after it was completely dry?
-
Also be careful with rings and other jewelry, it can mark the leather as well
-
Suggestions needed for Back pack straps breaking
Halitech replied to Sharon Mallory's topic in How Do I Do That?
Put a thin layer of leather over the nylon like some people do when making a guitar strap and they put a leather end on them.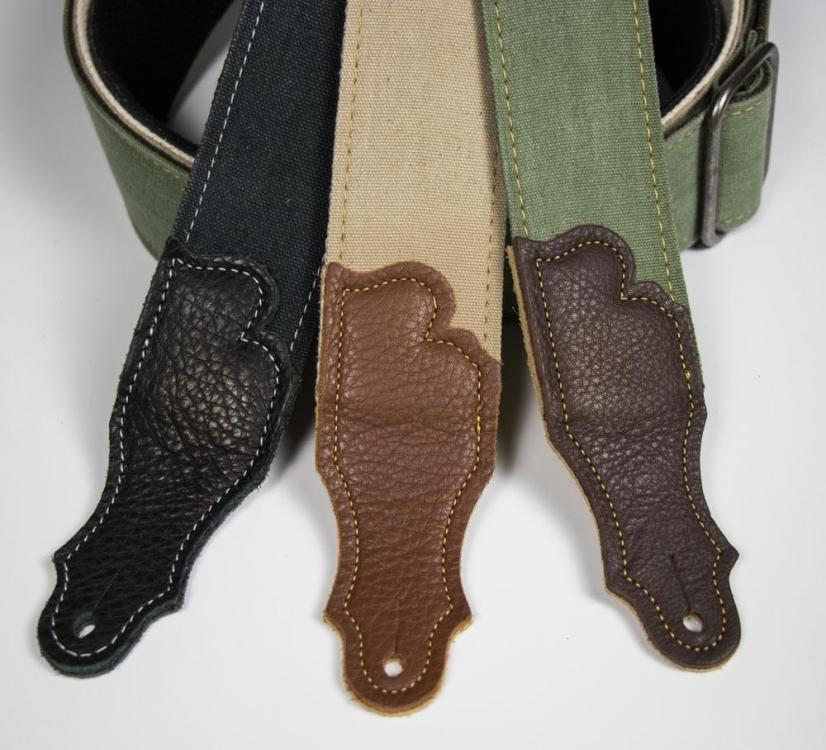
-
How do I stop dye rub off/transfer from Horween Essex black leather?
Halitech replied to YinTx's topic in How Do I Do That?
apparently they aren't drum dyed but hand rubbed. I'd call the company and ask, especially if you bought it from them -
How do I stop dye rub off/transfer from Horween Essex black leather?
Halitech replied to YinTx's topic in How Do I Do That?
Maybe I'm misunderstanding but I was under the impression that those Horween leathers were drum dyed so that they didn't have any dye rub off. -
Basic question about glueing and stitching
Halitech replied to NeilMott's topic in Leatherwork Conversation
If you are stitching as well, you don't need to glue. 90% of the things I do are assembled with double sided crafters tape and then either stitched or laced. I prefer the tape in most cases because I can reposition if needed either before I even start stitching, or as I'm going along. -
Front Pocket Wallet in Veg Tan
Halitech replied to Aari's topic in Purses, Wallets, Belts and Miscellaneous Pocket Items
Just out of curiosity, is that water buffalo? I made one a few years ago out of water buffalo and the inside looks the same. Mine was only 5oz and I used goat on the inside. It's a brick filled up. It's curved to fit my ass but hasn't really softened much. I really need to make myself a new one. -
At £26.26,, it's not worth it. I paid $5.00CND and only the blades are worth it. You cannot adjust the angle, starting on short pieces is a pain and you can only do 1" wide at a time. There is another one that you can adjust the angle, it's more money but it's an infinitely better machine if you are looking to do the edge. I looked at the bottom and there it was https://www.ebay.co.uk/itm/Leather-Craft-Edge-Skiving-Machine-Leather-Splitter-Skiver-Paring-Tool-DIY-809BP/223025244516?_trkparms=aid%3D888008%26algo%3DDISC.CARDS%26ao%3D1%26asc%3D20131227121020%26meid%3D0c3db2dee20f47c89e3fe6132965f210%26pid%3D100009%26rk%3D1%26rkt%3D1%26mehot%3Dpp%26sd%3D401795252129%26itm%3D223025244516%26pg%3D2047675&_trksid=p2047675.c100009.m1982
-
Front Pocket Wallet in Veg Tan
Halitech replied to Aari's topic in Purses, Wallets, Belts and Miscellaneous Pocket Items
I'm with Enanez, 7oz leather is way to thick. By changing from a back pocket to a front pocket, you're trying to minimize things. At 7oz with 8 layers once closed, you are running close to an inch thick before you add any cards or cash. Even dropping to 4oz, you've dropped to 1/2" closed and empty. And if you get rid of the backing piece behind the ID window, will help a little as well. -
I'm with Dwight. Not quite as long but going on 8 years now and other then a lacing chisel I dropped on a hard floor and bent a prong (totally my fault) I've never had an issue, unless you count blades going dull. And that lacing chisel? Tandy still replaced it. My grandfather was a finish carpenter and he always said, along with a lot of other oldtimers, it's a poor carpenter that blames a cruddy job on his tools. For the swivel knife, I highly recommend going in and actually trying a few of them. I used the one in the beginner kit for a while and hated it. My hand would always cramp up after 5 minutes and I actually stamped doing tooling and would only basketweave things. Then I went in and tried a few and got the adjustable knife. Got it so it fits me and how I hold it and I can now carve for an hour with no problem.If you think you may have trouble keeping the blade sharp (look at your kitchen knives ) pick up a ceramic blade. Yes, a little more money but other then stropping, no maintenance required. Pick up a bag of veg tan scraps and practice your swivel knife cuts. Try and get as even a circle as you can get and as small as you can get with a freehand. Contrary to what the so called Gods will tell you, you don't need to mortgage the house to buy tools in order to do good work.
-
I have the more no name version and it works well enough. Should have gone with the extra and got the 3000mw model instead of the 1500. It will engrave veg tan fine but even at 100 depth of engraving, it won't cut all the way through 2/3oz veg tan. But, it will engrave nicely and you can even dye stuff after.

-
In order to come up 4" short, you didn't add the 4" to account for the distance from the buckle and the overlap amount. If the pant size is say 36", you would measure from the end of the buckle to the middle hole at 40" and the total blank should be 52". Pant size plus 4" works 99% of the time
-
1. Is it a current pair of jeans that they wear? 2. Are all their jeans the same size? 3. HOW MUCH TOO SMALL ARE THE BELTS? 4. How thick is the leather you used for the belts? 5. Did you allow an extra little bit to allow for the thickness of the belt?
-
the older the roon gets, the weaker it gets. Sometimes it needs a refresher of a little vinegar
-
I normally dye a base color first in the areas I want dyed. Then I use Fiebings Pro-Resist to cover the entire piece. I know some use tan kote, never had it work for me so stopped. Then I wait 6 hours and give a light buff before applying my antique gel. Then I wrap a piece of paper towel arond a flat stick and use that to wipe off the excess. Allow that to dry then use an air brush to apply resolene or satin shene
-
I've got a stack of those cards and expired health/Credit cards/driver licenses/point cards just to test my slots. Granted after the wallets I've made, I've made my own plastic templates so they all turn out the same way every time
-
sit down with a pad of paper and a pen and figure out how big you want all the different parts. Then figure out if you want to do a rolled edge or flat edge on the gusset. Then start adding the extra for your stitch lines and thickness of the leather. Won't hurt in adding 1/2"-3/4" to all dimensions, just for safety sake. Then, grab some cardboard and draw the pieces out, cut them out and tape them together. Won't take long before you figure out what needs to be changed.
-
koreric75 asked you a few days ago, short by how much? And did you get the pant size from a pair of pants they are actually wearing and fit properly? If the pants are too small, the belt is going to be too small. I've used that chart for years, ever since I found it and only screwed 1 belt up
-
Whatever you use, make sure you allow the thickness of that material in your overall measurements. Spray adhesive will be faster but messier, do it outside if you can and get the automotive stuff they use for headliners. The craft stuff is garbage.
-
I use a dremel with a flex wand and sanding drums. Much smaller, much cheaper and can fit on even the smallest benches. Can even mount it in a work station if you want.
-
I wonder if it's English Bridle? Veg tan that's been drum dyed and stuffed with waxes like latigo but not as greasy. With use it would become a lot softer