YinTx
-
Posts
3,794 -
Joined
-
Last visited
Content Type
Profiles
Forums
Events
Blogs
Gallery
Store
Everything posted by YinTx
-
Those rock! Now I hafta do one... YinTx
-

My first Shoulder bag
YinTx replied to Efe's topic in Purses, Wallets, Belts and Miscellaneous Pocket Items
That is awesome! I really like the red surround, and that is a lot of detail work on the characters! YinTx -
Unapoligetically color blind.
YinTx replied to sonnyboone's topic in Purses, Wallets, Belts and Miscellaneous Pocket Items
Really nice work. Is that Teju? I can imagine it matching some of the more audacious watch faces out there... YinTx -
Ok, laptop seems functional again. Here are the images as promised. Again, not as great as Danne's but adequate for a prototype item. YinTx


-
@Wizcrafts, @Uwe and or @Constabulary may be able to help. Also consider posting in the sewing machines section with a bit more descriptive title including machine type and issue, you may get a better response! best of luck. YinTx
-
So many different skills in that one piece! edge work, tooling, stitching, lacing, lining, etc.! Cool piece! YinTx
-
Finished up, with adequate results. will post photos when I have a functional computer. YinTx
-
Small bit of Sedgwick bridle needed!!!
YinTx replied to Travllin Leather's topic in How Do I Do That?
Traditional or modern? Also, what weight? I have some, depending on all that. YinTx -
Nice work! YinTx
-
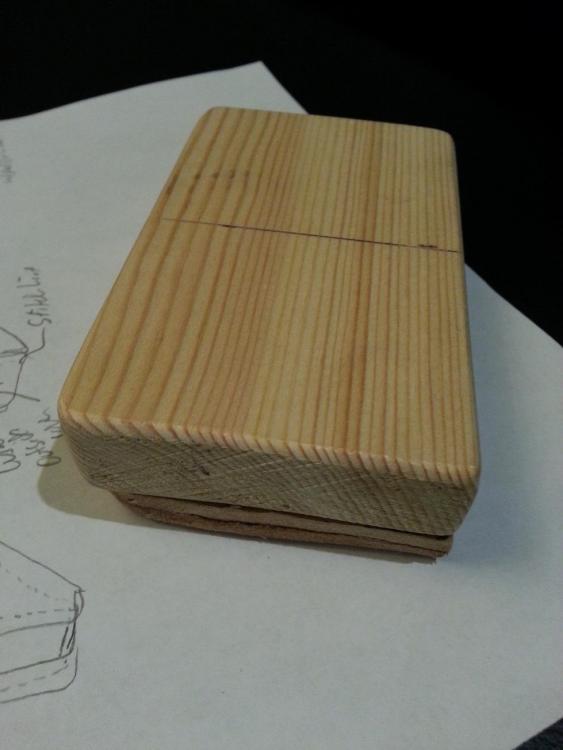
Scratch that, can't send a message apparently on this computer. My block form dimensions are 4 1/8“ x 2 1/2" x 1". YinTx
-
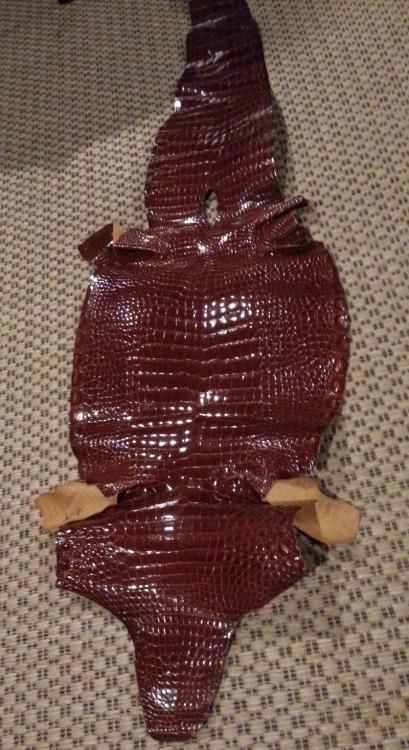
Sorry for the delay, my laptop decided to go kaputz, doing this on a borrowed computer. Skiver and I have a tumultuous relationship at best. I have been able to skive with it, but did have difficulty when I tried it on gator. I'll try it with the sanding on the sides I want to skive. The gator I have is a pretty level 2 oz. I'll send you the new dimensions I've come up with. Also, stitches are out, on a positive note! YinTx
-
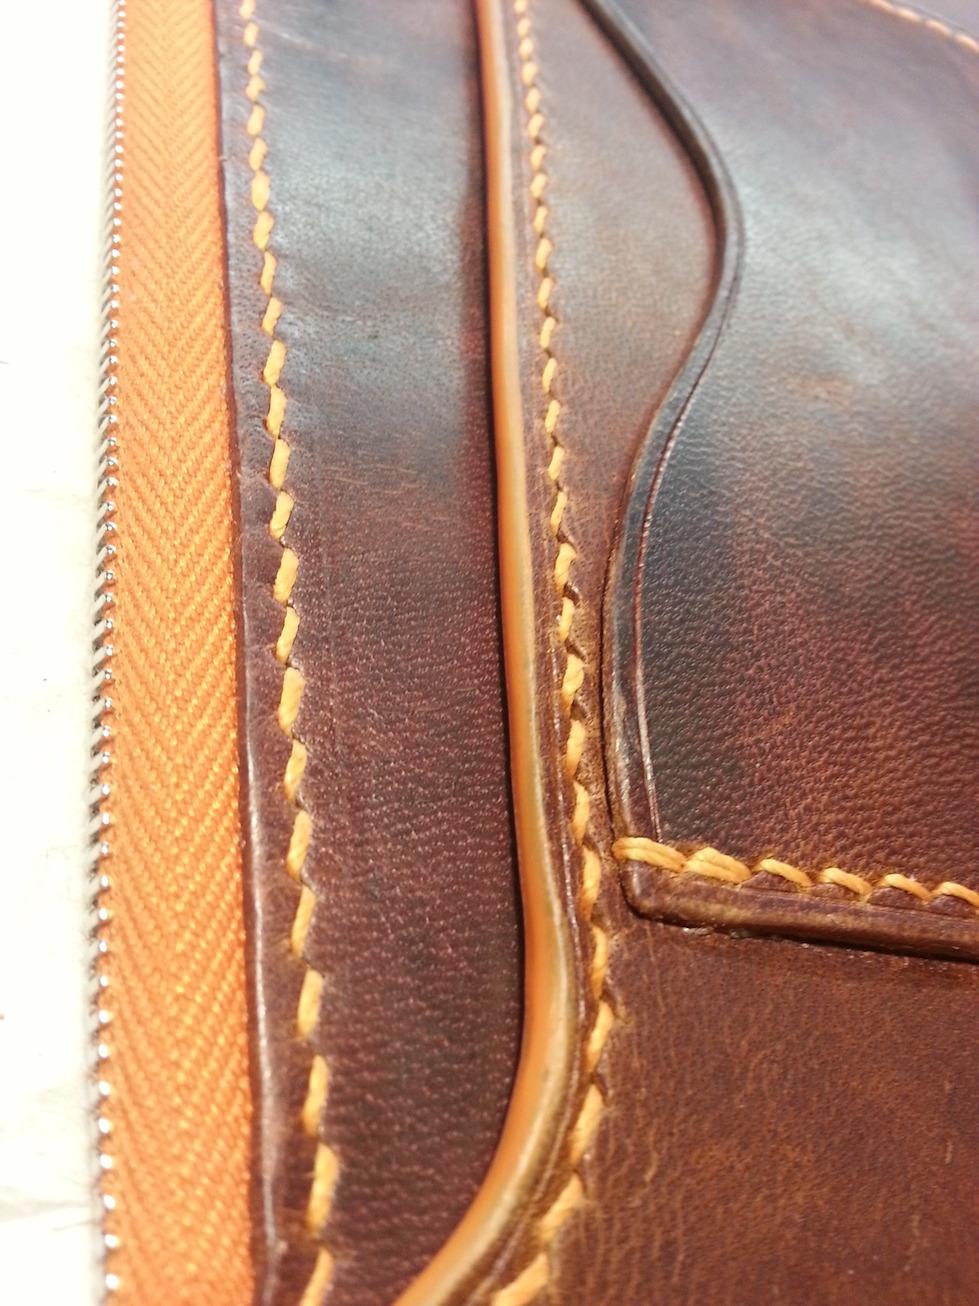
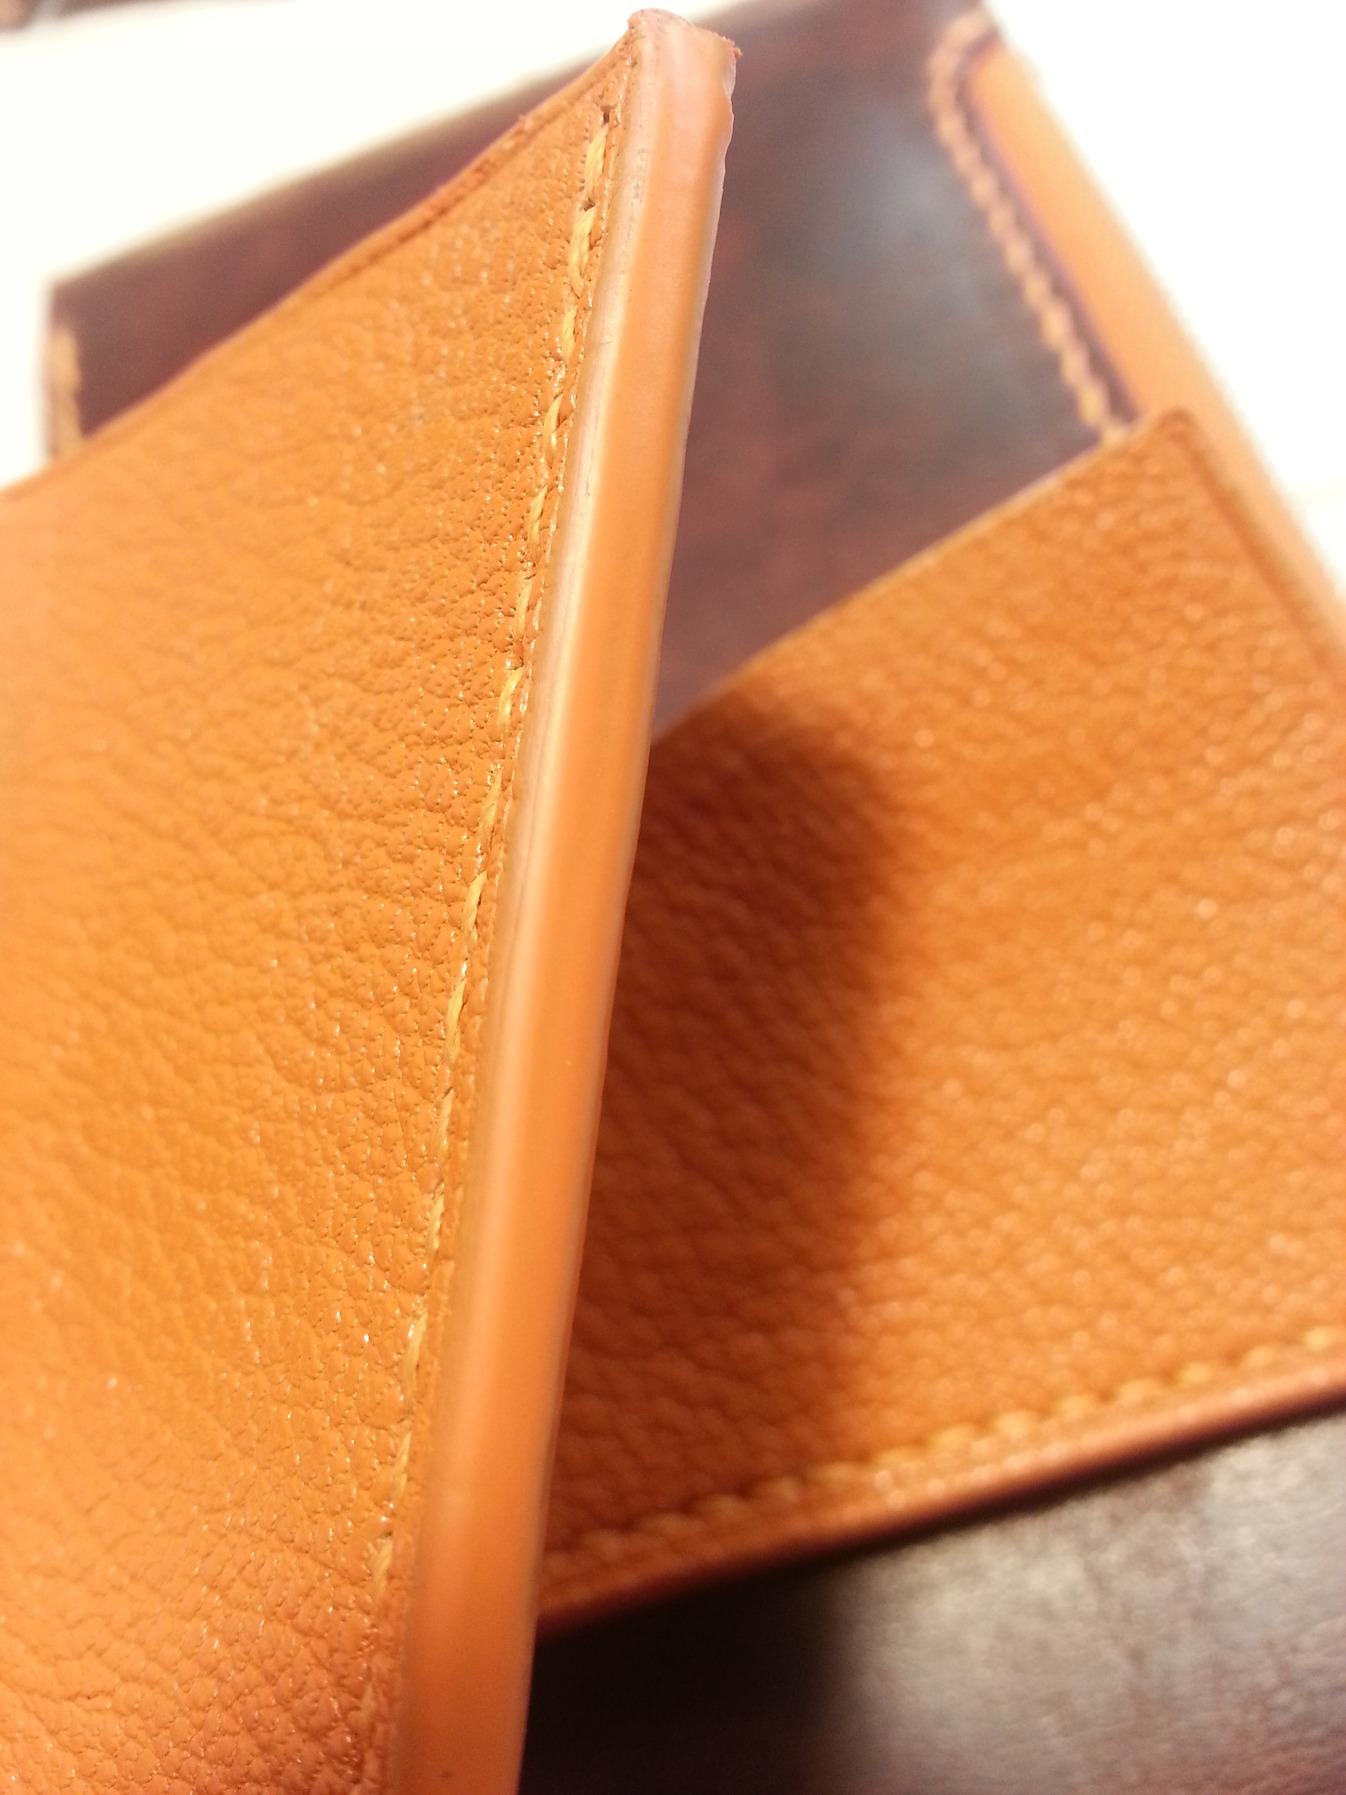
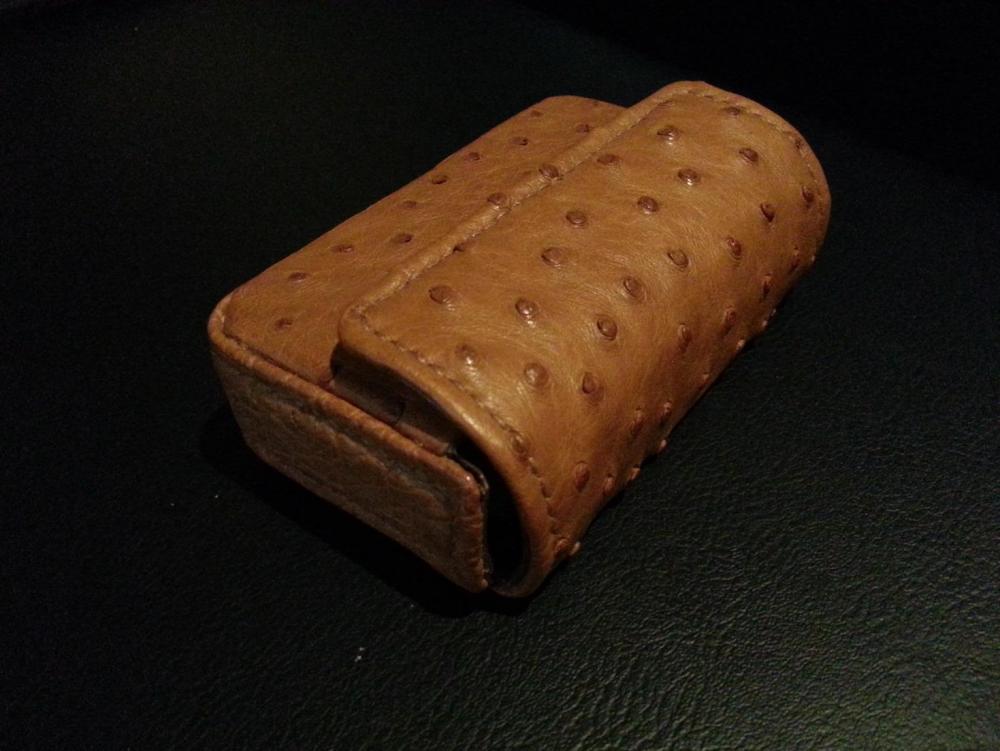
I am currently using Fenice edge paint on a very waxy Horween Dublin lined with Chevre Chagrin. Barge cement is useless to give you an idea of how waxy it is. I'll post the results when I am done. The project is a prototype, so I won't be going after the flawless edge that @Danne has achieved. I have only just applied the first layer, and letting it dry. YinTx
-
Thanks for the detailed explanation on cutting into the hide. This will definitely save me some heartache and heartburn! I will take you up on your offer. As mentioned, my dimensions were too large, so I have to go back to the drawing board. Also, everything is all of a suddenly going slower on account of several stitches in my right hand, so bear with me. I'll have to make a new form block as well for the new size. YinTx
-
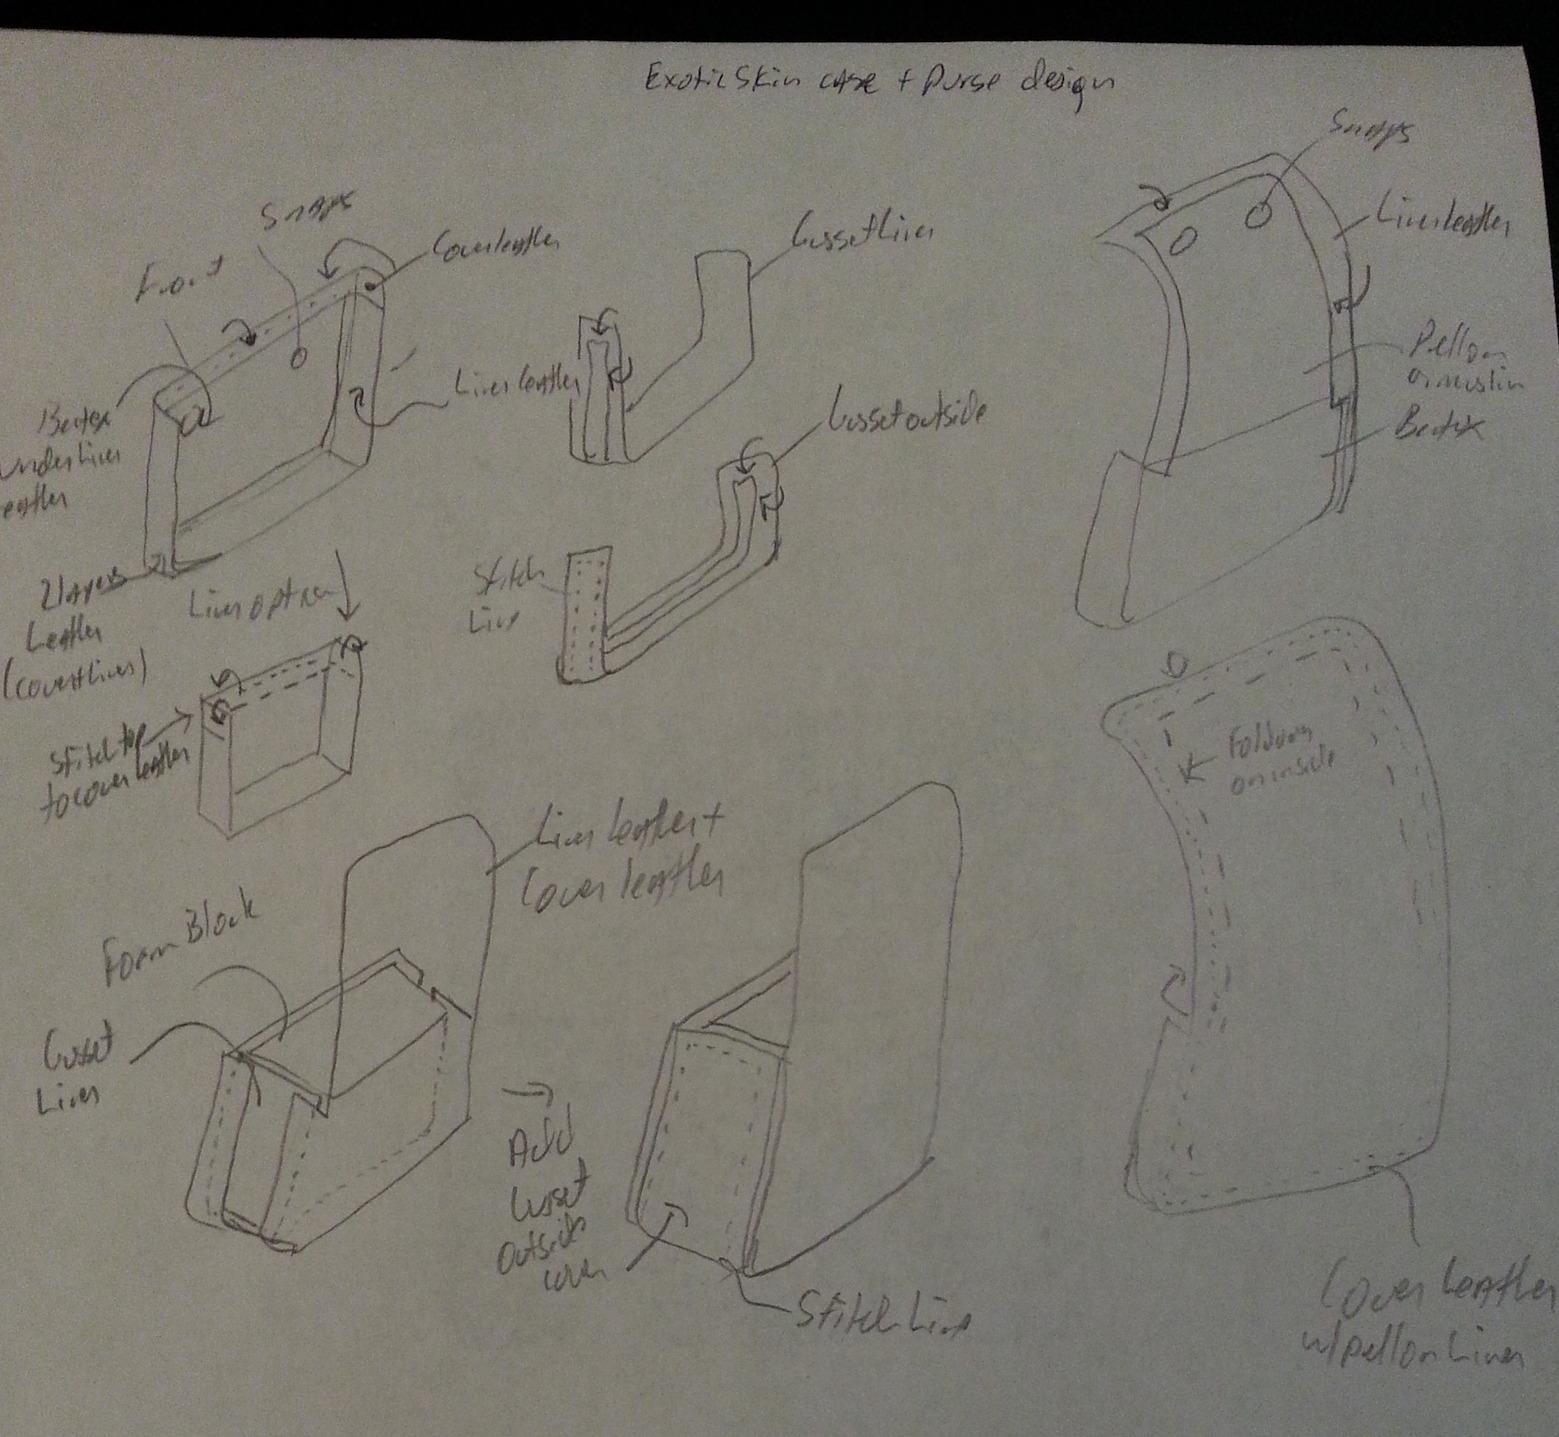
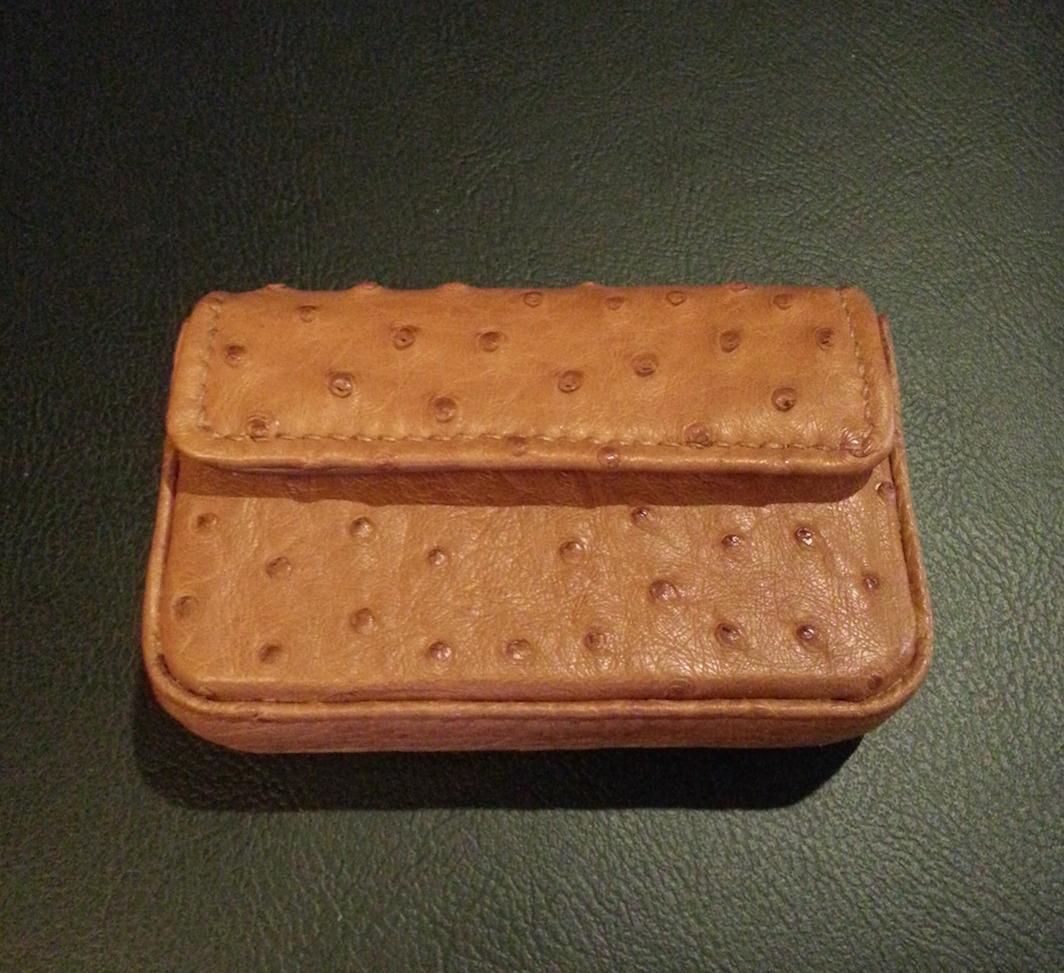
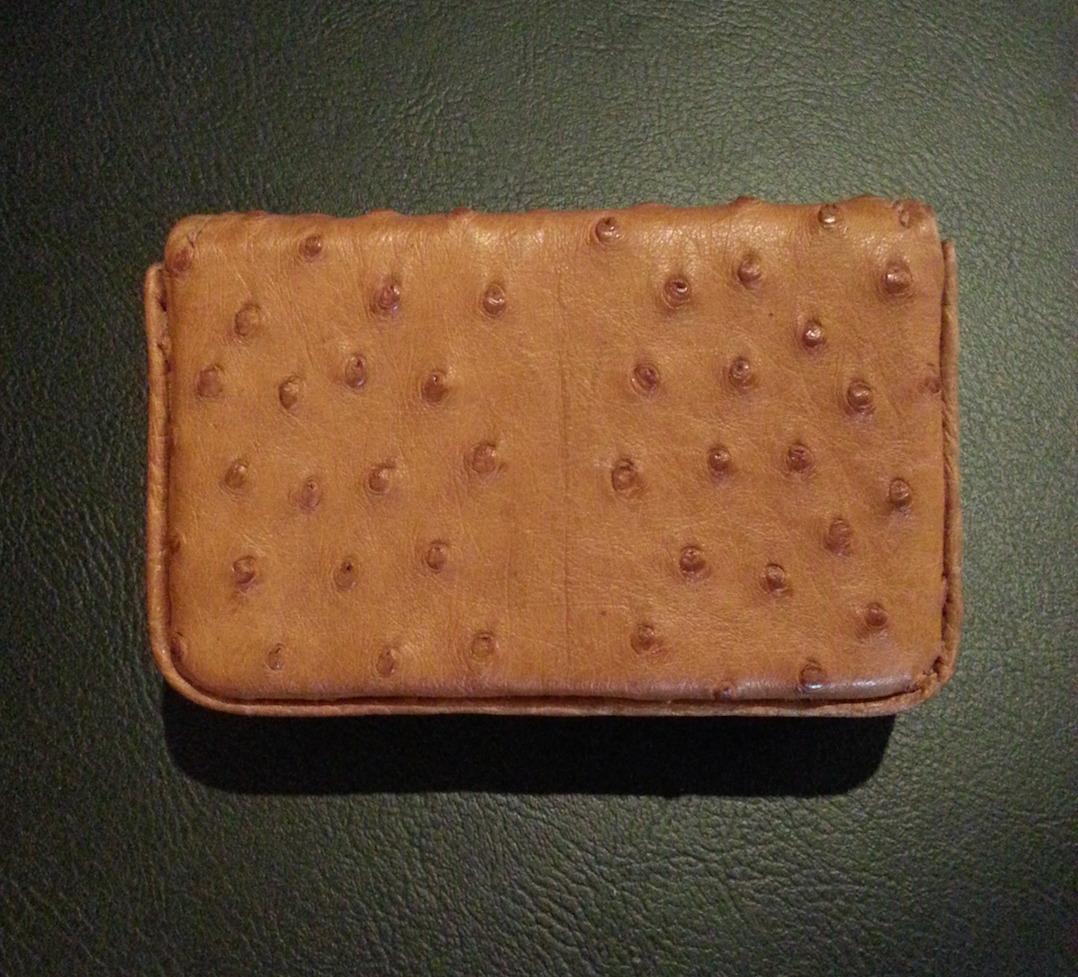
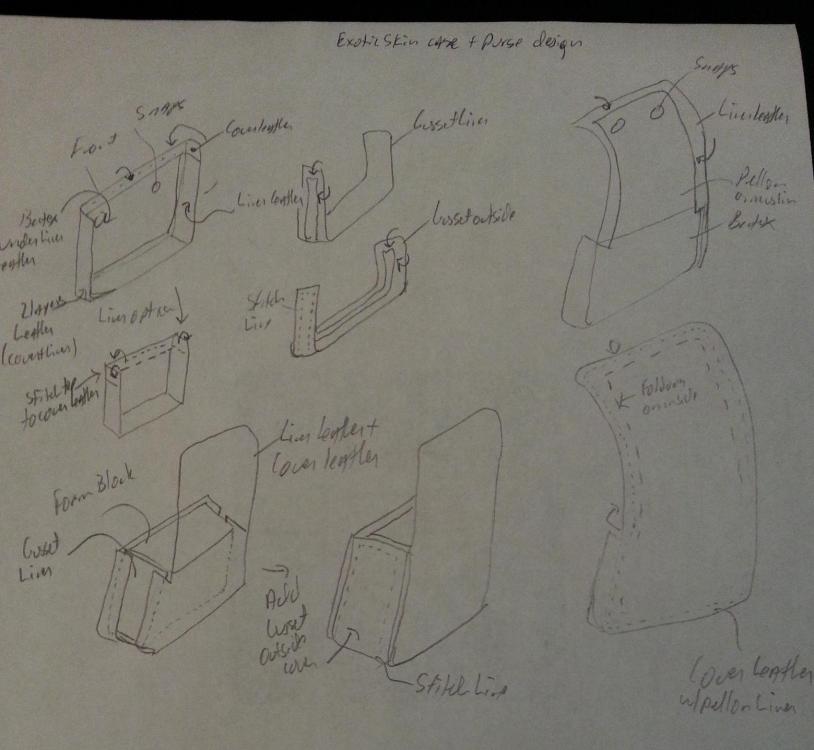
@RockyAussie, thanks so much for the info. Here is the design sketch I came up with. Lots of parts and pieces for such a little thing. I think twelve, not including snaps. I ended up using bag stiffener, about 1/16 inch thick, for the front and lower back pieces. Pellon (1/16") on the back and outer gusset piece, the inner lining and other bits were lined with fabric only to give me something to work up on to maintain dimensions. I had challenges at the transition between the lid flap and the body trying to not show any raw edges, which seems near to impossible since I have never seen it done. This is the form I made to shape it on. And this hapless fellow is slated to become fashion articles, so I can cut it in any direction needed. On the black and pink bag, I did not like the scales sticking up when the flap is closed, but I seem to have been the only one that noticed. I worried that cutting diagonally would be aesthetically unpleasing. Does no one notice that either? I had originally thought to use the tail, but if I read right, that may not be such a bright idea. YinTx
-
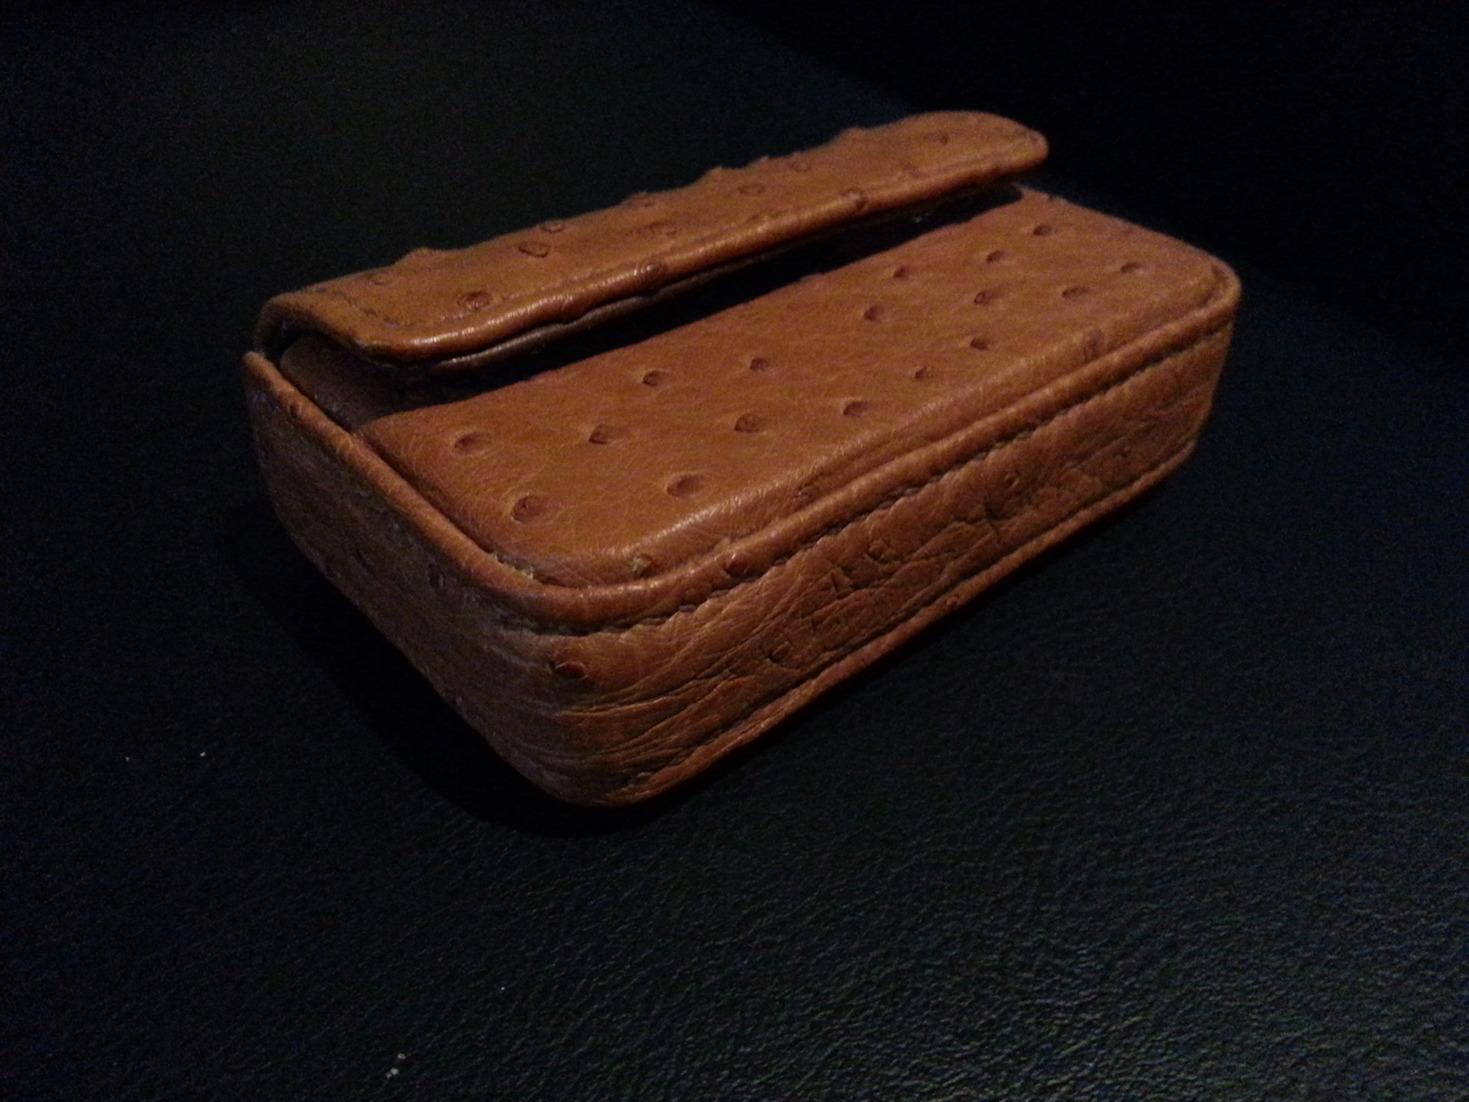
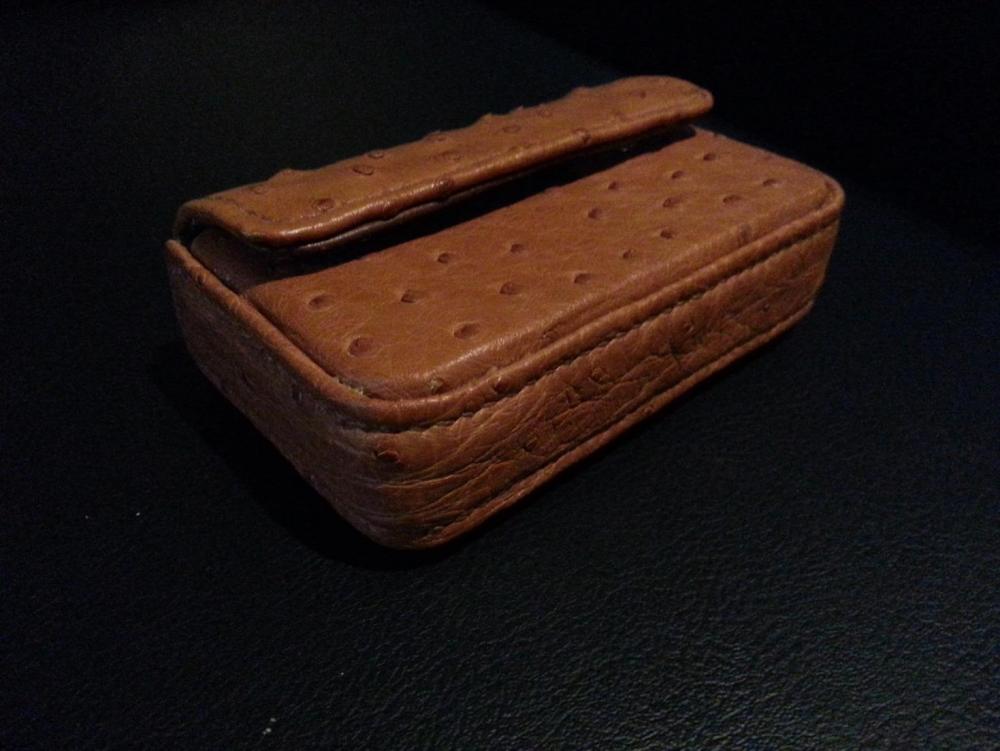
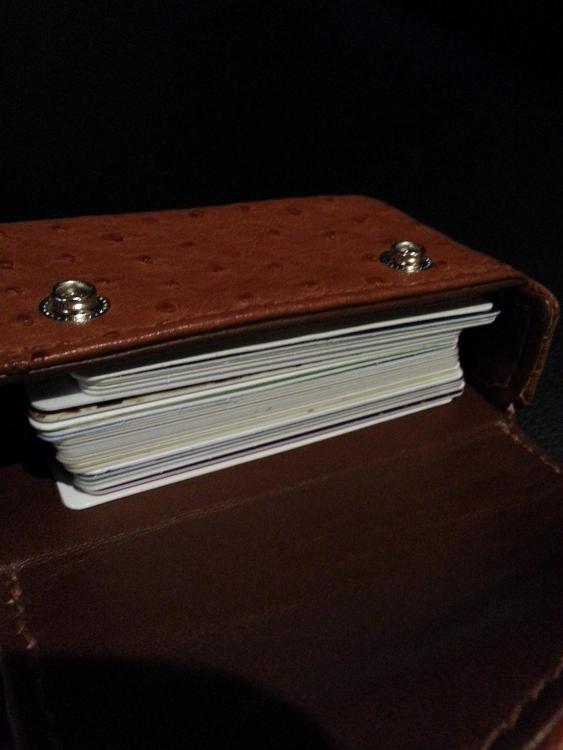
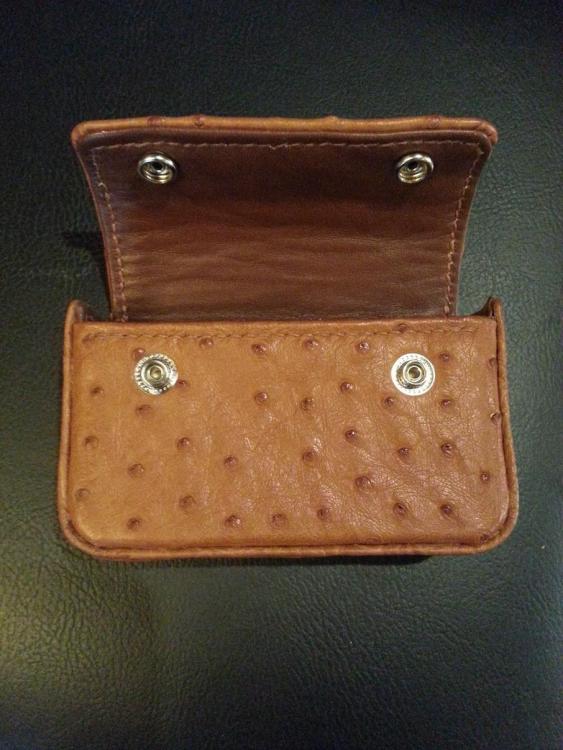
Version 4 of the case design. I think a bit oversized, very difficult to stitch together, particularly the gusset, which took nearly 6 hours. Of the 5 designs I prototyped, this is the one I liked the most. I am certainly open to constructive criticism, particularly on construction techniques, as the next one is to be made out of more expensive glazed Alligator. YinTx A couple more showing the inside, etc.


-
Axe and Sheath for presentation
YinTx replied to Woodshed's topic in Gun Holsters, Rifle Slings and Knife Sheathes
Cool story and nice sheath! YinTx -
That bargrounding is impeccable! YinTx
-
Outstanding work! May I ask what weight leather you use for the tooled section? YinTx
-
I was starting to feel guilty about my knife collection, feeling a bit less so today. Very cool knives! Which ones do you like the most and least for which tasks? YinTx
-
Agreed. If you click on the link provided, you will see it is not in English. You will also see that he is burnishing with gum trag, and thus you could deduce he was agreeing with that method, as opposed to just leaving it to burnish itself over time. @paloma has some great work, and has been trying to share his experience with us. Sadly, some does get lost in the translation, which is frustrating for him as well. Please be a bit more forgiving so that we can all learn from his efforts! YinTx
-
Nice work, that is a ton of tooling!! I have the same issue with black. Folks like my work, and want to know if I "have it in black." Like, "love the creativity, can you hide it so I can't see it now?" argh. "Love the hand stitching too, can you make it disappear into the black leather with some black thread instead?" YinTx
-
Pocket knife pouch sheath
YinTx replied to Rossr's topic in Gun Holsters, Rifle Slings and Knife Sheathes
Makes sense, pretty small for the belt! YinTx -
Thanks, and I hid the ugly parts from y'all! I was almost happy with it, but the last line of stitching was so bad that it disqualified the thing from the sell pile. Thank you! YinTx
-
Ok, wait, I just noticed the coffee cup! That is fantastic!! The bag is still awesome too! YinTx
-
Pocket knife pouch sheath
YinTx replied to Rossr's topic in Gun Holsters, Rifle Slings and Knife Sheathes
Cool combination. Just curious, any issues with flexing the snakeskin backwards? also How do you put it on a belt? Or is it not for that? Nice work! YinTx