TomE
-
Posts
1,300 -
Joined
-
Last visited
Content Type
Profiles
Forums
Events
Blogs
Gallery
Store
Everything posted by TomE
-
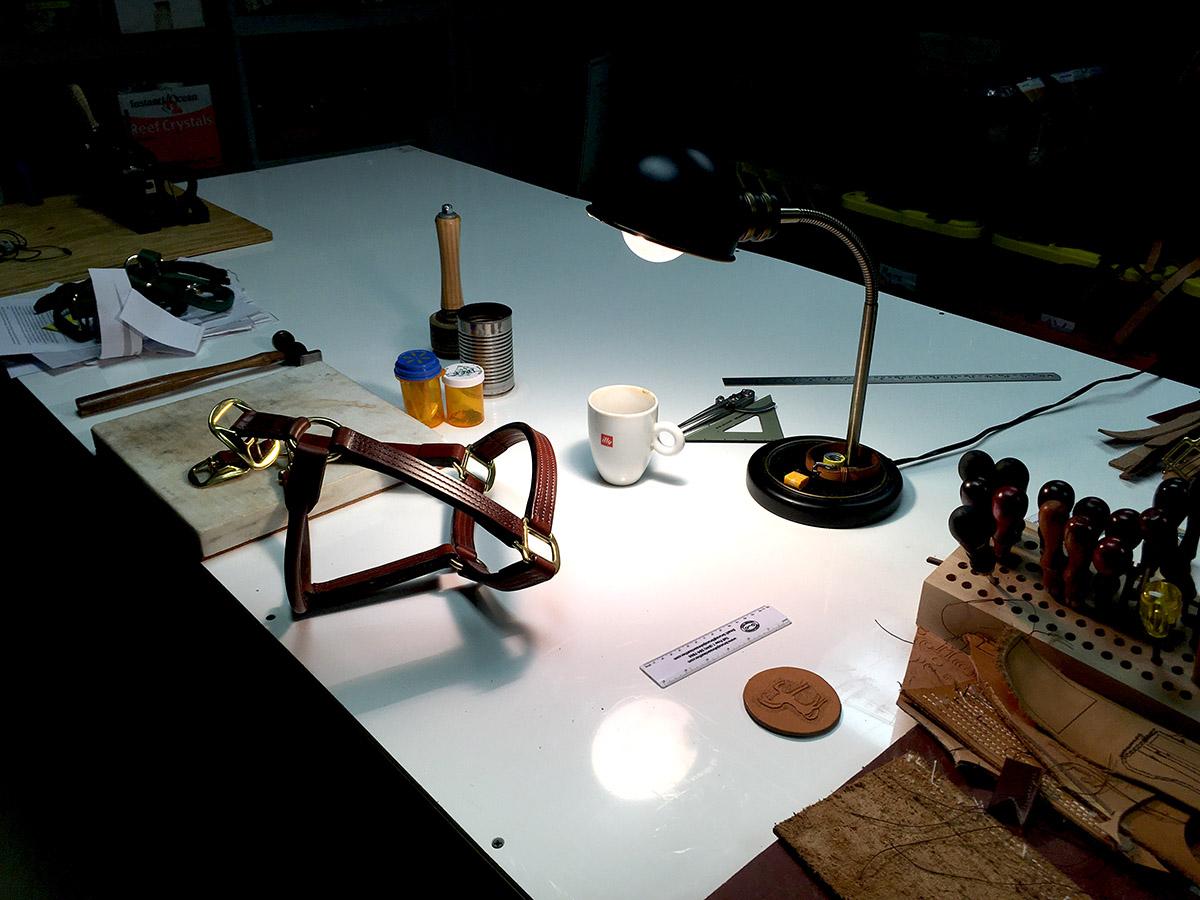
That's a very thick dog harness, which will be stiff and perhaps uncomfortable during the break in period. Also it will be thicker where the leather wraps around hardware, and might be difficult to sew on a Class 26. I make horse halters out of 2-3 layers of 9 oz leather. Leather halters are designed to break if a horse pulls back hard. This is a safety feature of leather vs. biothane or nylon. I doubt a dog could break it and I'm sure I couldn't hold on if an animal pulled that hard. I think a well constructed harness made of 9-10 oz leather +/- a liner would be adequate for a large dog. One option would be to use 10 oz bridle leather with a pasted back, skip the liner, and focus the sewing on the ends of the straps. Main thing is to use high quality leather cut from the back of the hide for straps that need to be strong. Sewing against hardware with a machine takes practice and I hand sew some pieces of halters. Bottom line: the Class 26 would be great for patches and harness that is a bit lighter than you describe.
-
 Like the rooster! ...and everything else. Beautiful work. Thanks for showing us.
 -
Denatured alcohol in CA.
TomE replied to DV8DUG's topic in Dyes, Antiques, Stains, Glues, Waxes, Finishes and Conditioners.
I would give it a try. As you probably know, isopropyl alcohol has an extra methyl group in comparison to ethanol. The chemical properties of these 2 alcohols are more similar than different in my experience as a biochemist. You might see different behaviors when dissolving a solid in these alcohols, but I doubt you'd see a difference when diluting alcohol based dye by 50% in either of these solvents. I dilute Fiebings Pro Dye with an equal volume of Tan Kote or Martin's Edge Solution for dyeing and burnishing edges in one step and this works great! I am careful to mix the solution before each use. The MSDS for Fiebings Dye Reducer does not list the ingredients but this post suggests ingredients for dye reducer. -
Nice result! What is the leather and can you show the gusset and bag interior?
-
Denatured alcohol in CA.
TomE replied to DV8DUG's topic in Dyes, Antiques, Stains, Glues, Waxes, Finishes and Conditioners.
Can't help with CA but I've purchased Klean-Strip Fuel denatured alcohol at several Walmarts in our area. I think it was in the camping/sporting goods section. -
Jeremiah Watt has decorative hardware, more western style than art deco but looks like high quality. https://www.ranch2arena.com/products/04034-vintage-double-buckle. Folks that make western head stalls use decorative buckles in smaller sizes.
-
Welcome. I recommend videos from JH Leather and Harry Rogers for basic construction methods. She uses the traditional tools and methods. Abbey England is a quality source.
-
I'd enjoy seeing your work. I don't have the skill to make a saddle and have focused on bridles and reins for jumpers and dressage. Antares is a favorite for their styles of bridles.
-
With all the beautiful leather and saddles produced in France, it didn't occur to me that tooling leather would be difficult to obtain. I've admired the tooled elements that sellier Jean Luc Parisot incorporated into his work. https://www.instagram.com/parisot_sellier He might know of another source for tooling leather in France. His friend Pedro Pedrini would know how to get in touch with Jean Luc. https://pedrinisaddleco.com/biography
-
I did receive some HO sides in 2021 that were puckered or had more defects than usual. I was told they were behind on production because of an equipment failure at the tannery (a large splitter? was being repaired) so perhaps they were sending out leather that was less than usual quality. Their sales manager answered my questions on the phone. Since 2021 I've had top quality HO sides, purchased from Springfield Leather Co. SLC will accept returns of leather in good condition. I recently visited their store and they opened bundles of bridle sides for me to inspect. Almost all of them were excellent in terms of consistency and minimal defects. Not sure if your distributor is an authorized dealer or getting HO leftovers from other sources.
-
UHMW polyethylene is different from HDPE. Here is one explanation https://plastichowto.wordpress.com/category/uhmw/#:~:text=One note about the static,would be the better choice.. I bought a 4 x 8 ft sheet of white HDPE from Menards and am quite happy with it.
-
Poly vs. Nylon ? Same size, different adjustments
TomE replied to Wyowally's topic in Leather Sewing Machines
Agree with @MtlBiker. I am grateful for the wisdom @Wizcrafts regularly passes along. Thank you! -
Handsome work! Strap and guitar are beautiful.
-
The white sheet also brightens up my workshop for these old eyes. I bought 1/8" HDPE in a 4' x 8' sheet at one of our big box stores, Menards. Had to drill and counter sink the holes to screw it on my plywood bench. I was told that the HDPE can be sanded if it becomes heavily grooved from knife cuts. So far it seems fine.
-
The failsafe is to stitch mark up to the hardware and begin machine sewing 4 holes away, leaving long tails of thread so you can hand sew back to the hardware. As mentioned in my triple stitched halter methods, I have used this method to sew tightly against the 3 rings on a halter. More recently, I've been inserting a wedge shaped welt next to the rings so that I can machine stitch right up to the ring. Two tips -- Be sure to include the welt when wet forming the leather around the ring to minimize the bulge that the machine has to climb. Also, I am having very good results using the narrow pressor foot setup from @Patrick1 at Hennigan Engineering and Precision. These feet climb the change in material thickness without a lot of hands-on manipulation. The Cobra double pressor foot is a bit more slippery in my experience with sewing bridle leather. I am using the narrow throat plate and feed dog from @RockyAussie for these heavy projects (2-3 layers of 9-10 oz bridle leather). I use the extreme narrow plate/feed dog from Hennigan Precision when sewing lighter projects with 138 thread and a #21 needle. For a halter with a round leather throatlatch, I still sew the gullet end against the throatlatch by hand in order to sew tight against the loop that wraps around the throatlatch.
-
That's a winner! Looks good on him.
-
Thank you, @Klara. I appreciate it. Thanks, Jonas. Two changes that made me happier with the plough gauge. I finally put a small bevel on the backside of the blade that relieved pinching of the strap against the guide. Also I covered my bench with a sheet of HDPE which allows the plough gauge to glide over the surface. The base was apparently dragging/digging in on the plywood. Also, the HDPE is a great work surface for cutting out leather with minimal damage to the blades.

-
Matching Saddle Scabbard and Holster
TomE replied to JWheeler331's topic in Gun Holsters, Rifle Slings and Knife Sheathes
Pretty work! I am curious what you mean by "to be like what the 19th Century called bridle leather." Different than modern bridle leather? -
Bridle and harness leathers are veg tanned and stuffed with oils and waxes to add finish and some water resistance. You still need to oil and condition the leather with use - as for maintaining horse tack. These leathers tend to be expensive and are correspondingly high quality tannage with a dense structure. I have been very happy with Hermann Oak bridle leather that I buy from Springfield Leather. You'll need a splitter if you need different weights for your project - in order to make everything from the same (dyed) hide. Springfield Leather can do custom cutting and splitting. Batz Corp has a number of aluminum clips similar to what I think you're describing. It's easiest to find their products in the catalog, which can be downloaded here https://www.batzusa.com/catalog-download/. I would call them for pricing and availability. Their website is hard to navigate.
-
Still Buffing
TomE replied to Gosut's topic in Dyes, Antiques, Stains, Glues, Waxes, Finishes and Conditioners.
This video has some tips that were new to me for even dye coverage and eliminating rub off, particularly near the end of the video. Best of all, he says there are no firm rules and many ways to get a good result. -
Barrel saddle horn repair
TomE replied to 3arrows's topic in Saddle Identification, Restoration & Repair
A two part article on a braided rawhide saddle horn cover was published in the 2003 Mar/Apr issue https://leathercraftersjournal.com/product/2003-volume-13-no-2-mar-apr/ and the May/June issue https://leathercraftersjournal.com/product/2003-volume-13-no-3-may-june/ of the Leather Crafters and Saddlers Journal. Both back issues are available at their online store. See content descriptions at the links above. -
I wouldn't think so, but I would test how the CXL leather burnishes and blends with a backer strap. If the edge doesn't look right, you could use the horse hide as inlay for a veg tan belt.
-
I have exactly one #245 punch and it works great in 9-10 oz leather. Like all Osborne tools, it needed to be sharpened when new. I'll be buying more sizes of the #245, maybe as the #K-245 set of belt punches. I agree that the #147 punch looks like it has more taper and might be best for lightweight leather. I don't see the #145 punch on the current website https://www.csosborneleathertools.com/category/punches.
-
Although horse hide is denser/strongmer than cow hide, 5/6 oz might be a bit lightweight for straps/belts. If you use 2 layers you could make a raised leather belt. There's more information on these leathers at the Horween Leather Co website. My understanding is the Chromexcel tannage is pull-up leather. Is the football dimpled leather CXL tanned cow hide?
-
My recent leather work
TomE replied to ddjchemist's topic in Purses, Wallets, Belts and Miscellaneous Pocket Items
Very nice work!