DJole
-
Posts
1,091 -
Joined
-
Last visited
Content Type
Profiles
Forums
Events
Blogs
Gallery
Store
Everything posted by DJole
-
From the album: DJole -- Completed Work
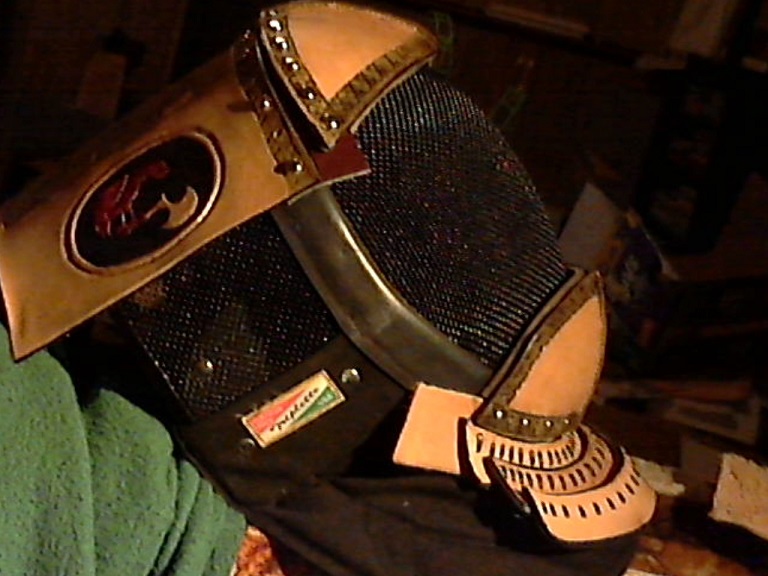
Here are the two panels sewn together, with the center strip, in place on a mask. The antique black of the swordsmen really makes a nice touch here! -
From the album: DJole -- Completed Work
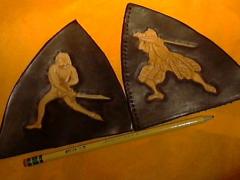
Here are the left and right panels. The left figure is from a manuscript, so I have to depend on shading with my spoon modeler rather than the dazzling cuts and lines of the woodcut figure to the right. Both figures are from Medieval sword fighting illustrations -- the guy with the bowl hair cut is wielding a Messer, and the fancy fellow standing in the Zornhut guard has a longsword. The pencil shows the scale -- these guys are pretty small! The panels are Fiebing's USMC black, and I will use antique black on the figures. Then I'll stitch them together and put in the fastening holes. I'll make sure, when it's all done, to show how it fits onto the fencing mask. -
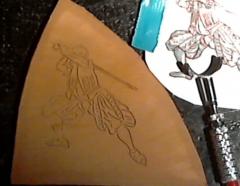
I'm making more sets of forehead "crash pads" for longsword fencing. The forehead is a frequent target, and a sword to the mask can leave some dents! But this is a piece of armor that attaches to the mask (with foam padding underneath) that will help cushion the blow. And since it's armor for swordfighting, why not put a swordsman on the piece? This man in his fancy pants is standing in a guard, ready to strike a fearsome blow. Note the swivel knife for scale, and the printed woodcut to the right, which was the traced source for this. Working in miniature is a pain!

-
From the album: DJole -- Completed Work
This is one panel for a fencing mask overlay (two pieces on the forehead, this is one half. To see the scale, look at the swivel knife to the right. Working in miniature like this is a pain! -
A lot of what people identify as "Celtic" (especially knotwork) is actually Anglo Saxon or Germanic in origin. Viking art is often pretty distinct from the Anglo Saxon stuff Looking on internet image searches, If you want the actual historical motifs and designs, you will have a difficult time figuring out what is the real stuff. Or you could look for the British Museum Pattern books, which use line drawings taken from historical artifacts from the cultures in question: Early Celtic Designs by Ian Stead and Karen Hughes is a nice collection of actual Celtic designs from the 5th C BC to the 1st century AD (thus avoiding the Celtic/Anglo Saxon knotwork). I've got this one on my shelf in the other room. The British Museum Pattern books also include the following (in no particular order): African Designs Ancient Egyptian Designs Early Medieval Designs Islamic Designs North American Indian Designs Roman Designs Greek Designs Iain Bain's famous Celtic Knotwork book is a nice mixture of historical patterns and instructions of how to make your own. He also points out that what we call "Celtic" when referring to knotwork is a conglomeration of cultural art motifs. Looking at illustrations from medieval illuminated manuscripts is a great way to get ideas, too. (see here: http://djole.altervista.org/djole/Publications/Leather/NativityPix/LeatherNativity.htm) Woodcuts are great for leather, since the lines used to both cut wood and leather are similar (<http://djole.altervista.org/djole/Publications/Leather/SerpentBox/SerpentBox.htm> I've used the Bayeux Tapestry as well. (http://djole.altervista.org/djole/Publications/Leather/Pouch/CometPouch-1.htm) You could do a google search for "celtic motifs" or "anglo saxon motifs" and get better results than when searching for "XX art" You could also look for books from the Dover Pictorial Archive (such as Viking Designs or Celtic and Old Norse Designs). These ones are not for the person who wants authenticity, though. That might be enough to get you going for a while.
-
I love fine woodwork, and that is some FINE woodwork. What a handsome, colorful place for your colorful thread to hang out in!
-
What first came to my mind when I read this was this:
-

Back quiver and matching arm guard
DJole replied to dhaverstick's topic in Archery Quivers and Bow Cases
Lovely design work! The multi-colored leather is very striking, and the primitive archer designs are nicely done. Great work, with a lot of attention to detail. -
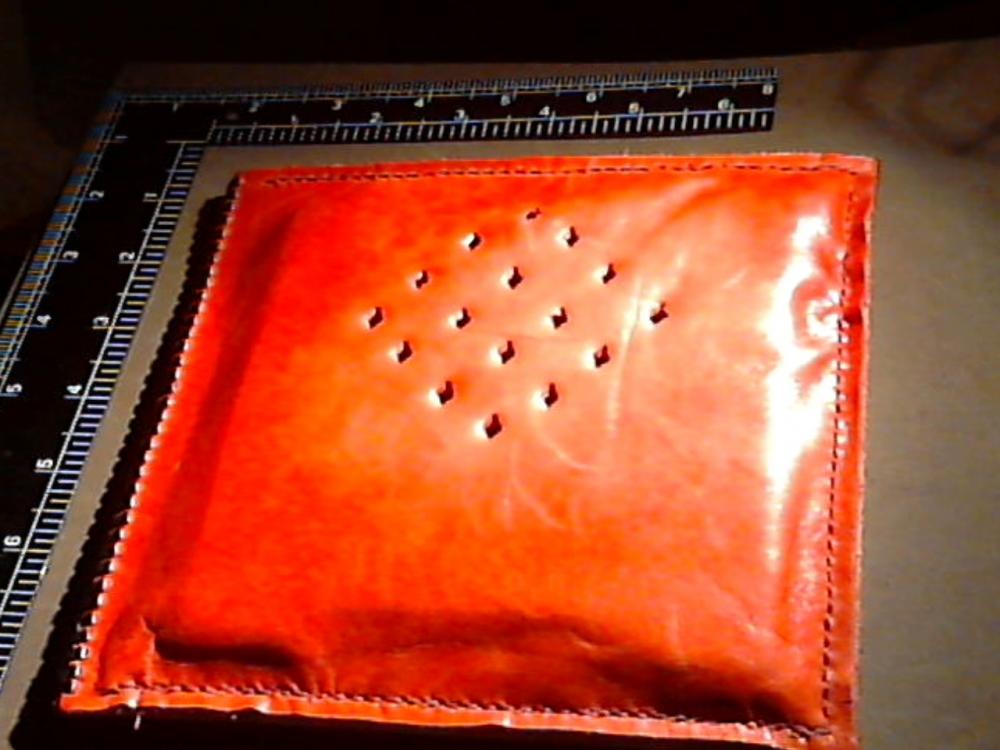
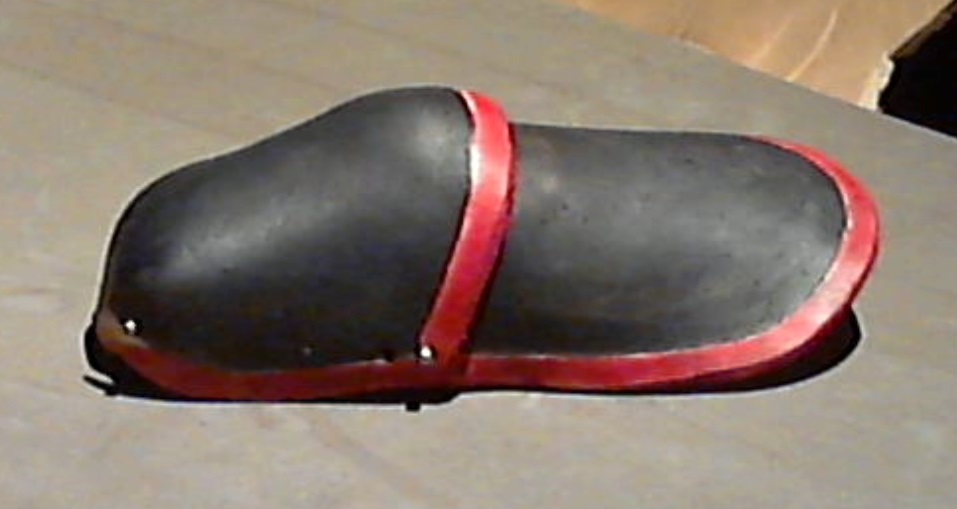
Got the first side all sewed together tonight -- padding glued in place and the liner sewed to the outside piece. The front edge has lacing around it to protect it from sword cuts. I didn't use blemish-free leather for this project, because it's going to get banged around and distressed pretty quickly. I am using Resolene on the outside for water resistance. Here is the reverse:
-
Having a forum like this is a great thing-- in the non-digital world, how would we ever have found all these answers? How many actual leather workers could we have actually met and learned from? Welcome to the forum, RedDun, and glad to have you aboard! It's likely that somebody will ask a question about horses or mounted shooting and you can get to be the expert of the day!
-
bag Dragon Boat Bag
DJole replied to AdamLVL's topic in Purses, Wallets, Belts and Miscellaneous Pocket Items
I like the concept! A nice design, and good styling details. It must have been frustrating coming back after 10 years, thinking to yourself, " Self, I used to know how to do this!" -
Your persistence paid off at last! Nice to see a piece of working equipment being returned to work, instead of gathering dust in a corner.
-
Green Elven Knight Helmet & Bp And Mini Tutorial
DJole replied to Prince's topic in Historical Reenactment
That is some VERY nice work! I lower my awl to you in salute. -
Show me your wallet
DJole replied to Joseph1836's topic in Purses, Wallets, Belts and Miscellaneous Pocket Items
Well, I made this just for myself, and it's the first time I ever tried doing this... so here it is, in its flawed glory: I like the tooling design. It's based on metal work found on the Sutton Hoo purse (an Anglo-Saxon ship burial from about 600 AD). Dye color is Fiebing's Oxblood; hand stitched with red linen thread. (Back from before I even knew what a pricking iron, or a stitching iron, even was.) Trifold design-- I find it bulky in actual use. Black pigskin liner--fitted like an amateur (see the wrinkle to the side of the ID?) 2 card pockets on the left side-- you can see the gold card in one pocket, and underneath that one is a custom pocket open on both sides -- the card can be slid out to the left or right. I like this feature. Middle ID holder, with plastic sleeves. Realistic DMV photo not included. Right side has one card holder (diagonal line marks it) and change pocket (with small rivets to reinforce.) -
Retirement looming, VERY SUCCESSFUL shoe repair shop for sale!
DJole replied to LMShoeCare's topic in Old/Sold
Best of luck to you in finding the right person, and may the right person find your offer! -
Ooh, nice work! Cleanly executed, delicate touch. That's a lot of stud work, too. No wonder the horse likes it-- she looks great in it!
-
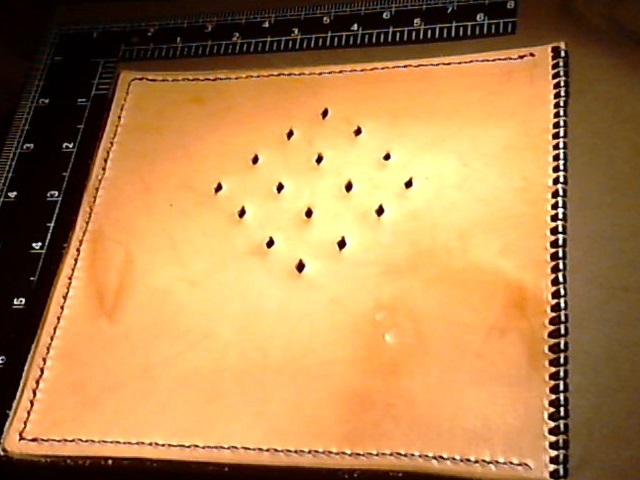
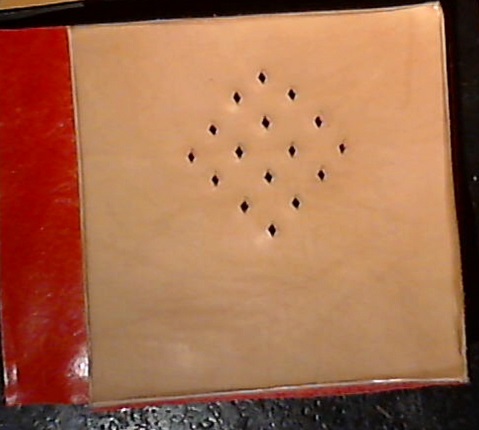
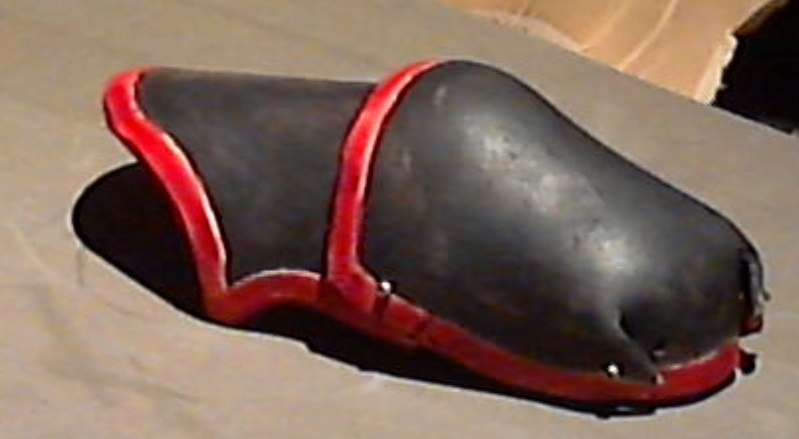
Here are the upper side pieces in their current stage. (there will be lower side pieces also, but those are still in the design stage.) I flipped one over so the red lining is visible. The perforated area is right over the ears. I was surprised at how much sound those holes actually let through. I'll have to do the same through the red lining, also. Underneath the lining I am putting some padding strips, and I am going to lace the front edge, because that edge will take a lot of abuse. The lacing will help lock the red lining, the padding, and this thicker piece together. I don't remember what this thin red leather was -- it was in a bin of bargain upholstery leather at Tandy, 15 bucks for the side. It's a bit thicker than pigskin. No tooling here, just a nice diamond design made with a filigree punch, and some nice slick edges (gum trag and elbow grease). It certainly took some pounding to punch those diamond holes in the thick leather, and lubricating the punch with wax helped a lot in pulling the punch out afterwards.
-
Mjolnir, here are some Angelus dyes that might be exactly what you want-- take a look at Light Rose and Rose at their online catalog: <https://angelusshoepolish.com/collections/leather-dye> I have a bottle of the Rose dye, and it's certainly pink.
-
I am satisfied with regular Fiebings dyes for my small projects. The rounders you mention earlier are great for learning not just how to dye, but how dye works on the leather (i.e. color changes, need multiple coats, is black really black enough, etc.) You might also want to look at Angelus leather dyes. They are a spirit dye, like Fiebings, but they have colors that Fiebings does not. I get mine via Dharma Trading, based in California , so as a California resident you should have no trouble getting these shipped to your house. (See Dharma Trading online catalog here: https://www.dharmatrading.com/dyes/angelus-leather-dyes.html?lnav=dyes.html)
-
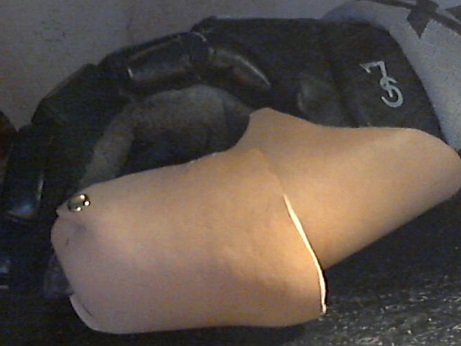
Here's my project for today-- I am making a heavy leather over-glove to go over some lighter hockey gloves that a couple people in my longsword class use. Hockey gloves aren't the best protection, so if they take a good strike to the hand it HURTS. And if you are worrying about hurting your hand all the time, it's hard to fight well. So I offered to help protect their hands better, and they thought that was a great idea! Here's the project so far: This is the thumb, two pieces wet molded onto the hockey glove and then hardened by hot air blowing over them. (I set them next to the electric wall heater nearby -- not too close, but enough so an hour or so dries the leather). Next step: Got the articulation point in the middle, and a nice curved dish shape, too. Here's a better view of the thumb tip: It curves around the thumb tip very nicely! Details: 8 to 10 oz veg tan, cut from tooling belly (I got them for a great sale price, so I don't feel bad about having to throw away a prototype that doesn't work). Dyes are Fiebing USMC black and Fiebing red. This is the right thumb -- the left thumb is drying off to my left a ways. Next step is riveting, and then on to the fingers.
-
I found a used copy of this book: Leatherwork Manual, by Stohlman, et al. (Here at Amazon: https://www.amazon.com/Leatherwork-Manual-Patten-Wilson-Stohlman/dp/B007QGQ8PM/ref=sr_1_1?s=books&ie=UTF8&qid=1516419918&sr=1-1&keywords=leatherwork+manual+stohlman) It's a basic illustrated step-by-step leatherworking course in a book from 50 years ago, which introduces basic techniques: How to prep the leather for carving (casing the leather), and skiving. how to use the standard tools (swivel knife, beveler, shader, camoflage, etc.) Basic dye work. Basic edging. Some simple projects with patterns. It gives some lacing patterns (which is why I have it), but not much information about stitching. I don't have any of the other books mentioned, so I can't say if this one is going to be better for your needs than those ones already mentioned.
-
31 Pen Pouches
DJole replied to Rolandranch's topic in Purses, Wallets, Belts and Miscellaneous Pocket Items
Well, that would be a REALLY exotic leather. Right up there with some Tyrannosaurus belly. -
So down on that side of the equator, do you stitch leather in the opposite direction? Heh-- just kidding, and welcome to the forum! I have an Aussie friend who is an Algebra teacher and Scout leader down in Tasmania.
-
31 Pen Pouches
DJole replied to Rolandranch's topic in Purses, Wallets, Belts and Miscellaneous Pocket Items
They ALL sold?! Well, that's a nice surprise! You must be doing something right, then! Those pens are very nice -- you and your fellow business owners/operators have some talent in tool use and design work. All that shows up in your leather work, too. Good thing you've got the sewing machine to do all those! I can't imagine hand stitching for mass production like that -- it just would not be cost effective. On the other hand, you may consider offering a premium pen case, of a different design with some more bells and whistles, and hand stitched as a value-added point. -
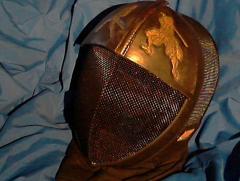
And here's the first teaser of what the top, forehead and chin will look like together: I haven't riveted the top pieces together yet, and the chin piece is still loose, because the side pieces are the missing links here.