


TomG
-
Posts
1,024 -
Joined
-
Last visited
Content Type
Profiles
Forums
Events
Blogs
Gallery
Everything posted by TomG
-
If it's a Type L size bobbin (I believe that's the size -- Consew 227R etc.) you can buy prewound bobbins in white and black thread that have built in magnets on the hole. These require that you remove that spring. Super popular on embroidery machines. But I always had tension issues with steel bobbins that I wind if I forgot to put it in. Here's a picture. Look at the middle one. The flex goes up.

-
They are eliminating the Gold and Elite memberships, I was told and lowering prices to elite or less across the board. Businesses will still get that extra discount. I believe that it goes into effect tonight.
-

Attaching Rhinestones to leather using bonding agent
TomG replied to rino4578's topic in Getting Started
I've done it using a heat press with good quality stones designed for that method. Hibby Lobby or Michael's my have some, bit never bought from them. You can dye, but dont apply balms, waxes or creams before pressing -
My problem with the round/head knife is it digs into the cutting surface. I'm usually cutting on a long pine board. What do you guys cut on?
-
Does anybody have some spare System 332 LLG #24 needles?
TomG replied to Wizcrafts's topic in Leather Sewing Machines
Hi Wiz.. Long time.. I assume that these are different than the standard Consew/Singer 24/180's? -
Where did you find the post?
-
I almost always dilute my dyes 50/50, unless someone wants a very, very dark shade of the color. I use denatured alcohol for the diluting though. Then I dip dye almost everything. Let dry before a second dip if needed
-
Fiebings has discontinued all flavors of this product except Neutral. I spoke to one of their chemists via email some time ago and he said that I could use the Eco-Flo water based dyes from Tandy (2600- series) to create a colored Balm. I've tried it with brown and black. The black was OK but the brown requires some experimenting. I used a few small disposable cups and syringes to do a couple of colors. I wanted to be able to pour "X" ounces of neutral into a bottle and "X" amount of dye and be consistent. Except the black, I found it was too much of a PITA to do, as the difference between the Neutral and the colors was not enough to warrant the effort. For Black, pour enough black into the balm so it stops being grey. I don't remember the proportions as I found a quart of the Fiebings Black and am still using it... If you do get the Zack White version, please let us know how you like it. That's the Neutral.
-
What LJK said - Plus -- If that bottom right birdsnest is where you started, you might not be holding tension on the top and bottom threads as you start. Get your piece ready to sew and before you step on the treadle, pull both threads out towards the back and hold them snug as you sew the first 3 or 4 stitches. See if that helps. As for the top right corner.. when you make a right turn, stop at the stitch before it and use the hand wheel to make the last stitch on that edge. As the needle comes up from it, stop with the needle still in the leather, on the upstroke. lift the presser foot slightly and turn the leather to tht new position. That will stop the angled thread that I see up there. FYI, the bucking is probably from trying to force the needle through the tangled mess. What size thread is it and what size needle? Finally, what's the total thickness of the leather?
-
I've done that for years. One of the older Leatherworker "bibles" shows how to do it. I think the measurement is 1/8th inch above the leather. The only time I've ever had a problem is early on when I cut it too short. I cut it with a pair of side cutters (actually flush cutting nippers) and the use them to make the tip round again.
-
Check with an Ace Hardware. The usually have an assortment of springs in various sizes and shapes.
-
Pink or white Leather Dye
TomG replied to Russ498's topic in Dyes, Antiques, Stains, Glues, Waxes, Finishes and Conditioners.
You can order pink from Angelus. You can also make pink by diluting red about 10:1 with denatured alcohol. 90% Isopropyl will work just as well. Play with the ratios until you get the shade thatyo like -
Standard Rivet has tons of them. Great customer service as well. https://www.standardrivet.com/shop/flat-head-spot/
-
Stamping flesh side of leather with INK
TomG replied to nancygreen9's topic in Leatherwork Conversation
Get a blank stamp pad. Soak it with your ink. I actually use oil based Fiebings dye. Get a rubber roller that you can dedicate to it. They have them at Micheal's for rubber stamping and such. Now, roll it on the stamp pad and then, roll it on the face of your stamp. Put it carefully on the leather and press or hit lightly to slightly indent the leather and lift straight off. You only get 1 shot at this, so a press would help. Take a photo when you try it and let us see the results! -
I make mostly dog collars and leashes. I just dye the back. Most of my stuff is dip dyed, so it's automatic. If I have a project that I am hand dying and want to keep the dye off, I've used blue painters tape. Just be aware that when you pull it off, it will fluff up the nap of the back side and may require some light sanding to get rid of it. I've heard that the frog tape or something like that has less stick and should fluff less, but I have not personally tried it.
-
Dying only the (laser) engraved parts of leather?
TomG replied to blackmad's topic in How Do I Do That?
Personally, I've used a number of different pens and found that they tend to clog easily I now use the refillable Moltow with replaceable nibs and acrylic paint -
Dying only the (laser) engraved parts of leather?
TomG replied to blackmad's topic in How Do I Do That?
On the back side, yes.. for sure. But on the top, the blue tape should not affect the leather at all in most cases -
Dying only the (laser) engraved parts of leather?
TomG replied to blackmad's topic in How Do I Do That?
Try covering with blue painters tape and engrave through that. Air assist will help -
I use a slow speed buffer to buff out the loose dyestuff on the darker colors.. black, navy, etc. Then, I rub in a coat of Leather Balm with Atom Wax. Buff Then, I seal with several coats of 50/50 Resolene. Water to dilute. Let dry thoroughly between coats and buff with a piece of lambs wool between. I have never been able to 100% stop bleed in every case, but most of the time, it does the trick.
-
I'm not a pro at all of the different compounds, but.. In the comments someone asked if he was using beeswax to burnish and he said yes. A few comments down someone asked about the process and he said it was just balm. I know there are many concoctions for treating leather. Lots are based on beeswax, mineral oil, tallow, fariry dust and magic I use Fiebings Leather balm with atom wax for many of my products, but it's a liquid. Recently, Fiebings stopped making the various colors of it and just sells Neutral now. I used the black and brown versions daily and preferred those over Neutral so I email and was put in touch with one of their chemists. He said that I could make my own by combining the Neutral with Tandys Eco-Flo water-based dye. He said to experiment with ratios, I settled on 25% dye and it seemed to work well. HOWEVER, I have gradually just stuck to the neutral as I have switched to dip dying most of my items and it works as well as the colored wax. For small, hand-dyed items, the colored versions seem to even out andy sponge or dauber marks. NOW, if you have some of the paste type of balm, try taking a small dab and mixing some dye in and see how it works. It might or it might not. Can't hurt to try!
-
The listing says it's a chain stitch machine. If I remember correctly, that's the type of stitch that you see on top of dog food bags so you can remove a lock stitch at one end and pull the thread end. You literally unzip the bag. Not what you want for leather, clothing or any durable goods. Plus, it sounds pretty lightweight. Hopefully, someone much more knowledgable than me will chime in. Tom
-
Zipper installation multipurpose guide
TomG replied to RockyAussie's topic in 3D Printers and Lasers
Wow. Great idea and concept. I'll print some out as soon as I reassemble my printer. Adding some upgrades as time allows -
Print the pages 100% to 8.5 x 11 inch paper. Trim all the pages to the outer black lines. Thanks just line up the ticks "A" to "A", "B" to "B" (or A1 - A1, A2-A@, etc)> Then tape them together as you go. You will then have a full size pattern.
-
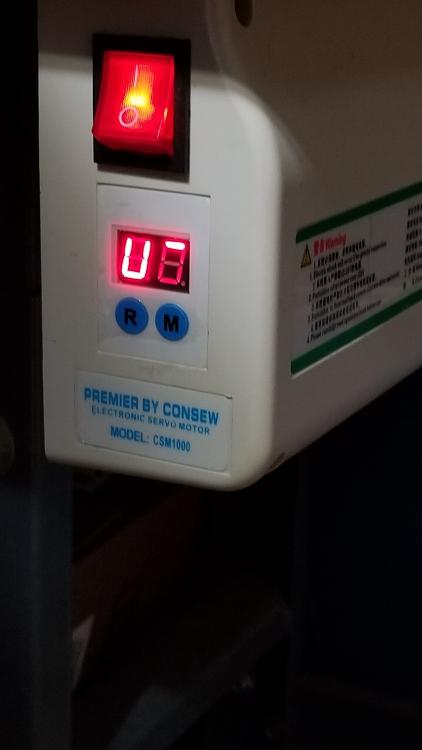
Does someone have this motor and have it set up to sew really slow. Can you share your settings with me? Mine does sew pretty slow, but it's hard to do a single stitch. I feel I'm close, but just need a little tweek. Also, does anyone experience it stitching a couple of stitches after you left up on the pedal? Usually ONLY within the firt couple of starts.
-
Does anyone make a piping foot for the Consew walking foot machines?
