


bland
-
Posts
270 -
Joined
-
Last visited
Content Type
Profiles
Forums
Events
Blogs
Gallery
Store
Everything posted by bland
-
Yes, the liner is assembled and then dropped in as a unit. I think that is the way to go.
-
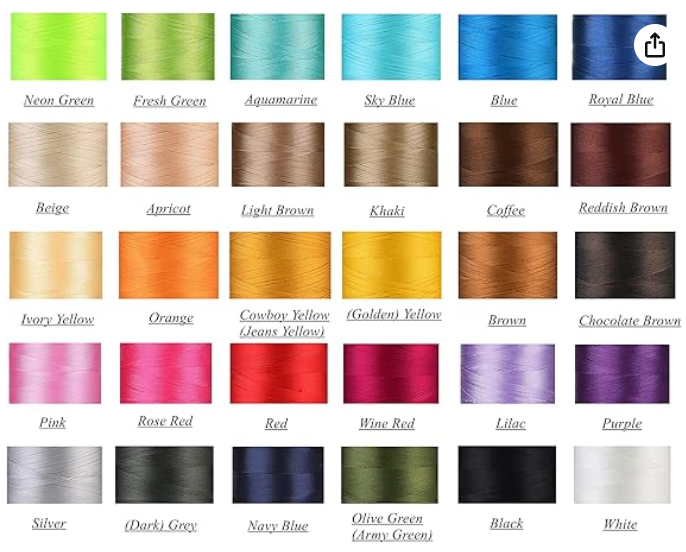
Leather Machine Co, Toledo Industrial, other advertisers on this site, an Amazon search or trip to a local industrial sewing shop will give you many sizes and colors to choose from. You can get a 1 oz or larger spool/cone. ~ $7-10 for the 1 oz. Below is from just a sample of an Amazon search. Toledo industrial has an even larger selection of colors. Even if you are sewing by hand sewing machine thread works well and will match the thread on the purse. Colors will generally sew in and look a little lighter than when it is on the spool/cone. When the liner was dropped into this purse it was sewn in on this top seam. So, to me that is the way to go. To me it is easier to sew if you can see both sides to saddle stitch or lock stitch with a Speedy Stitcher or similar. You should be able to match up and use the same stitching holes when putting it back together.
-
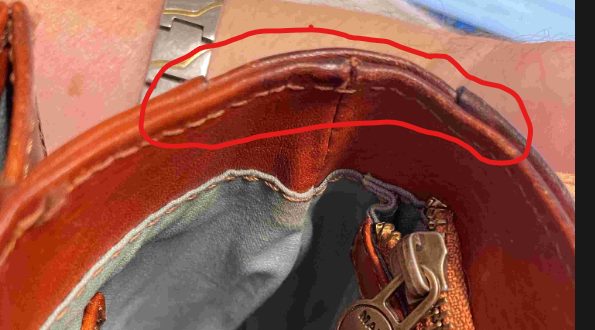
If it was me, I would remove the liner or at least pick out a few stitches on each end. Then you can do your repairs stitching and riveting the strap attachments and it won't show on the inside. Then restitching the liner. I would pick out the top seam on the liner where both pieces are leather. That is the easiest way to get it back in looking good. Good luck!
-

Laying out a saddle pattern
bland replied to ladyhawkjm's topic in Saddle Identification, Restoration & Repair
Thanks for the photos. It looks like it has been in some serious wrecks. Personally I would not put all new leather on that saddle unless you are just wanting the experience. I would inspect and see what you are up against. From the pictures it looks pretty rough. Is the tree damaged? I know it has some sentimental value so If everything checks out and seems okay I would clean, oil, repair or replace the small items, damaged areas and missing items (stirrup hobbles for one). If you are ambitious you might put a new seat in it. Still you can get a saddle like that in good condition for $300-$600. -
@Dwight I don't think you would like a saddle bag 18 x 18 x 5. They would get under you leg or hang way back (about 6 inches on a square skirt saddle) interfering with your horses movement. They would also hang way down on the side getting in the way. The old cavalry saddle bags are pretty big and I think the measurements there are in the range of 13 x 10 x 4. You could include a cantle bag on top and still tie your jacket/blanket on top. To your original question about dimensions. There is some "it depends" in the calculations. All saddles are a little different. Do you have a saddle handy? If not I can give you measurements from mine. The distance from the cantle to the edge of the rear skirts on my 4 saddles average 5 1/2 inches. The bag opening/lid should be just below where the cantle ties in at the seat ear where the conchos and saddle strings are (if it has them there). Rear saddle strings are about 12-14 inches apart again not all the same. The distance from the center of the cantle to the level of the where the bag starts is about 8 inches so overall in the 16 inch range. As far as the arc on the cantle it also depends on the saddle tree maker some are a little flatter on the back. I would just take some paper/posterboard for a pattern and cut the general shape then you can scribe a line on your pattern with your compas. I don't punch my tie holes until I can see where the rear saddle strings hit on the bag. Take that for what it is worth.
-
Laying out a saddle pattern
bland replied to ladyhawkjm's topic in Saddle Identification, Restoration & Repair
What type of saddle are you restoring? Western? English? What is the purpose of restoration? How old? I don't know much about English saddles but most of the western saddles I have worked are not worth the expense of replacing all the leather. The tree would have to be in pristine condition. There are areas of the hide that are better for certain parts of the saddle. Do you have a picture of the saddle you are working with? -
Welcome to the forum!
-
Here are the pictures. Can you pull the tabs to the outside?
-
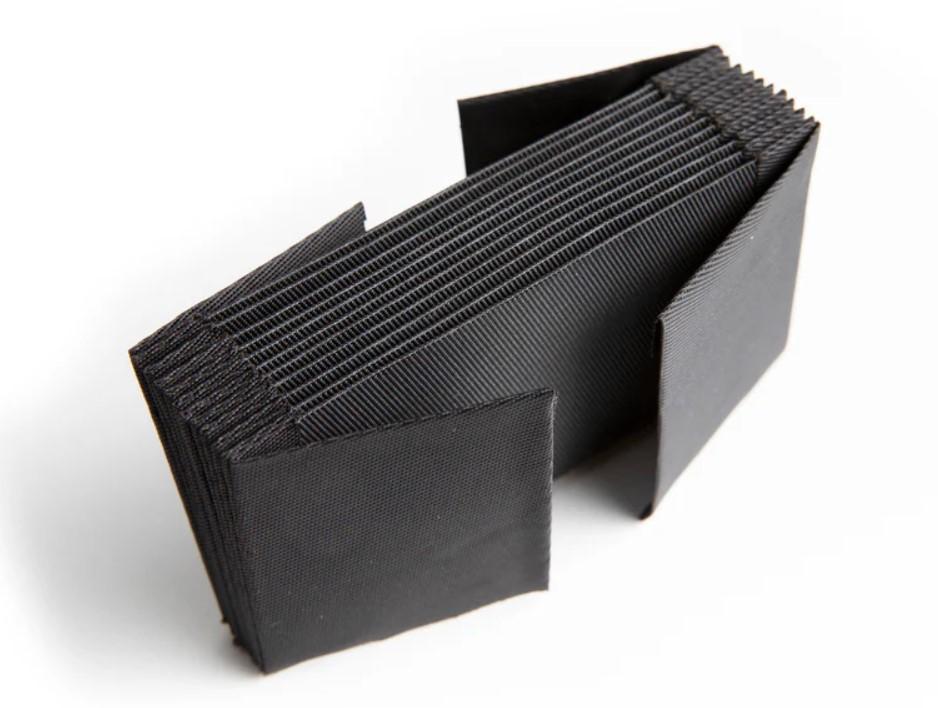
You could also not use gussets. Keep the little tabs you have sew up the sides either so you can turn it. You could also do a lap seam or just stitch them together flat. Then bring the tab up and sew it in on the inside or outside. So many possibilities. Here is one I did. It is pretty narrow only about 2" wide but it holds computers or a 2 inch binder.
-
-
That historic holster looks to be a little tricky. With double flaps, cut outs and mag pouch all in one. I don't have an actual ppk but I do have a copy. But not a copy of the historic holster. Below are the basic dimensions if it helps if not read no further. Dimensions 155 mm by 110 mm. Slide width front 23 mm at serrations 25 mm, depth 28.5 mm. Barrel in front of trigger guard 45 mm. Depth at trigger guard 57 mm. Angle of handle to barrel is about 108 degrees. It begins 50.8 mm from front of trigger guard so about 96 mm from the front. It is also about 50 mm wide. Depending on the grips the handle circumference is about 130 mm. Magazine is 25 mm x 9.5 mm x 95 mm. It also has an angle to match the handle. Picture from internet search. I did see one in the search with the symbol above the keeper tab.
-
Very nice! Good to see you back.
-
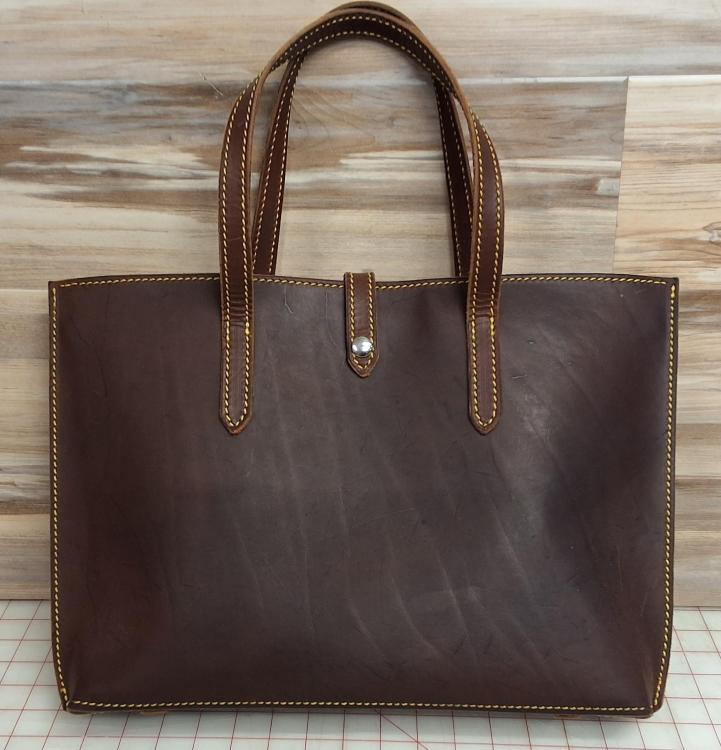
Passport Book
bland replied to mikesherman's topic in Purses, Wallets, Belts and Miscellaneous Pocket Items
very nice -
Poly vs. Nylon ? Same size, different adjustments
bland replied to Wyowally's topic in Leather Sewing Machines
I do find it helpful to change my needle to a smaller size when using poly thread. You may still have to make some minor adjustments to the tension as well. -
Holster with inlay
bland replied to Bawarrior's topic in Gun Holsters, Rifle Slings and Knife Sheathes
Beautiful -
Very nice.
-
Very cool
-
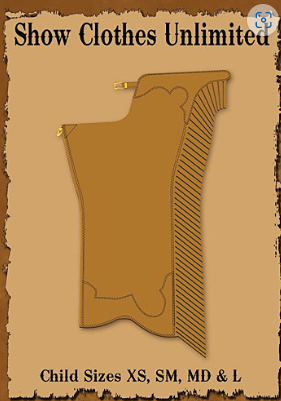
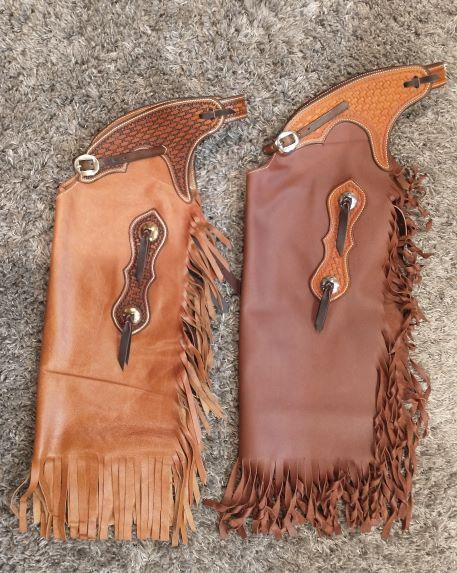
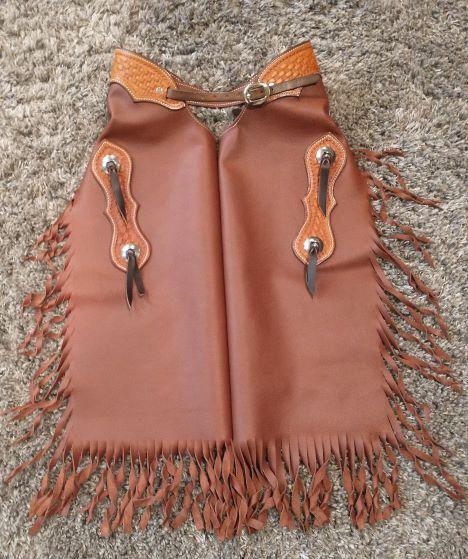
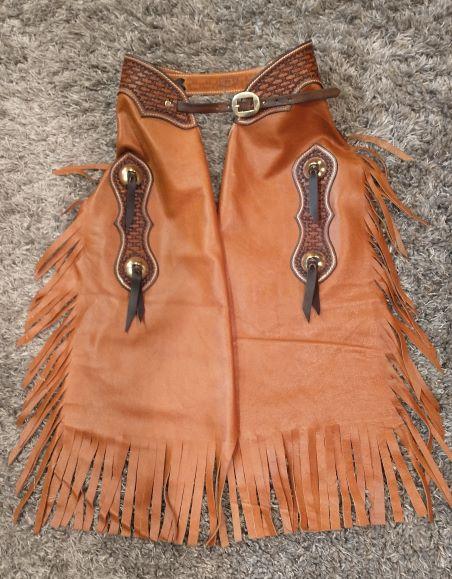
I know this is an older thread but I would have the step-ins taper to the knee (not too tight) and then flare a little at the calf and straight straight down from there. Kind of like in this picture I found here. Patterns for Chaps, Chinks and Armitas : Sew Your Own : Equine Web Design
-
Are you tooling the yokes and back=belt? For me I like a tooled yoke in the 5oz to max 8oz range or about 2mm to 3mm. When you sew them to the body it will make them in the 3.5 to 4.5 mm. I don't want them to be too stiff as it makes them a little uncomfortable. For the back belt I would line it and be up in the 10 to 12oz range or 4mm to 5mm. I also like them to come apart in the event I get hung up so the front belt is single ply 2mm to 3mm. Some people like them heavier so... As far as color I would go with a light oil finish and antique if you like.
-
Take a saddlers' awl/spike and punch a hole in the center of the rivet and pull it apart. Easiest way with least damage to the project.
-
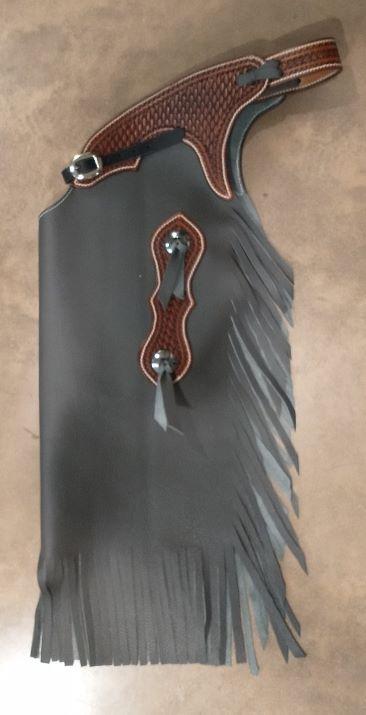
Thanks to all. Big smiles Christmas morning. Third set now completed not for Christmas.
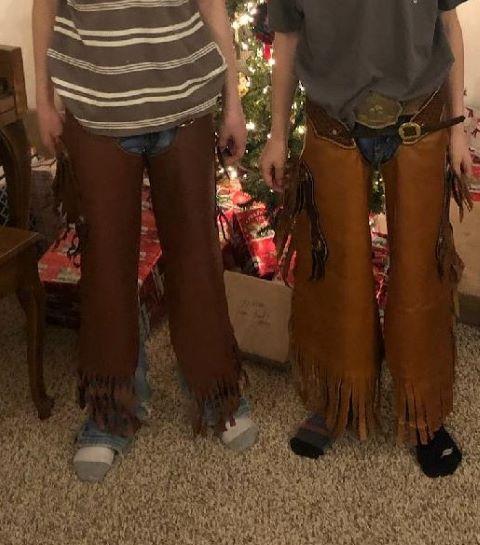
-
Last minute Christmas order for a couple young cowboys. Hopefully they get there in time. Merry Christmas.
-
Watch Strap Repair
bland replied to Handstitched's topic in Purses, Wallets, Belts and Miscellaneous Pocket Items
I'll go with repair. Looks like some of the original parts may have been used (buckles). Looks great. -
I think it looks great even better than the original.
-
Cutting all depends on the projects you have planned for the hide. There are numerous ways to cut the hide. For belts and straps goods the higher in the back at the butt end to toward the shoulder is best in my opinion. Depending on the length of your straps or belts you can measure up the butt end to the desired length and cut it to length all the way across leaving the but end and shoulder end. Or you can cut the bend (butt to shoulder minus the belly) again to your measurements. Leaving you with the shoulder and belly attached. Or trim off the belly and leave the top. The belly and neck are good for molded projects. If you are trying to stay away from the brands you can take that into consideration as well. Or you can incorporate them into your project. When working with brands you need to know the leather is generally weaker in that area and doesn't stretch or form well. Anyway, there are many ways of cutting your leather for the projects you have in mind. Have Fun!

