


RockyAussie
-
Posts
3,265 -
Joined
-
Last visited
Content Type
Profiles
Forums
Events
Blogs
Gallery
Store
Everything posted by RockyAussie
-
May I ask why?
-
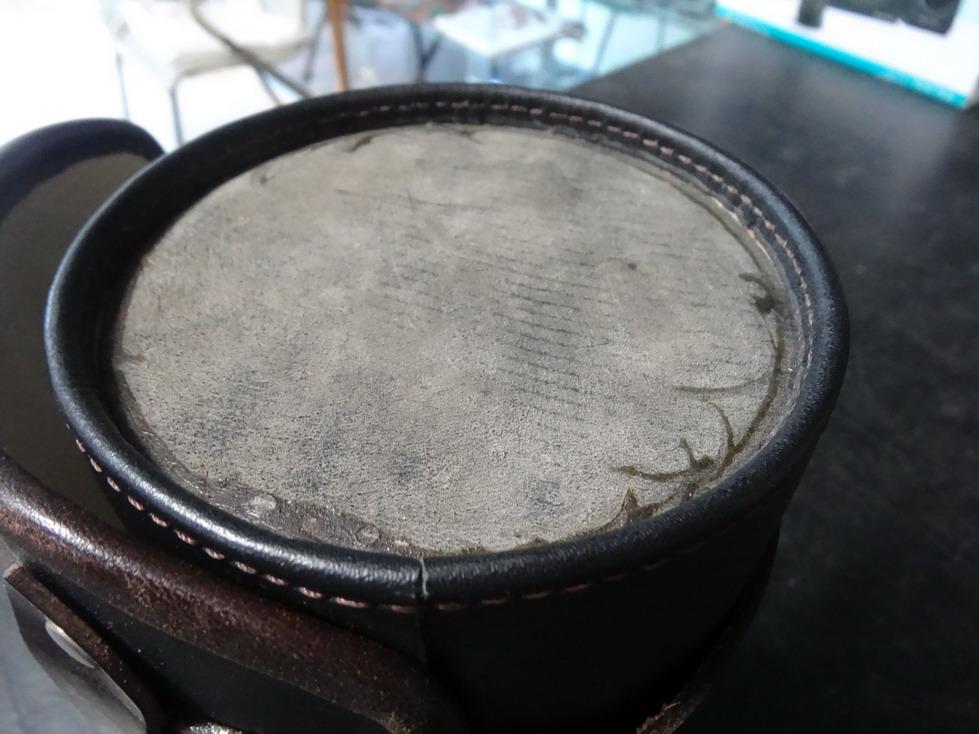
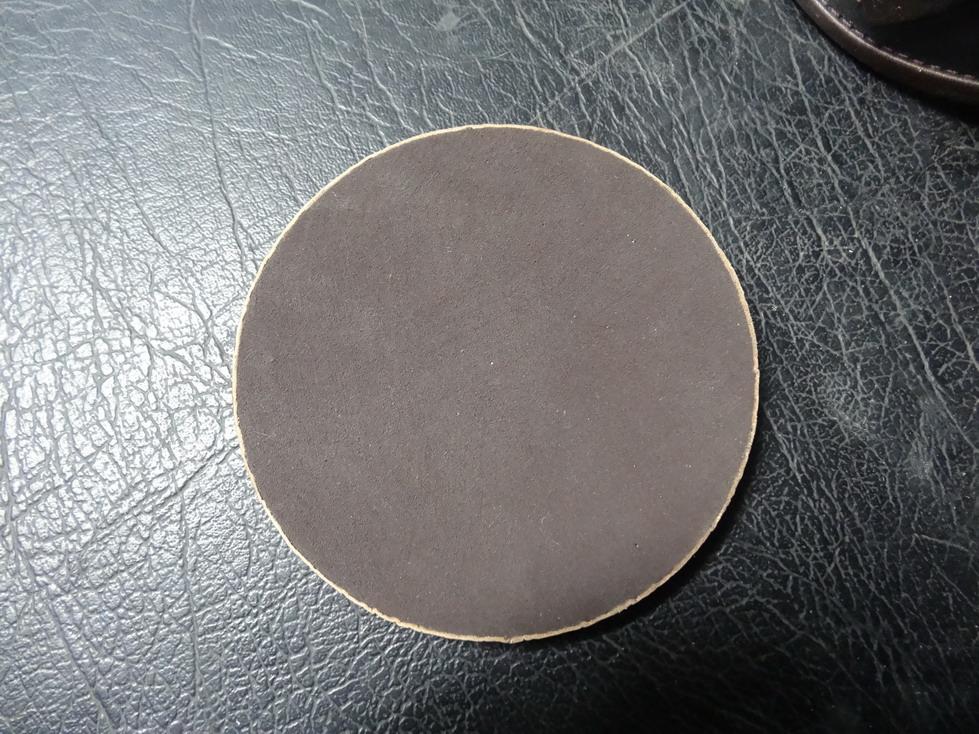
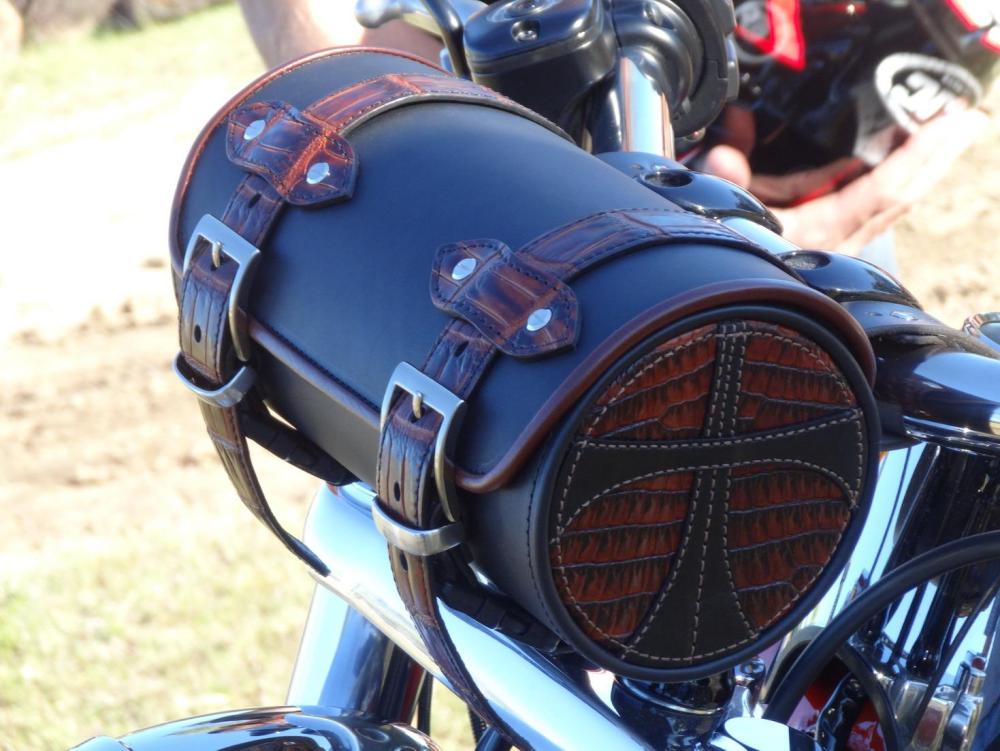
I have seen a few of these sort of bags done like this and it does appear that most have only glued the leather to the wood and either screwed or used upholstery escutcheon pins to hold the leather to the wood. Personally I would not recommend this method as no matter how good the glue is it is only held by the underside/flesh side of the leather and therefore the pins, nails or screws must do most of the holding. The gaps between the pins will be easily pressed out and then so will many of the pins in time. I would suggest either doing something similar to what I did when I made this motor cycle tool bag. The gusset end was machine stitched in place first after folding the outer leather over the ends. After that I covered an eva rubber plug with a leather design and then glued it into the end onto the lining. The plug was a tight fit into the end and was tested without any gluing to start with. The plug could have been wood or steel or whatever.
_resize.thumb.JPG.eb9962299c343ee21e4c724aa937d48f.JPG)
-

How much to charge for your leather goods?
RockyAussie replied to GrampaJoel's topic in Leatherwork Conversation
I have to agree with you about the quality and how much people will charge and what people will pay. Like you said and I feel the same. Over here I see even a lot less quality but the marketing seems to make the average consumer blind. Their website is where the quality really shows a skill set to be admired. Baffles me that we could make wallets like those in less than 1/4 of the time than the wallets we make and still not get the same $$$$ -
For any one curious to how this translates to English this is what Google came up with - This sewing machine requires the "FEED ROLL" to be pulled forward to thread the fabric. So this part connects with the knee lifter. I don't have this part. If anyone has one, please post a photo. I want to get this part.
-
Very nice tidy work there @SteveOz and good to see you made it here at last
-
I have done a few with my little diode laser and they work pretty good. Mostly can only use black with a diode as the clear does not work at all.


-
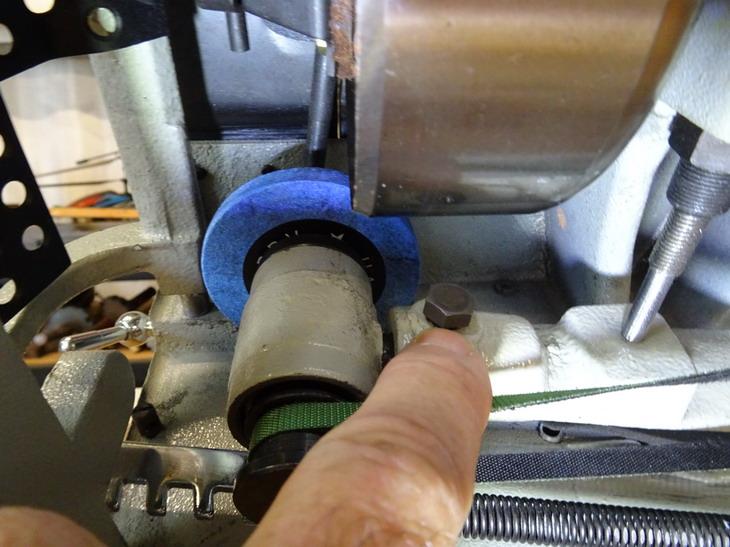
Questions re: DIY box style speed reducer
RockyAussie replied to shelr1's topic in Leather Sewing Machines
It May be just the picture but it looks like the small pulley mounted where it is would not allow a belt to miss the motor above it on the way up to the machine head. -
Backside Stitch Almost Perfect
RockyAussie replied to ArchiveGoods's topic in Leather Sewing Machines
This could also be just a badly wound bobbin. If your thread path from the spool is not a smooth run then the intermittent tightness can make the bobbin wind on with tight spots on and off. When the tight part holds up the thread as it feeds off of the bobbin it will pull the thread down as you have shown. It can also be if you have left any tail thread hanging out of the bobbin. Test with the bobbin in the machine a slowly pull out the thread and feel for any catching as it goes. -
A REDHEAD !!! Ohhhh Frodo .....R.I.P. friend. Maybe could you quickly do the whole floor black????
-
Try this....lightly pull the threads taught when you have the thread return lever all the way up then hold them down on the machine and do not pull them. This allows enough thread slack for the needle to form the loop for the hook to catch the same as every other stitch the machine does.
-
Generally I put some marks on at various points that have to meet up as I get to them. As I am going along the edge I make little adjustments in how I pull or push the leather in order to get these to line up. The gusset stretching too long is often a problem and it can be helped a little by slightly lifting the presser feet every few stitches which allows the leather to relax back and not grow so much in length. DONT lift the feet high enough to release the tension discs if you can avoid it as that can affect the thread balance etc.
-
Only thing I can suggest from here assuming that you have moved the bell backward the correct distance is that you have not given it enough of a sharpen yet.
-
I can not be sure as the video does not show from the best angle to see the gap between the bell edge and the presser foot but I am thinking that your bell edge is too close to the presser foot edge. This video of mine should help to show that distance I think -
-
It is possible that you have your walking feet set up to have a fairly high lift already. That will work well enough most of the time unless you are doing thinner work. You get a better looking stitch generally if the feet are not running too high above the job and the smoothness of the machine will be better and less inclined to miss stitch as well. The knob on top is great because when you come up to a thick piece like the join in a top line of a bag you can simply give the knob a quick turn to give you a higher foot lift until you are clear of the thick part. In the Cowboy range in Australia that machine is called a CB6900 and in the States I think it is a CB 1341. On most machines to get a higher or lower foot lift requires using spanners at the back of the machine. You can see me using one of these machines in this video but alas I did not think to show the knob adjustment in use. I will try and do a video showing it sometime. -
-
Looks pretty good to me Roger. That looks like a little shifter you have stuck in with a Surge I think? I am working on a 3D mold for a Wave+ and a Surge at the moment. I am up near Rockhampton if your ever around this way.
-
Hitting the corner with the needle
RockyAussie replied to PlanoMike's topic in Leather Sewing Machines
This depends on the importance of the finished article and how it will be seen by others. When it is fairly high end I mark a point in the corners before i start stitching so that it gives me some warning to adjust the stitch length before i get to the corner hole. If it is of critical importance I work out the distance of the start and stop holes and work out the gap for each stitch to be even before I start. I actually do a print out to show the print spacing and then get some leather scrap of the same thickness as the job to be done and do a few stitches to compare my sewing against the printed. This will get me a perfect stitch spacing from start to finish without any adjustments. This crocodile covered memorial book is an example of one I have done this way recently.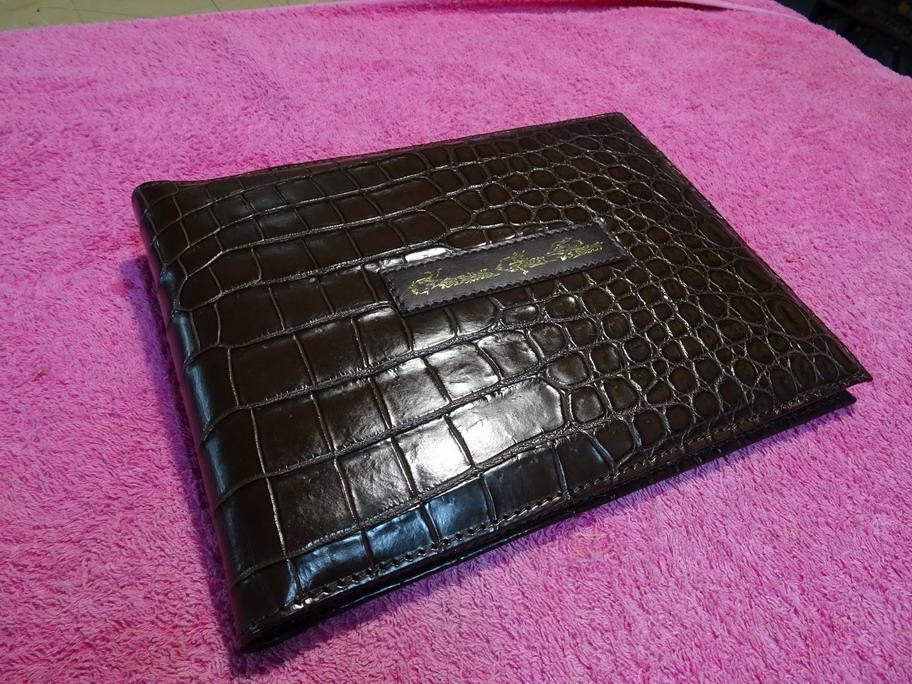
-
I would not wish that for anyone but I am sure you will get yours happily running in not a long while. You can tell when the bearings are gone you can press the bell up and down and that is pretty rare.
-
This waver is more than likely a very small chip out of the bell edge. Turn it around slowly by hand and you should be able to see it. Sharpen then dress inside the bell then with a medium temper leather SLOWLY let it feed through for a few inches. This can help to remove and little fine bits of feather edge off of the bell edge. A couple of pictures showing your foot to feed roller positioning may help. AS for the speed ... the faster the bell goes and the slower the feed goes within reason will give you the best results. All of my skivers have either a clutch that allows me to feed in slow or a separate motor that does the same. My first old Fortuna had no clutch and and was a nightmare to get running well so I gave it away to some poor fella. Work on separating the bell feed to get it running continuously at about 1200 to 1300 rpm.
-
A new bell is around 45mm wide and anything less than around 30mm is getting near to worn out. The sharpening stone needs to not get to worn out either as it will make a shorter and steeper skive angle. Check if you have an adjustment bolt to shorten the length of the arm that the sharpening stone is attached to. it would look like in this pic if you have it - If yours has it you can undo it with a 12mm spanner and move it back to get a wider angle. I would not use the metal feed wheel unless doing heavy leathers, if you ever inadvertently let it touch the bell it will not be good. A medium grit feed stone should be best for most applications. I know this video is long and boring but unlike a lot of other stuff on the tube its not full of shit so just double check some of the info on it.
-
How to add this effect on leather edges?
RockyAussie replied to Mocivnik's topic in How Do I Do That?
I don't see this as all that hard to think out. To show respect to the maker I ask you ...what if the welt area was not burnished at all and perhaps folded instead? In your specialty it says Holsters so the bottom pic with the knife beside the sheath should not be that much of a mystery I would have thought. I hope that is enough for you to see how. -
First up you will find occasionally that some leathers have a sort of tendency to want to split at a certain thickness whatever the setting you try and dial in. Important points are to have the bell super sharp, the back feed stone spring set lightly and the feed stone set to almost touching the bell and set very parallel. Having a roller foot is important for this and you may have to experiment with some of the same leather scrap and move your bell a little closer or further away from the presser foot center line. Feed in slow as you go. Don't try and take less than .3mm off as it will not give the feed stone anything good to pull through. This video shows me doing something similar and may help - There is another one on my channel where I am doing some circular skiving and that gets a bit tricky.
-
How to keep leather/Patterns flat while cutting.
RockyAussie replied to Littlef's topic in How Do I Do That?
Depends on the size and the thickness you want to cut really. 90% of what I use I spray the card pattern or masonite or printed plastic with contact glue then let it tack off for a few hours. This stops the pattern from moving around while I push the knife along the edge. This post I did awhile back shows both where I used cardstock with a spray glued back and plastic patterns I made with a spray glued back as well - -
Tall post sewing machine in use
RockyAussie replied to RockyAussie's topic in Leather Sewing Machines
First thing I have to say I am in Australia and I have been wanting one of this type of machine for some years. I pushed pretty hard to get the Cowboys reps here to get me in this one and it did take some time. I would check if the dealers there would be happy to do the same for you first. If no good then Techsew have a similar machine you could check out. Note well that no one type machine will do everything you want and if I was starting off all over again I would still get a cylinder arm machine first but following that this would be my next investment for sure. I hope you go well with a Cowboy machine because over here at least I can say they look after their buyers and any issues they may have very well. -
Got me thinking...Thanks for posting @Frodo
-
Tall post sewing machine in use
RockyAussie replied to RockyAussie's topic in Leather Sewing Machines
Yeah I've got a Adler 268 with a feed roller foot and about that high. Good machine but not anywhere near as useful overall. Good for shoe uppers and stuff but don't laugh....I mostly use it for stitching belts cause it goes so fast.

_resize.JPG.f1da300ccc73b385d9a85957ab28125b.JPG)