RockyAussie
-
Posts
3,265 -
Joined
-
Last visited
Content Type
Profiles
Forums
Events
Blogs
Gallery
Store
Everything posted by RockyAussie
-
Once you are used to it calibrated fingers are calibrated but how to translate that to a newbe who has just spent a lot of mula on this wonderful machine..... It would be nice to be able to say something like take your thread up through here and back off your springs untill this 1 litre bottle of milk starts to drop sort of thing if you get what I mean.
-
I was curious if it would give enough scale for the bigger machines or not so I might get one and try it out. It often comes up on this forum about getting the tension right and It would be handy to be able to advise a starting point rather more than the pull should be firm. When the tension springs get worn or something is stuck under them it would be good to know if 180 grams pressure would be a good starting point or whatever. Maybe some fish scales might be better?
-
For those in the US https://www.ebay.com.au/itm/Thread-Tension-Gauge/382447551778?hash=item590ba68522:g:3YkAAOxyRhBS5oMu For us in Aussie land https://www.ebay.com.au/itm/Echidna-Thread-Tension-Gauge/281399903744?hash=item4184bdc600:g:OecAAOSwXudbGLB1 And here's a video demo of similar
-
Now that sounds like a good idea. I'll check out the ebay and get back if I find something.
-
Wax on...wax off...wax on....
-
Cingradulations The first 2 pictures look alright but your stitchin on the last pic make me feel better You gonna need a guide line or guide I reckon but I bet you already knew that.
-

Stitched coin purse
RockyAussie replied to Raksha's topic in Purses, Wallets, Belts and Miscellaneous Pocket Items
This link is worth a read and might help if not now some time soon. -
Question about lining a leather bag
RockyAussie replied to panchoskywalker's topic in How Do I Do That?
Easiest way would have been to attach a binder strip over the lining and outer all together when inside out then bring right side in back through the zip opening. If putting the lining in as a pocket it is normal to leave a join in the middle at bottom and bring it through the open zip top and fold the edges in then stitch together whilst holding the seam together. Drop it back in and your done. From where you are at now either turn it inside out then stitch the bottom corners together then turn it back the right way and do the seam trick as I said above or you may be able to turn it inside out and put a binder across the bottom corners thereby securing it down and in place. -
CB3200 questions - considering refund
RockyAussie replied to BenR's topic in Leather Sewing Machines
The hand wheel should not be difficult to turn and I would be concerned that the side load may mean that the shaft or cam is not secured in the right place. I would not turn the machine over any further due to it creating more damage. The fact that the screws came out is not a good omen. I would be surprised that they would not offer a another machine in replacement. I would be keen to get that machine back quickly if I were them. The Cowboys do not have a lot of line up marks as do the Juki and some others and reseting the timing and such can take a lot of time if you don't have clear instructions. I would return it and try to be understanding that this would not normally happen. For the price they are an excellent machine normally. -
It looks like you have your thread return spring held at the uppermost height in the picture. Does the thread start to go slack at the needle just as it is entering the leather? That is what it should be doing and It may make some difference. When you say you adjusted the tensioners a little what do you mean? The tension disc adjustments or the foot pressure or the bobbin spring or?
-
Stitched coin purse
RockyAussie replied to Raksha's topic in Purses, Wallets, Belts and Miscellaneous Pocket Items
Neat idea. The stitching looks good time to work on the edging -
Welcome. As battlemonkey said please post your pictures. If they are bad enough it makes us think we are getting better if nothin else That's what I say. I hope your experiences on LW are always positive and rewarding.
-
If you are sure it is coming through the thread path on top without any tight and loose happing as you pull it through have a look and make sure that your foot pedal is not letting the spike that separates the tension discs at the back touch. If there is no gap from the discs it may be enough in operation to make the tension loosen and tighten a little. Make sure your foot pedal where it hinges is moving freely because if it gets caught up it could be holding the tension discs apart as well.
-
CB3200 questions - considering refund
RockyAussie replied to BenR's topic in Leather Sewing Machines
Firstly I will say that telling us what country and preferably what town area you are located could help. Some members like myself are willing to drop in and have a look. I did that just this last week with a Saddler acquaintance that had just got himself a second hand "Stallion" which in many respects the same as my Cowboy machine. One big difference was that it is on a clutch driven motor and he was now used to using a servo motor. One of the things I found that suprised me for an 80 year old saddler was that he had little idea of how to adjust the foot pressure. It was wound down that tight that he could not get the machine to go along slowly and he had trouble getting the foot to lift so that he could turn corners. I backed of the clutch on the motor and wound off the foot pressure and he is happily back making up a heap of holsters he could not stitch before. Secondly- a couple of pictures that show the top for the foot pressure and the back where the tension discs are could help as well. I found similar problems getting caught up with the foot lift on mine when I got it and found that the spike that disengages the tension discs was way out of alignment and I had to do quite a few adjustment and shaving to get it behaving nicely. If nothing in this area seems to be the cause it may have a bent shaft on need some other adjustments. Yes it is a bad design. I put a brass washer above the roller to get it down lower and it works good now. Not the best pic but note how it now nearly touches the needle plate. If this is your first machine and your not very mechanical I would recommend getting someone who is familiar with them to have a look at it with you.
-
Edge paint VS Burnished edges showdown!!!
RockyAussie replied to immiketoo's topic in How Do I Do That?
I should have added that after I finish putting on the last coat of edge coat I do polish it on a finishing machine which puts a coat of a beeswax mix on. This gives a barrier/seal on the paint to help it not stick to itself if left in contact in hot weather for long periods. For instance if a lot of belts are piled up against each other before being polished they can tend to glue together sometimes. Another thing - before polishing if I see any little bumps or grainy looking bits I use a grey fine scotchbrite to gently cut it back and the polish will blend it all in. Hooco wax neutral is one that I use frequently. -
I guess there is one or 2 things here to consider.Did they get the idea from looking on LW ? I hope they did as that may mean they are reading this now and along with their deceptive advertising regarding the " Cow leather/Italian veg tant cow hides " the construction change with the spring clips means they have elected to use will unclip at a very annoying rate. Aesthetically I think it looks better but in service it will lose appeal very quickly. I would promote the original as REAL + ORIGINAL along with all of the better points. Shame on Tantat Piece company for not offering some credit to @andrewsejlv
-
Edge paint VS Burnished edges showdown!!!
RockyAussie replied to immiketoo's topic in How Do I Do That?
Hi Gary, Thank you for sharing your test results with us all. I wonder if before the clear sealer coat were applied if it were sanded back would the adhesion have worked better. Sort of reminds me of how PVA glue behaves when wet for too long. I might try the base coat now having seen your results. Normally I just apply straight to the rough sanded leather 2 or 3 coats then sand back with an 80 grit? (Medium foam sanding block)to get smooth then finish of with another 2 coats. That separation line up the middle can drive me mad at times if I get too much on but its not to bad if I do as above. Again thank you for sharing so well this information. -
Pattern cutting made easy for prototyping. eg key purse
RockyAussie replied to RockyAussie's topic in How Do I Do That?
Hey jimi, yes that is correct. One side has the gussets and the other not. Thanks @garypl turning inside out is not that hard but I should have pointed out that doing that with glazed crocodile would be very difficult with out getting wrinkles in the glaze. I should also point out that if doing this in most leathers the leather lining would not be necessary. Thickness wise between 1 to 1.4mm (about 3oz) would work fine. Thank you all for the kind comments..... It helps to know if it is of any help to anyone -
Quite likely the post is not long enough for the leather you'r using. Check that they work on some thinner weight leather first. If they work alright then you can get some speedy rivets (7mm) i think that you should be able to substitute for the post male part to give you some more length.
-
Pattern cutting made easy for prototyping. eg key purse
RockyAussie replied to RockyAussie's topic in How Do I Do That?
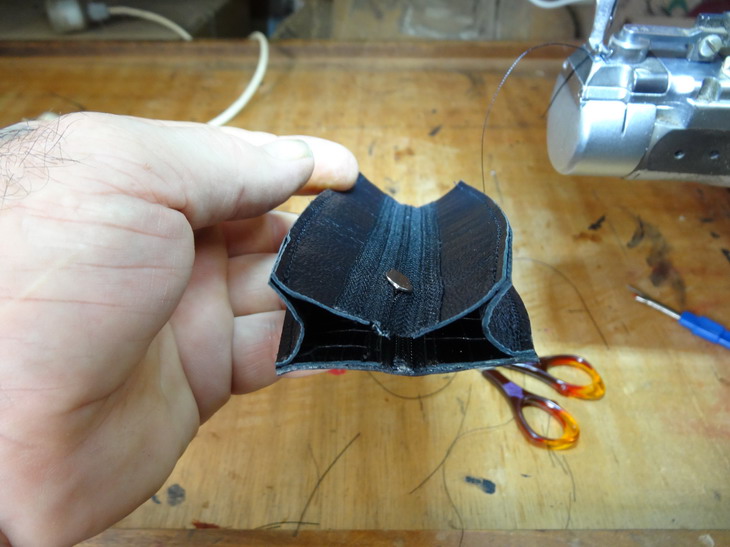
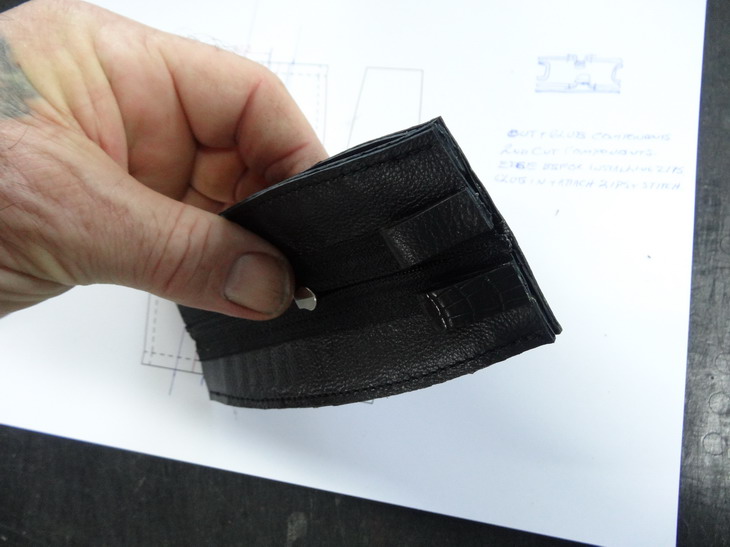
This should be the last round now-- Both the gussets get stitched down Next is the other side stitched on Little straps for the key ring attached Now the final stitching gets completed. Note: they get carefully backstitched into the same holes- The case now gets turned inside out and pressed into shape That's it all and thanks for looking. Comments are welcome Brian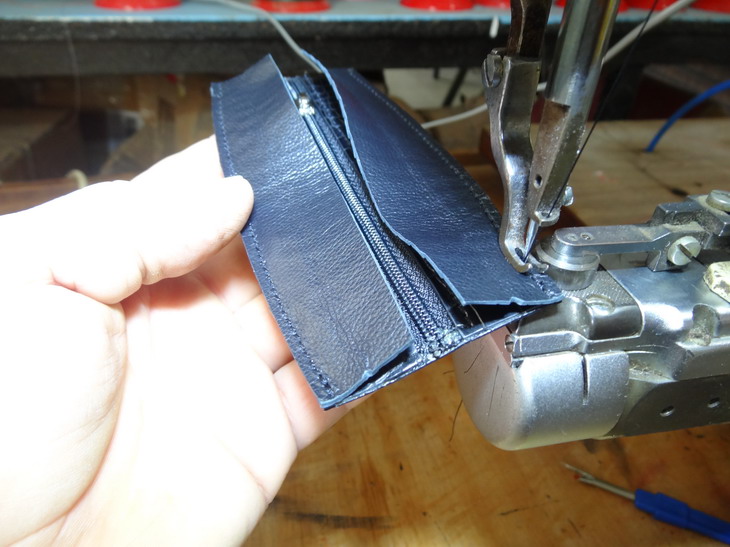


-
Pattern cutting made easy for prototyping. eg key purse
RockyAussie replied to RockyAussie's topic in How Do I Do That?
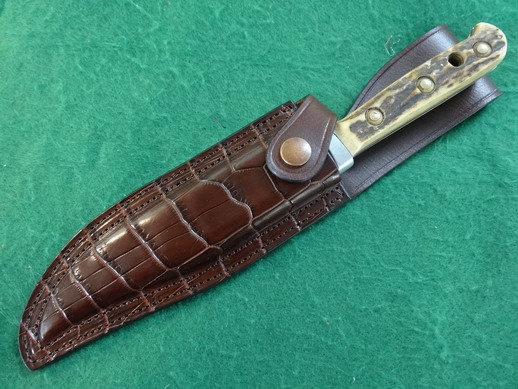
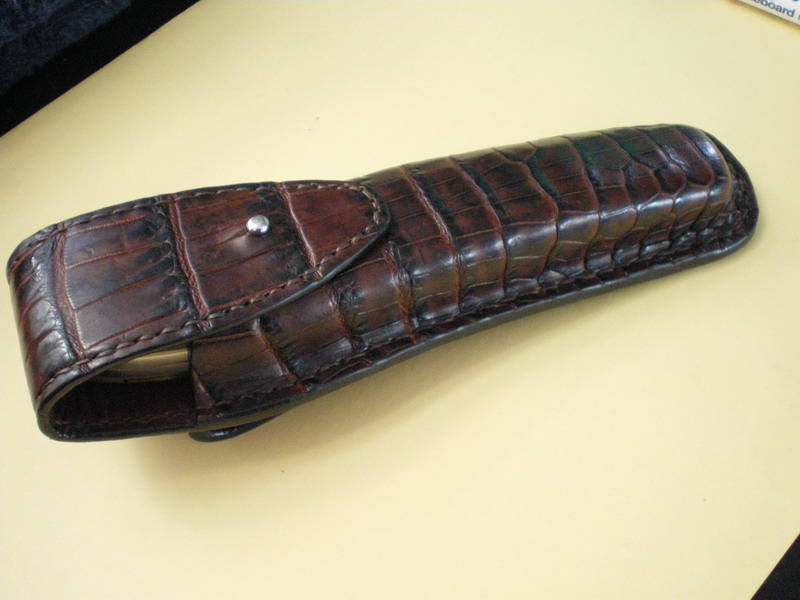
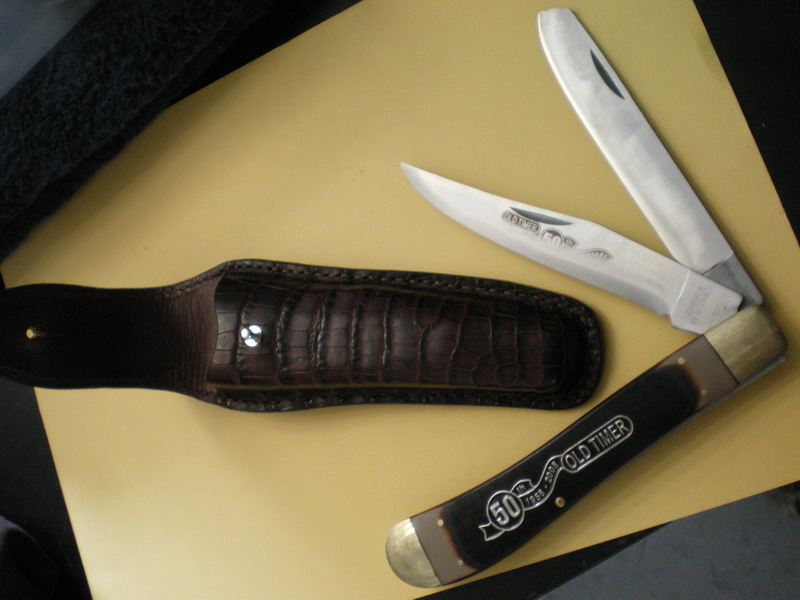
Thanks, I was hoping somebody might notice it. For the croc skin given your location I would give Valerie Douglas (in Broome) a call and tell her it was at my suggestion if you like. She is a very nice lady and I have a great respect for her. If she would prefer I could do it from here for her if you only want a small piece to try out. Here's a couple of pictures of croc knife pouches I've made from skins like she has. The last one, I had to get that knife as it was an anniversary one and shared my birth year.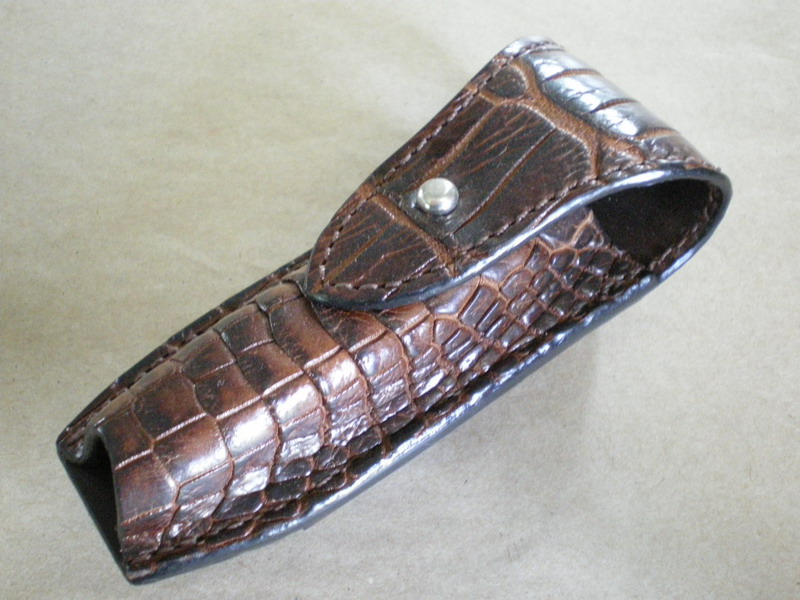
-
Pattern cutting made easy for prototyping. eg key purse
RockyAussie replied to RockyAussie's topic in How Do I Do That?
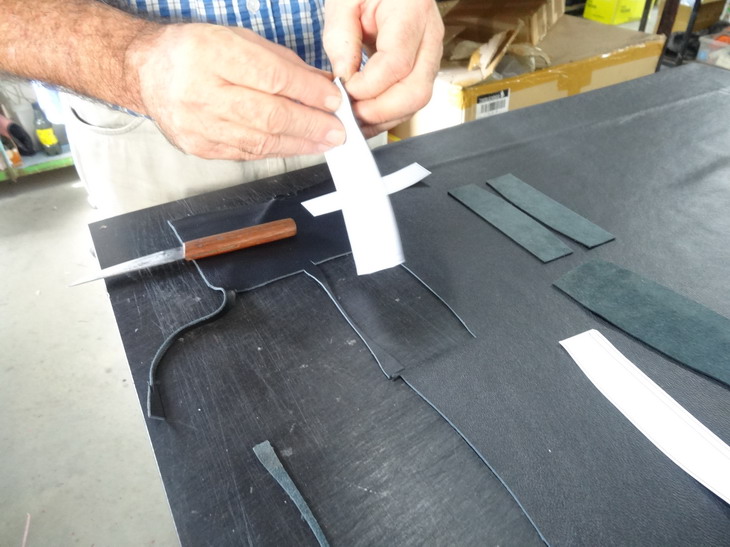
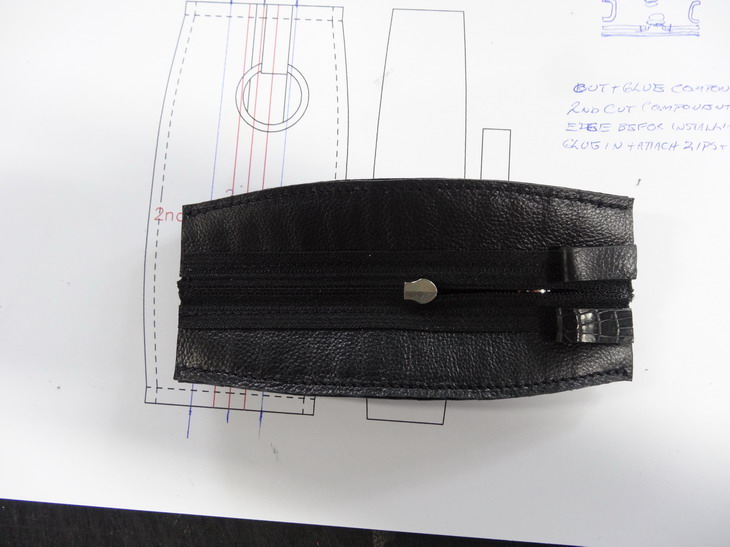
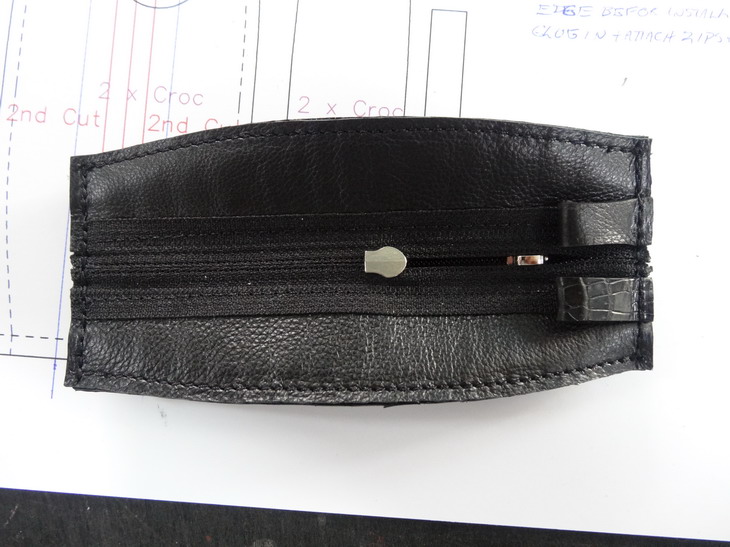
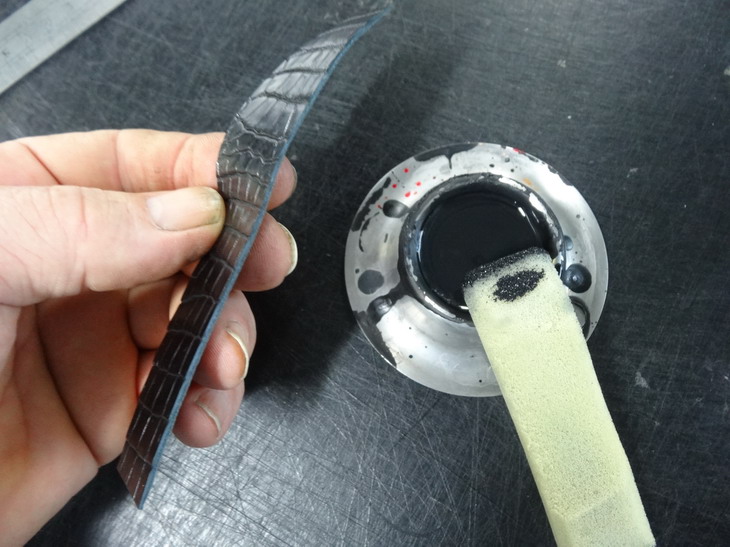
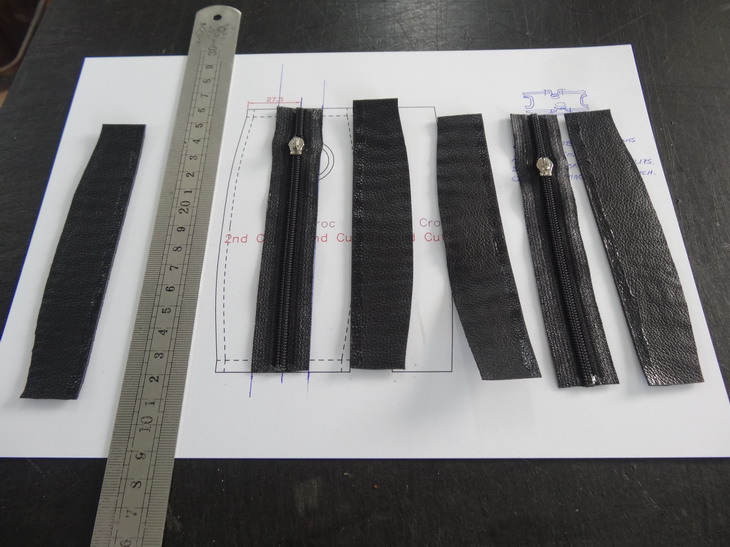
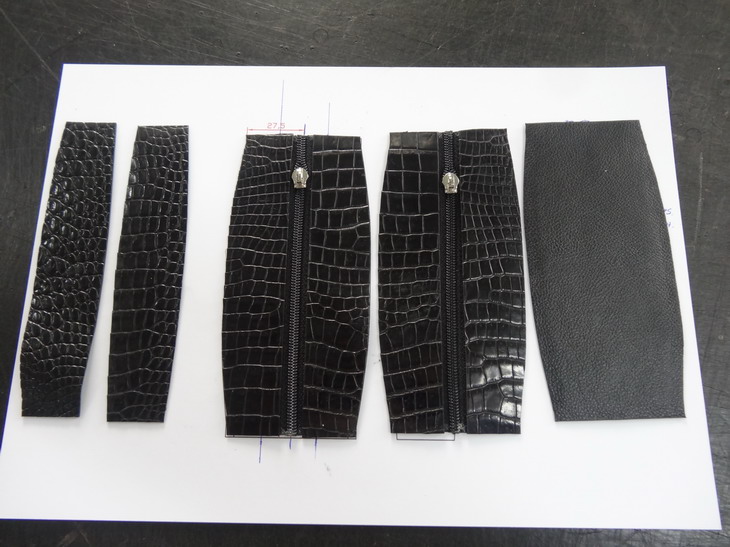
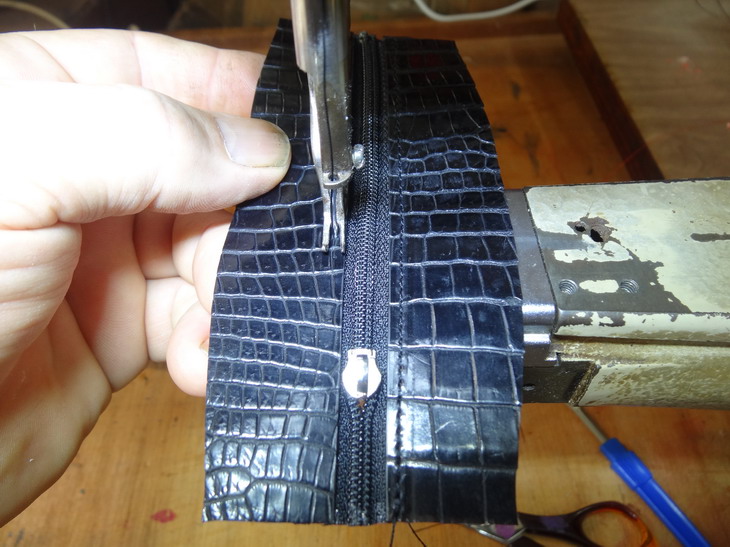
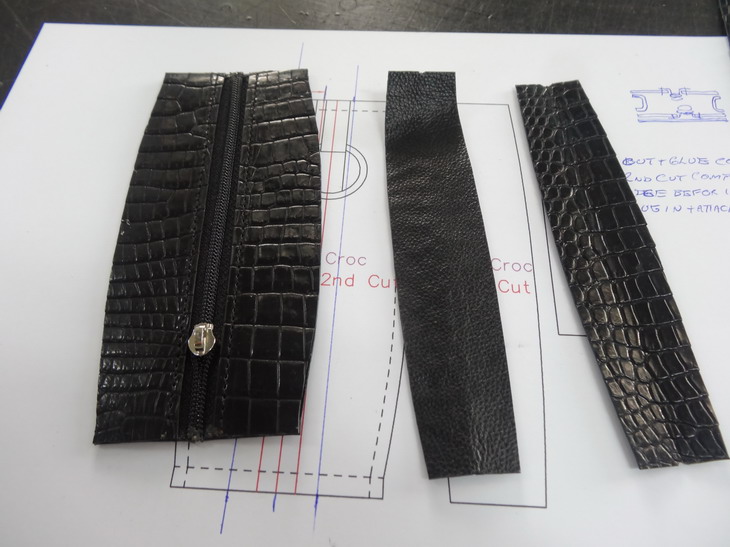
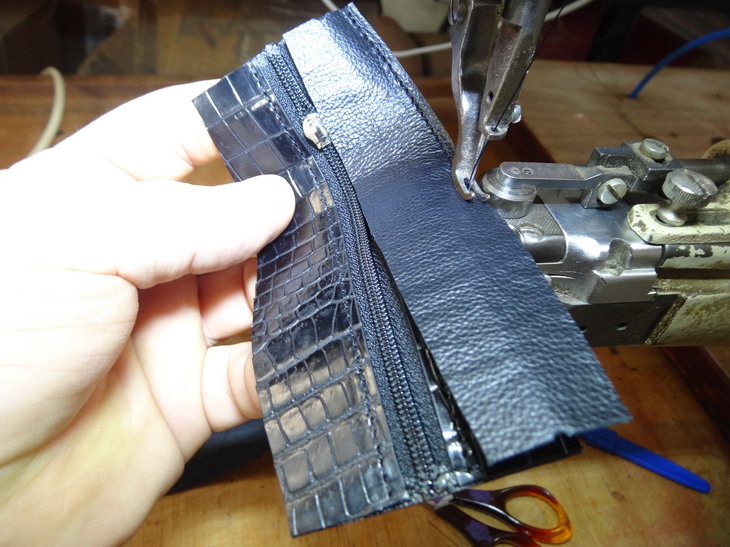
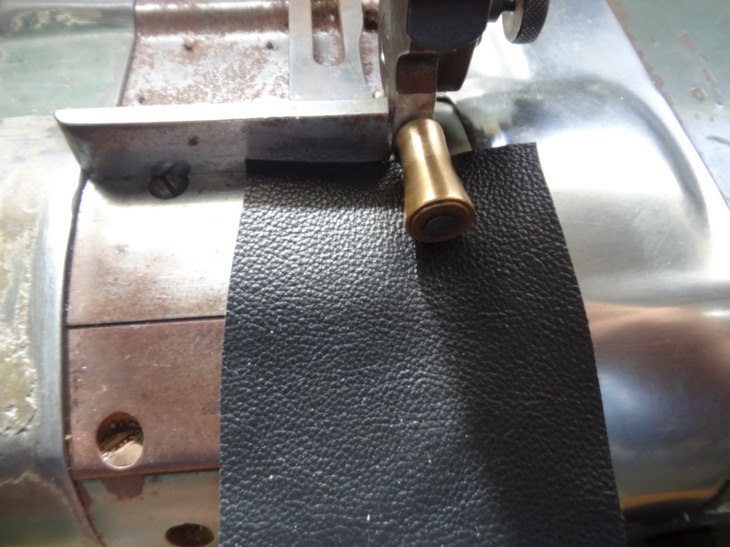
The next step from here is to second cut all of the now attached pieces down to their finished sizes. Here the cardboard pattern is attached to the gusset piece- This one shows one of the top pieces ready to second cut. Below are all the pieces now second cut. As we are not now folding the croc edge along the zips we have to use some edging to improve the finished appearance. The 4 zip line edges now completed with 2 coats of edge coat each. Next with a prepared pattern the zips are glued and lined up in place - This picture shows the zips attached and ready to start the stitching- My trusty old Pfaff cylinder machine does a beautiful job. This is what we now have left to assemble- The middle lining is now glued to attach to one of the outer pieces- showing the piece now attached Here I start to stitch the gusset side pieces into place More to come later.


-
Pattern cutting made easy for prototyping. eg key purse
RockyAussie replied to RockyAussie's topic in How Do I Do That?
Thanks Gary, I will post more tomorrow as dinner is ready now and its hot -
Pattern cutting made easy for prototyping. eg key purse
RockyAussie replied to RockyAussie's topic in How Do I Do That?
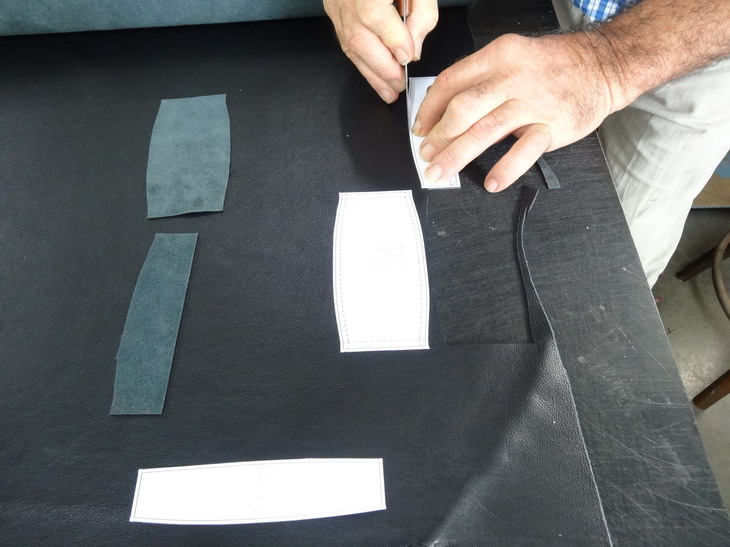
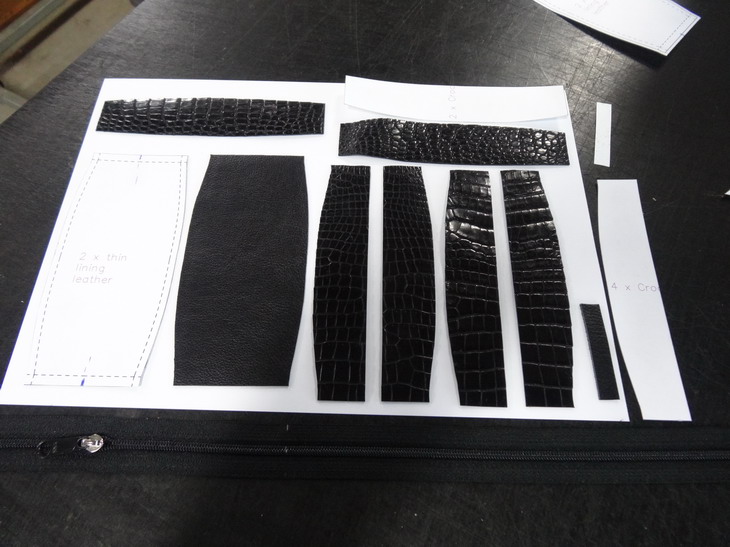
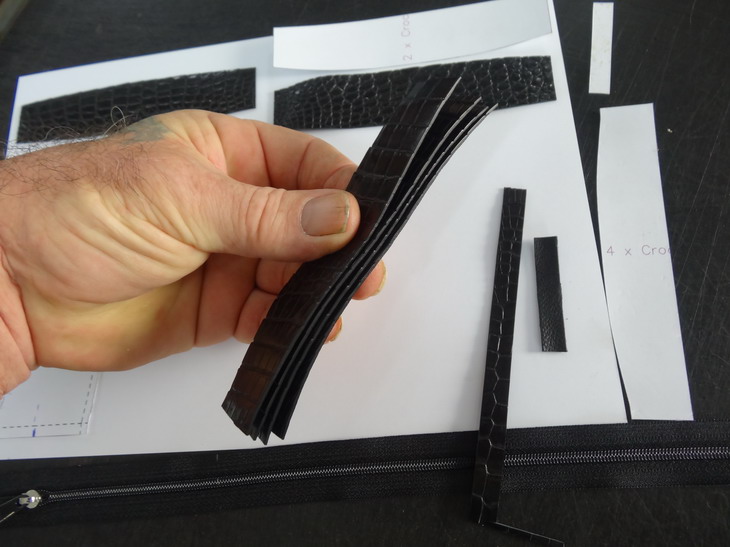
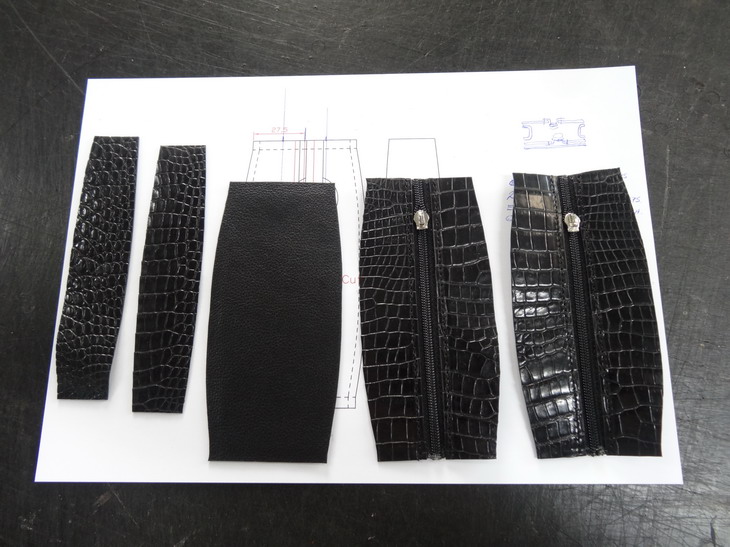
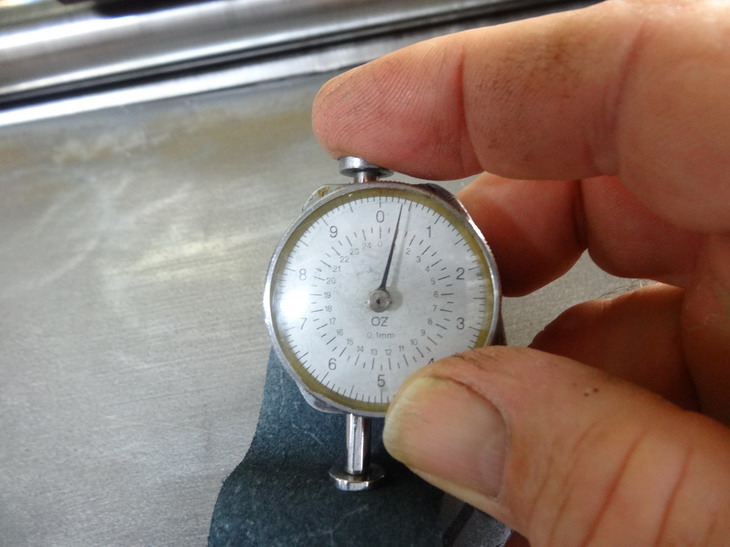
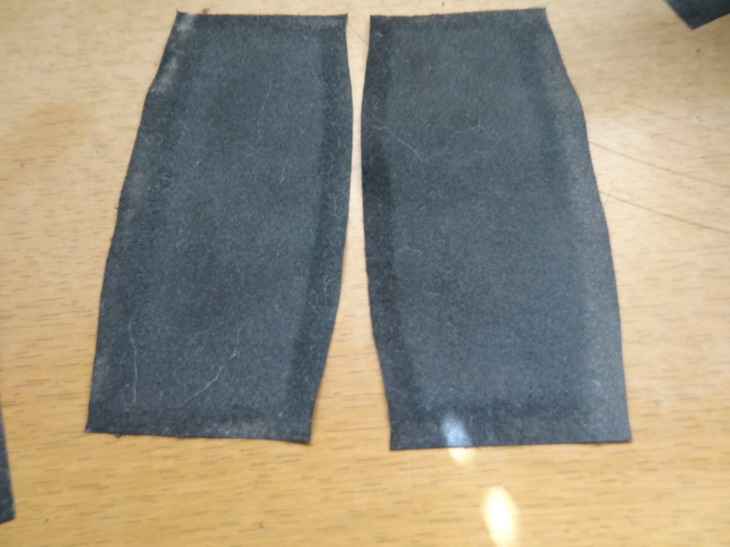
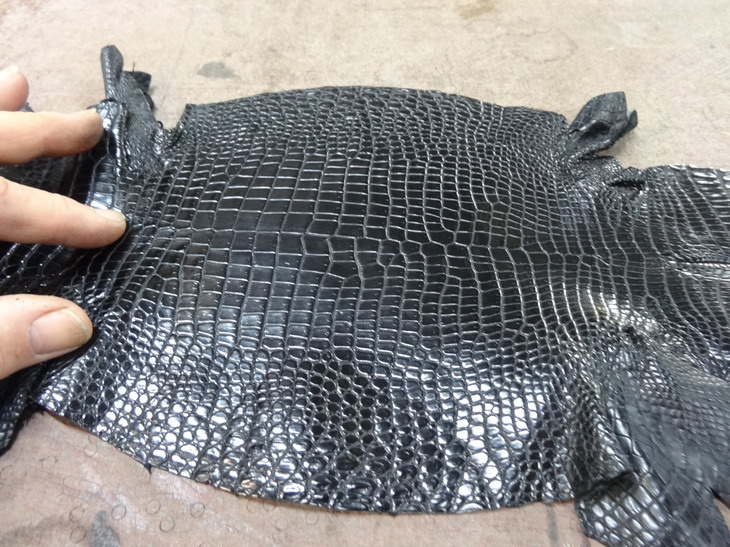
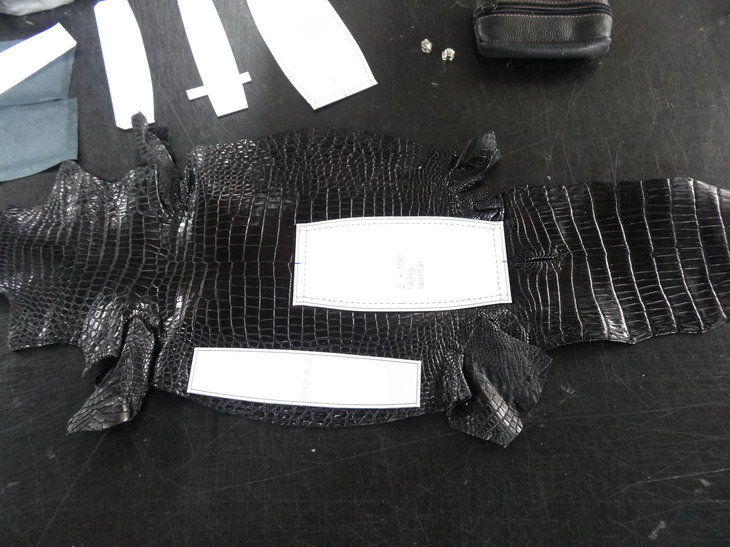
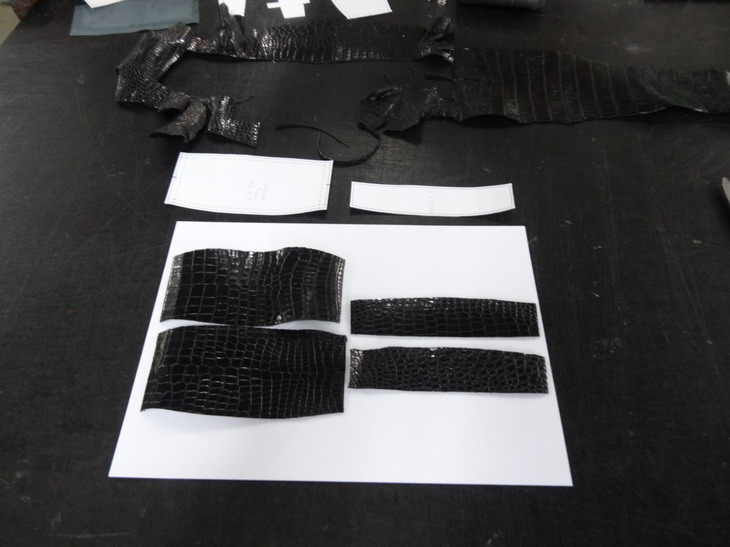
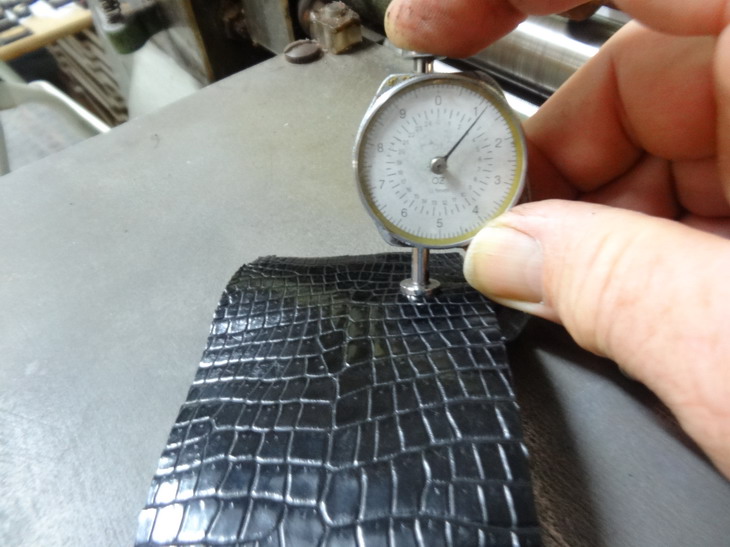
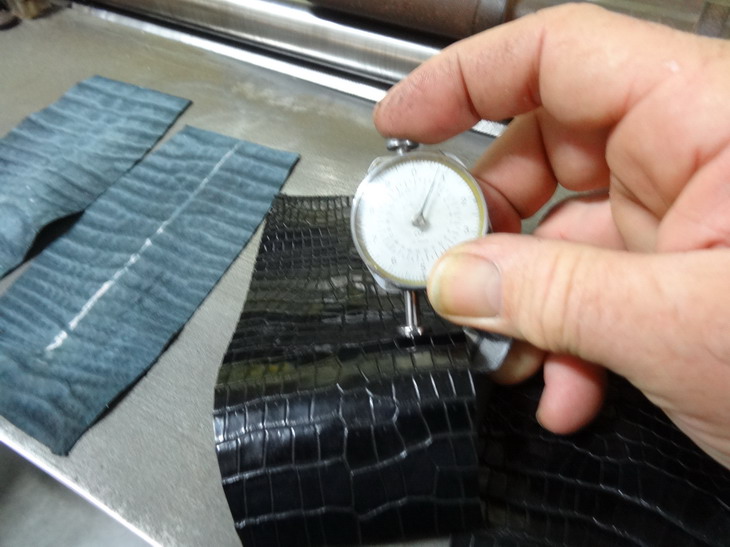
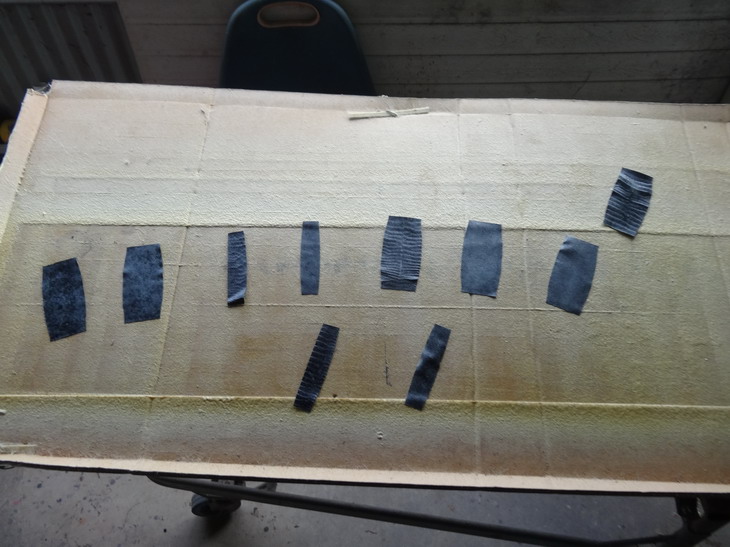
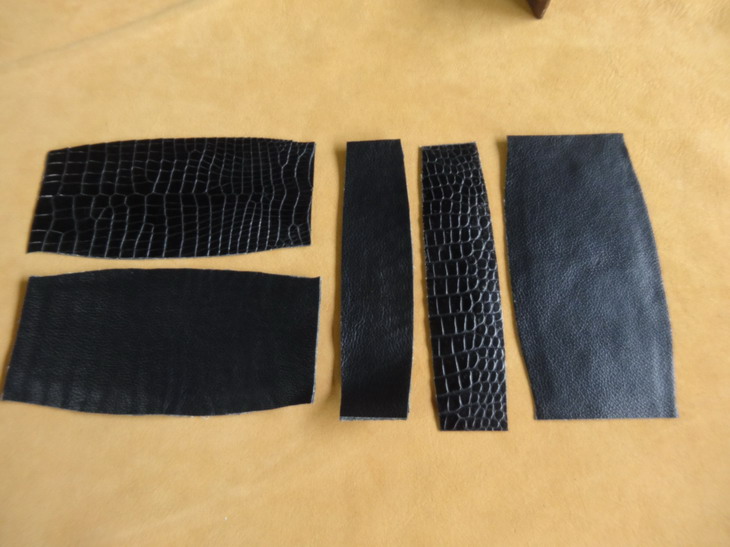
Ok now the leather bits cut above are all bits for lining on the crocodile and must be split down to about .5 mm so this next picture shows what we started with is about 1.4mm- After splitting .5mm A little bit more skived of around the edges Now the design change- The customer wants the prototype in black matte croc and this skin I though would be nice to use is a bit small so I wont be doing the folded edge on the zips. This is the skin- Cardboard attached to skin for cutting next All the croc now cut out shown The croc is a bit thick at 1.1mm A run through the splitter and is now .7mm. The 2 pieces on the left are the bottom splits. Next its time to start putting it together so I've decided to spray glue them all in this case. Here they are now with the linings all attached. More a little later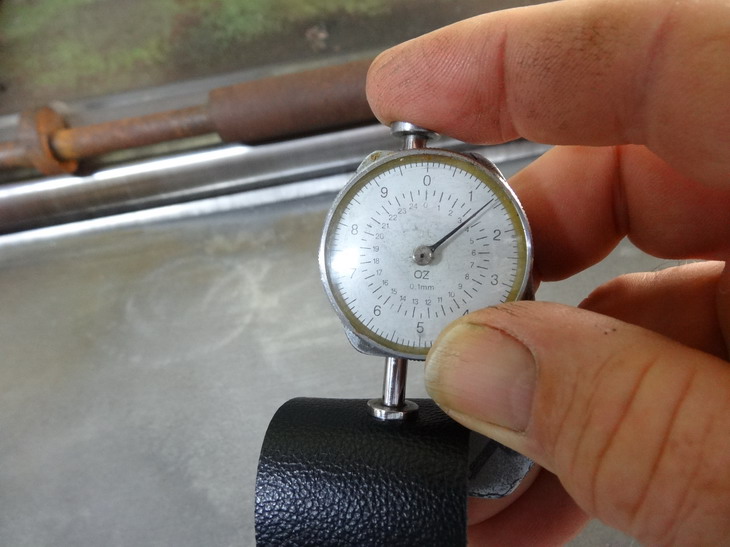

-
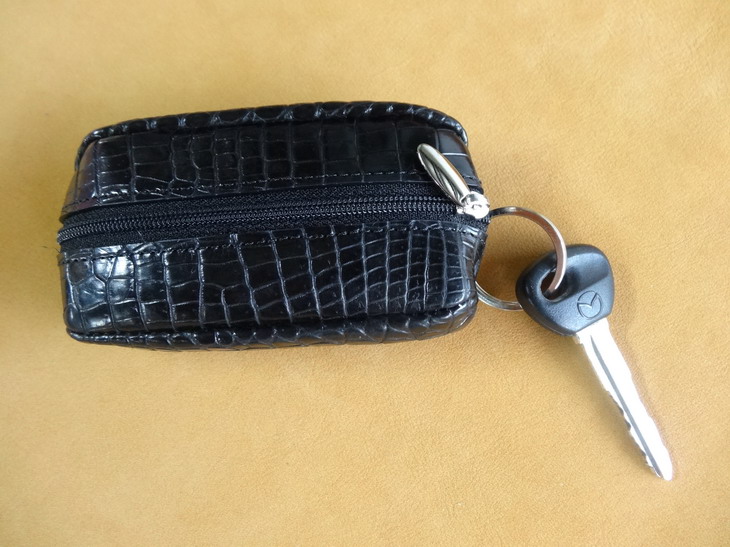
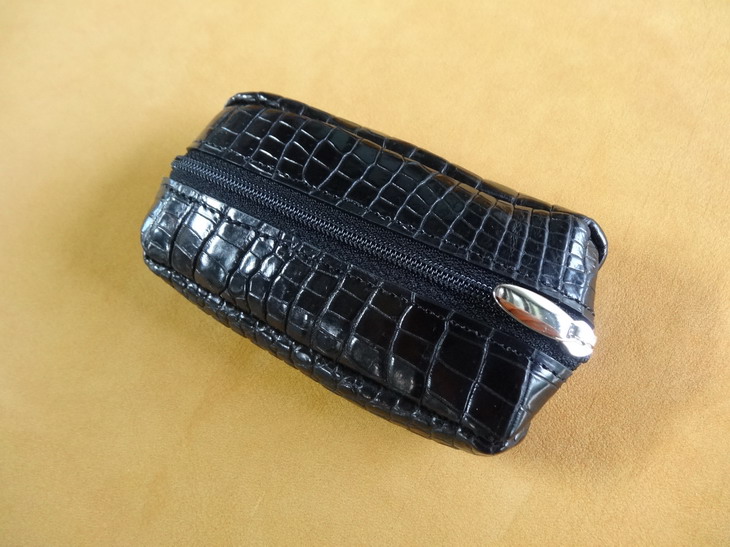
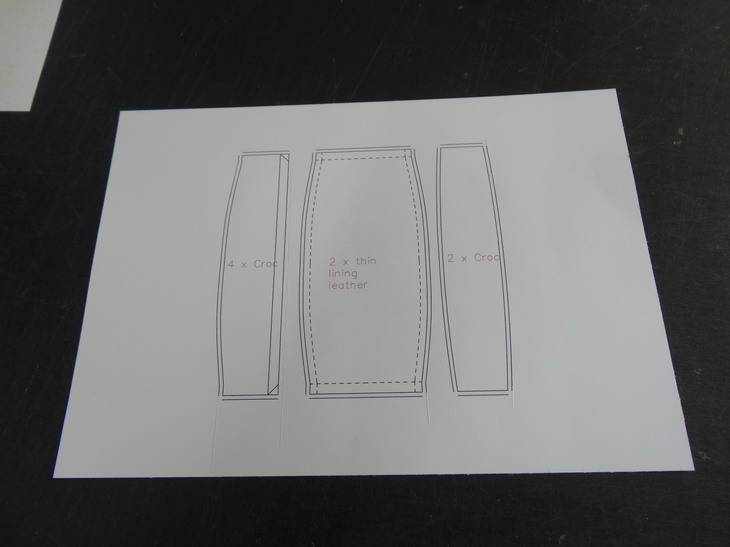
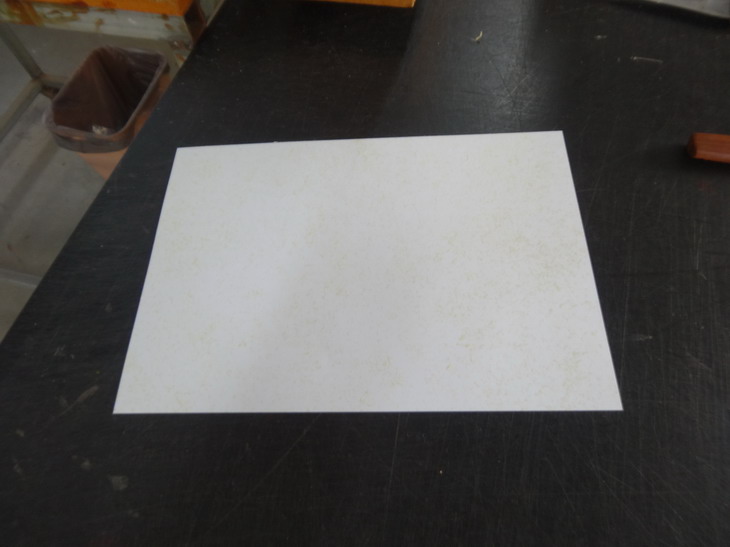
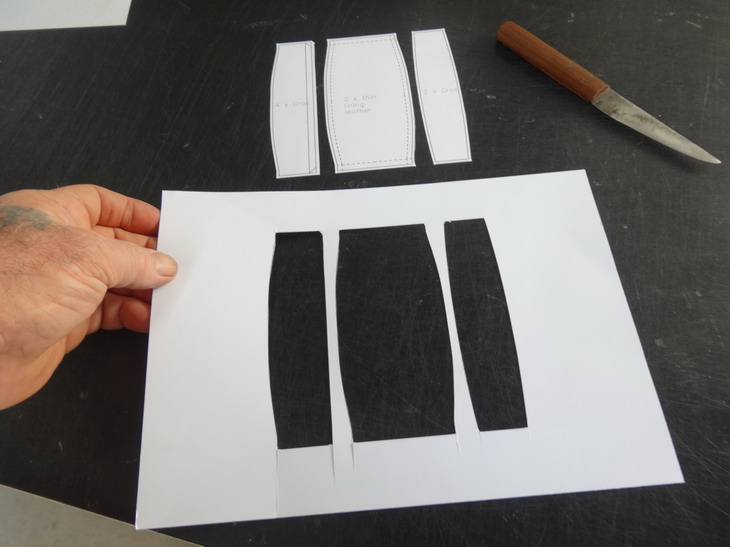
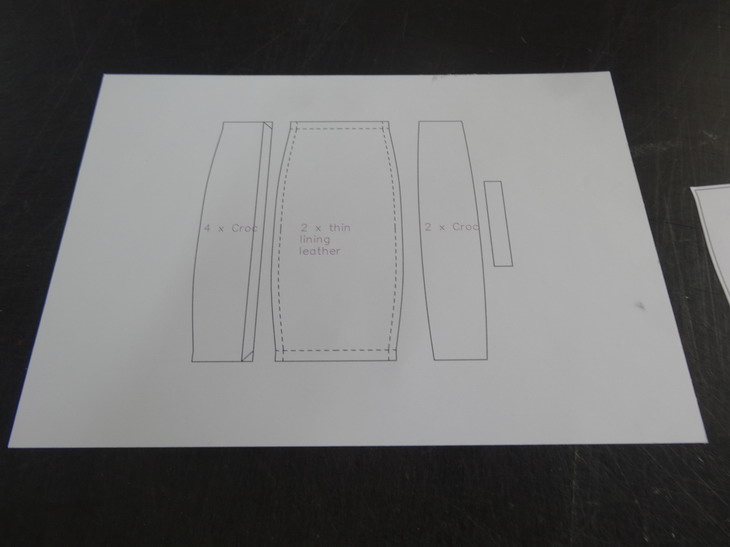
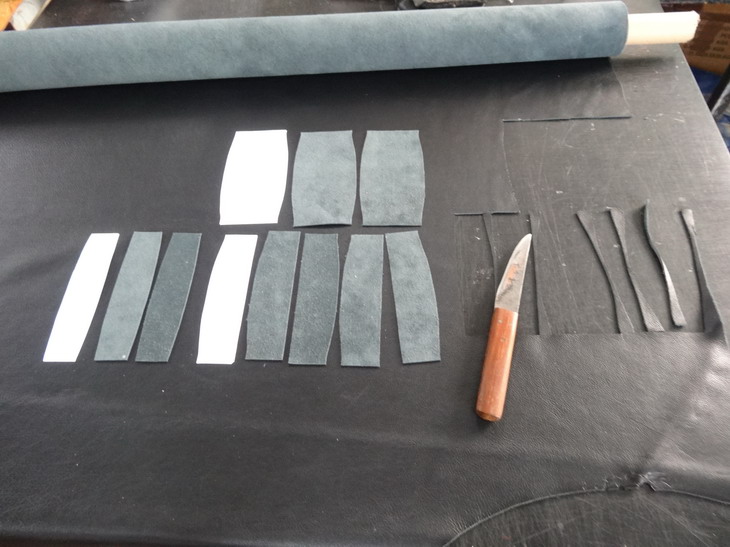
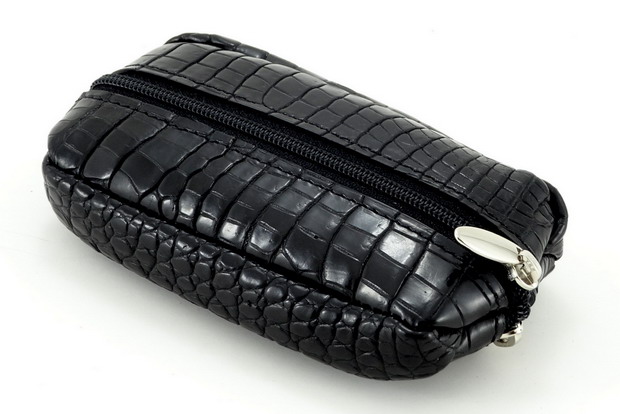
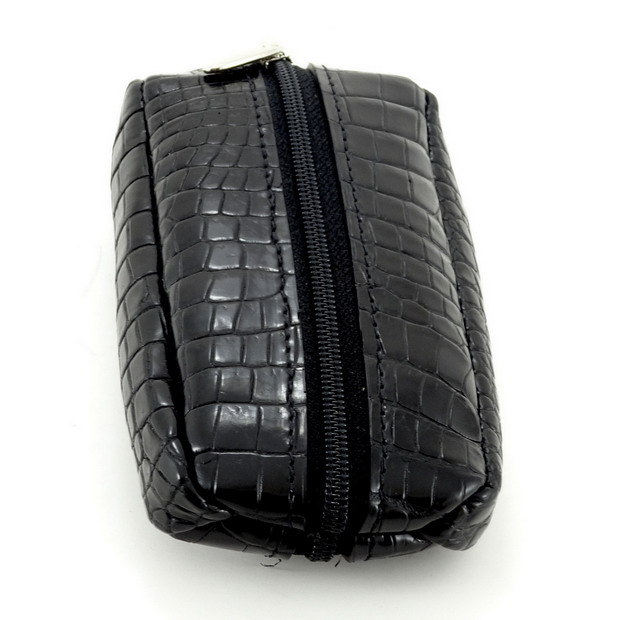
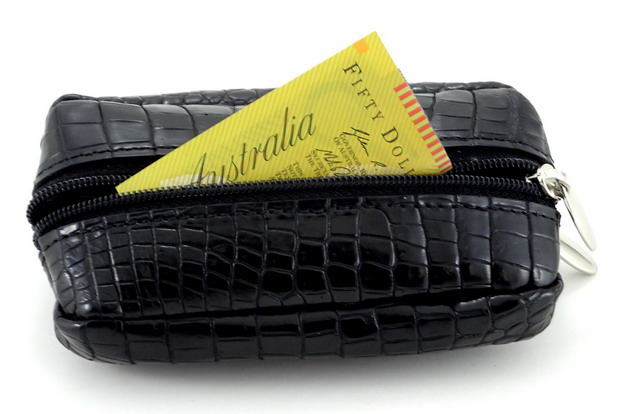
This is a method I use to help make my prototypes quickly and neatly. The example product is a double zippered key purse which unfortunately had a design change halfway through. The first 3 pictures show the key purse when finished. This one is the side that holds the most bulky key bunch. This is the other side This one shows what it all looks like when closed up. The following picture shows the patterns I've drawn for this model and they are the patterns for first cutting the pieces. They are 2mm all around over the size they will be cut down to in later steps. This picture shows how before cutting out I give the thin cardboard a spray with some contact adhesive and left to dry for 1/2 hour or more. Brushing on is alright as well but do it light and quick so as to not change the cardboard shape. The patterns now hold down well for cutting out if placed onto a poly cutting surface. The poly cutting boards for kitchens work well as well. Here I show the 1st cut patterns neatly cut and no movement. Next I use the same procedure for the second cut patterns shown below All the patterns cut out and shown below Next a sharp knife is used to cut out the leather pieces. Note that the glue holds down well still but not enough to damage the leather when removed. Shows cardboard being removed. All the leather parts needed are now cut out. The crocodile parts will come later. I think that is the limit of pictures I can load in one go so more a bit later.